
Sovereign Tower Quest Database — 312 Tasks & Conditions
Search a 312-task Sovereign Tower snapshot for stats, Knight choices, rewards and special outcomes, with route examples and current-patch evidence limits.
On this page · 16 sections
- Find the quest or problem on your screen
- Search the 312-task reference
- Named quest examples and reported Knight choices
- A reliable assignment checklist
- Version 1.1.1 route, reward and display fixes
- Version 1.1.0 restores mushrooms invasion rewards
- Version 1.0.11 quest and balance fixes
- What changed in version 1.0.8
- Version 1.0.10 quest and result fixes
- Version 1.0.9 quest fixes
- What each outcome means
- Turn each result into the next action
- If two Knights look equally suitable
- A quick assignment worksheet
- What is not safe to guess
- Watch an assignment being explained
- Published
- 2026-08-10
- Updated
- 2026-09-19
- Last verified
- 2026-08-31

Find the quest or problem on your screen
| What you need | Start here |
|---|---|
| Search the full 312-task reference snapshot | Searchable quest database |
| A named quest and a reported Knight choice | Quest examples below |
| The goose quest and Chester's follow-up | Chester recruitment steps |
| The magic lamp and Ligia's father | Ligia's reported route |
| A special result instead of an ordinary success | Unexpected Outcomes explained |
| Different results after a patch | Version-specific quest fixes |
Search the 312-task reference
This index includes every task ID in the August 31 community-extracted dataset, with stat requirements, assignment details, rewards and special-result records where available. Search by quest or Knight, filter by location, then expand a task to compare its reported outcomes.
Coverage: 312 task records, 103 base special-result records and four additional variant references. Three variant references lack complete definitions in the source. These counts describe the dataset, not every reachable story branch in patch 1.1.1. Missing unlock conditions and ambiguous values remain unknown; a task's presence does not prove it is available in your current run.
Community-extracted referenceAugust 31 snapshot; game build unspecifiedImported September 16 and rechecked against the upstream quest export September 18; its quest data was unchanged. Not replayed on 1.1.1. See the original author's explanation and corrections. Compare version-specific fixes below when old conditions differ from your game.
312-task snapshot
Search the recorded tasks, compare requirements, and explore 103 base special outcomes, plus recorded variations. This community snapshot has an unknown game build and is not a complete guide to every current story branch.
312 of 312 tasks · Open a record for conditions and outcomes
001Bucolic diplomacyVillador · DiplomacySpecial outcome+
- Location
- Villador
- Knights needed
- Not established by this snapshot
- Duration
- Not established by this snapshot
- Deadline
- Not established by this snapshot
- Damage range
- 0–1
- Requested Knights
- Not established by this snapshot
Recorded stat requirements
These are recorded base values, not a guaranteed success formula.
Unlock conditions: Not established by this snapshot.
Task themes: Help, Woods. These labels are not simultaneous requirements or a complete unlock route.
Normal success
- Recorded reward +5; reward type not established
- Nobles: satisfaction +1
Failure
No outcome effects recorded. This does not establish that there are none.
Special outcomes
Recorded matches to investigate. Other conditions may apply; these are not guaranteed triggers.
Outcome 1 · Gwendan
Knight match: Gwendan.
- Recorded reward +150; reward type not established
- Nobles: satisfaction +2
Recorded damage: 0–0.
002Alcoholics eradicationGrest · AssassinationSpecial outcome+
- Location
- Grest
- Knights needed
- Not established by this snapshot
- Duration
- Not established by this snapshot
- Deadline
- Not established by this snapshot
- Damage range
- 2–3
- Requested Knights
- Not established by this snapshot
Recorded stat requirements
These are recorded base values, not a guaranteed success formula.
Unlock conditions: Not established by this snapshot.
Task themes: Crowd, Track. These labels are not simultaneous requirements or a complete unlock route.
Normal success
- Nobles: satisfaction +3
- Population group not established: satisfaction -1
- Merchants: satisfaction -1
- Sovereign trait: trait not established; recorded change +1
- Angelica: affinity -3
- Recorded reward +35; reward type not established
Failure
No outcome effects recorded. This does not establish that there are none.
Special outcomes
Recorded matches to investigate. Other conditions may apply; these are not guaranteed triggers.
Outcome 1 · Angelica
Knight match: Angelica.
- The assigned Knight leaves
003Alcoholism eradicationGrest · DiplomacyView record+
- Location
- Grest
- Knights needed
- Not established by this snapshot
- Duration
- Not established by this snapshot
- Deadline
- Not established by this snapshot
- Damage range
- 0–2
- Requested Knights
- Not established by this snapshot
Recorded stat requirements
These are recorded base values, not a guaranteed success formula.
Unlock conditions: Not established by this snapshot.
Task themes: Crowd, Help, People Involved. These labels are not simultaneous requirements or a complete unlock route.
Normal success
- Nobles: satisfaction +1
- Merchants: satisfaction +1
- Angelica: affinity +1
- Recorded reward +35; reward type not established
Failure
No outcome effects recorded. This does not establish that there are none.
004New rampartsAlmora · DiplomacySpecial outcome+
- Location
- Almora
- Knights needed
- 2
- Duration
- 3 cycles
- Deadline
- Not established by this snapshot
- Damage range
- 2–4
- Requested Knights
- Not established by this snapshot
Recorded stat requirements
These are recorded base values, not a guaranteed success formula.
Unlock conditions: Not established by this snapshot.
Task themes: Heavy Lifting, Help, Climbing. These labels are not simultaneous requirements or a complete unlock route.
Normal success
- Recorded reward +65; reward type not established
- Merchants: satisfaction +2
- Population group not established: satisfaction +1
Failure
No outcome effects recorded. This does not establish that there are none.
Special outcomes
Recorded matches to investigate. Other conditions may apply; these are not guaranteed triggers.
Outcome 1 · Childeric
Knight match: Childeric.
- Population group not established: satisfaction +3
- Recorded reward +100; reward type not established
- Childeric: affinity +1
Recorded damage: 3–3.
005Demon huntAnveldSpecial outcome+
- Location
- Anveld
- Knights needed
- 3
- Duration
- 2 cycles
- Deadline
- Not established by this snapshot
- Damage range
- 2–5
- Requested Knights
- Not established by this snapshot
Recorded stat requirements
These are recorded base values, not a guaranteed success formula.
Unlock conditions: Not established by this snapshot.
Task themes: Magic Involved, At Night, Cave. These labels are not simultaneous requirements or a complete unlock route.
Normal success
- Relic: Demon Heart 2
- Recorded reward +80; reward type not established
Failure
No outcome effects recorded. This does not establish that there are none.
Special outcomes
Recorded matches to investigate. Other conditions may apply; these are not guaranteed triggers.
Outcome 1
Knight match: Not established by this snapshot.
Trait match: Demon.
No outcome effects recorded. This does not establish that there are none.
006The lich queenAnveldSpecial outcome+
- Location
- Anveld
- Knights needed
- Not established by this snapshot
- Duration
- Not established by this snapshot
- Deadline
- Not established by this snapshot
- Damage range
- 3–4
- Requested Knights
- Alwena
Recorded stat requirements
These are recorded base values, not a guaranteed success formula.
Unlock conditions: Not established by this snapshot.
Task themes: Cave, Ghost. These labels are not simultaneous requirements or a complete unlock route.
Normal success
- Nobles: satisfaction +2
- Recorded reward +70; reward type not established
- Consumable: Wit Potion
Failure
No outcome effects recorded. This does not establish that there are none.
Special outcomes
Recorded matches to investigate. Other conditions may apply; these are not guaranteed triggers.
Outcome 1 · Zolta
Knight match: Zolta.
- Population group not established: satisfaction +2
- Recorded reward +50; reward type not established
- Consumable: Powerful Tonic
- Zolta: affinity +1
007The lich will not returnAnveld · ScoutingSpecial outcome+
- Location
- Anveld
- Knights needed
- 2
- Duration
- 3 cycles
- Deadline
- Not established by this snapshot
- Damage range
- 1–3
- Requested Knights
- Not established by this snapshot
Recorded stat requirements
These are recorded base values, not a guaranteed success formula.
Unlock conditions: Not established by this snapshot.
Task themes: Magic Involved, Ghost, Investigation. These labels are not simultaneous requirements or a complete unlock route.
Normal success
- Nobles: satisfaction +1
- Recorded reward +65; reward type not established
- Consumable: Strength Potion
Failure
No outcome effects recorded. This does not establish that there are none.
Special outcomes
Recorded matches to investigate. Other conditions may apply; these are not guaranteed triggers.
Outcome 1
Knight match: Not established by this snapshot.
Stat check: Magic, recorded threshold 10. The exact comparison is not established.
- Scholars: satisfaction +2
- Recorded reward +70; reward type not established
008Reduce the lich to ashesAnveldView record+
- Location
- Anveld
- Knights needed
- 2
- Duration
- 3 cycles
- Deadline
- Not established by this snapshot
- Damage range
- 3–5
- Requested Knights
- Not established by this snapshot
Recorded stat requirements
These are recorded base values, not a guaranteed success formula.
Unlock conditions: Not established by this snapshot.
Task themes: Cave, Ghost. These labels are not simultaneous requirements or a complete unlock route.
Normal success
- Nobles: satisfaction +1
- Recorded reward +75; reward type not established
Failure
No outcome effects recorded. This does not establish that there are none.
009Skeleton invasionAnveldView record+
- Location
- Anveld
- Knights needed
- 2
- Duration
- 3 cycles
- Deadline
- Not established by this snapshot
- Damage range
- 2–3
- Requested Knights
- Not established by this snapshot
Recorded stat requirements
These are recorded base values, not a guaranteed success formula.
Unlock conditions: Not established by this snapshot.
Task themes: Magic Involved, At Night, Crowd. These labels are not simultaneous requirements or a complete unlock route.
Normal success
- Population group not established: satisfaction +1
- Recorded reward +75; reward type not established
Failure
No outcome effects recorded. This does not establish that there are none.
010Apple pie riotsMilkford · DiplomacyView record+
- Location
- Milkford
- Knights needed
- Not established by this snapshot
- Duration
- 2 cycles
- Deadline
- Not established by this snapshot
- Damage range
- 0–2
- Requested Knights
- Not established by this snapshot
Recorded stat requirements
These are recorded base values, not a guaranteed success formula.
Unlock conditions: Not established by this snapshot.
Task themes: Crowd, Help, People Involved. These labels are not simultaneous requirements or a complete unlock route.
Normal success
- Recorded reward +20; reward type not established
- Population group not established: satisfaction +1
- Merchants: satisfaction +1
Failure
No outcome effects recorded. This does not establish that there are none.
Recorded variations
Activation conditions are not established. Do not add these changes together or apply them to every attempt.
Reported variant 1 · activation unknown
- Strength requirement change: +2
- Charisma requirement change: +1
- Knight count change: +1
Reported variant 2 · activation unknown
- Charisma requirement change: -1
- Wits requirement change: +3
- Damage change: -2
011Ask the mysticsRozenn · ResearchView record+
- Location
- Rozenn
- Knights needed
- Not established by this snapshot
- Duration
- Not established by this snapshot
- Deadline
- Not established by this snapshot
- Damage range
- 0–2
- Requested Knights
- Not established by this snapshot
Recorded stat requirements
These are recorded base values, not a guaranteed success formula.
Unlock conditions: Not established by this snapshot.
Task themes: Crowd, Investigation. These labels are not simultaneous requirements or a complete unlock route.
Normal success
- Nobles: satisfaction +1
- Recorded reward +25; reward type not established
Failure
No outcome effects recorded. This does not establish that there are none.
Follow-up audience recorded after success; the dialogue route is not established.
012Ask the noblesRozenn · ResearchView record+
- Location
- Rozenn
- Knights needed
- Not established by this snapshot
- Duration
- Not established by this snapshot
- Deadline
- Not established by this snapshot
- Damage range
- 0–1
- Requested Knights
- Not established by this snapshot
Recorded stat requirements
These are recorded base values, not a guaranteed success formula.
Unlock conditions: Not established by this snapshot.
Task themes: Crowd, Investigation. These labels are not simultaneous requirements or a complete unlock route.
Normal success
- Scholars: satisfaction +1
- Consumable: Wit Potion
Failure
No outcome effects recorded. This does not establish that there are none.
013Ice dancing competitionAvalon · CompetitionSpecial outcome+
- Location
- Avalon
- Knights needed
- 2
- Duration
- 3 cycles
- Deadline
- Not established by this snapshot
- Damage range
- 0–2
- Requested Knights
- Not established by this snapshot
Recorded stat requirements
These are recorded base values, not a guaranteed success formula.
Unlock conditions: Not established by this snapshot.
Task themes: Musical, Magic Involved. These labels are not simultaneous requirements or a complete unlock route.
Normal success
- Recorded reward +115; reward type not established
- Consumable: Charisma Potion
- Scholars: satisfaction +2
Failure
No outcome effects recorded. This does not establish that there are none.
Special outcomes
Recorded matches to investigate. Other conditions may apply; these are not guaranteed triggers.
Outcome 1 · Gideon
Knight match: Gideon.
- Recorded reward +175; reward type not established
- Consumable: Charisma Potion
- Scholars: satisfaction +1
- Population group not established: satisfaction +1
- Consumable: Ginger Chocolate
014Artifact fishingAvalon · Relic RecoveryView record+
- Location
- Avalon
- Knights needed
- 2
- Duration
- 3 cycles
- Deadline
- Not established by this snapshot
- Damage range
- 2–3
- Requested Knights
- Not established by this snapshot
Recorded stat requirements
These are recorded base values, not a guaranteed success formula.
Unlock conditions: Not established by this snapshot.
Task themes: Water, Track. These labels are not simultaneous requirements or a complete unlock route.
Normal success
- Scholars: satisfaction +1
- Recorded reward +55; reward type not established
Failure
No outcome effects recorded. This does not establish that there are none.
015Walking on waterAvalon · Relic RecoveryView record+
- Location
- Avalon
- Knights needed
- 2
- Duration
- 4 cycles
- Deadline
- Not established by this snapshot
- Damage range
- 0–1
- Requested Knights
- Not established by this snapshot
Recorded stat requirements
These are recorded base values, not a guaranteed success formula.
Unlock conditions: Not established by this snapshot.
Task themes: Magic Involved, Track. These labels are not simultaneous requirements or a complete unlock route.
Normal success
- Scholars: satisfaction +1
- Recorded reward +55; reward type not established
Failure
No outcome effects recorded. This does not establish that there are none.
016Underwater artefactAvalon · Relic RecoverySpecial outcome+
- Location
- Avalon
- Knights needed
- 2
- Duration
- 4 cycles
- Deadline
- Not established by this snapshot
- Damage range
- 0–1
- Requested Knights
- Not established by this snapshot
Recorded stat requirements
These are recorded base values, not a guaranteed success formula.
Unlock conditions: Not established by this snapshot.
Task themes: Water, Track. These labels are not simultaneous requirements or a complete unlock route.
Normal success
- Scholars: satisfaction +1
- Recorded reward +55; reward type not established
Failure
No outcome effects recorded. This does not establish that there are none.
Special outcomes
Recorded matches to investigate. Other conditions may apply; these are not guaranteed triggers.
Outcome 1 · Ligia
Knight match: Ligia.
- Scholars: satisfaction +2
- Recorded reward +50; reward type not established
- Consumable: Salted Cod
017Vision troubleAvalon · DiplomacySpecial outcome+
- Location
- Avalon
- Knights needed
- Not established by this snapshot
- Duration
- 3 cycles
- Deadline
- Not established by this snapshot
- Damage range
- 0–1
- Requested Knights
- Not established by this snapshot
Recorded stat requirements
These are recorded base values, not a guaranteed success formula.
Unlock conditions: Not established by this snapshot.
Task themes: Water. These labels are not simultaneous requirements or a complete unlock route.
Normal success
- Scholars: satisfaction +1
- Recorded reward +60; reward type not established
Failure
No outcome effects recorded. This does not establish that there are none.
Special outcomes
Recorded matches to investigate. Other conditions may apply; these are not guaranteed triggers.
Outcome 1 · Chester
Knight match: Chester.
- Scholars: satisfaction +2
- Population group not established: satisfaction -1
Outcome 2 · Silgur
Knight match: Silgur.
- Scholars: satisfaction +2
- Population group not established: satisfaction +1
- Recorded reward +60; reward type not established
018SOS underwater creaturesAvalon · ScoutingSpecial outcome+
- Location
- Avalon
- Knights needed
- Not established by this snapshot
- Duration
- 3 cycles
- Deadline
- Not established by this snapshot
- Damage range
- 0–1
- Requested Knights
- Not established by this snapshot
Recorded stat requirements
These are recorded base values, not a guaranteed success formula.
Unlock conditions: Not established by this snapshot.
Task themes: Cute Creature, Water. These labels are not simultaneous requirements or a complete unlock route.
Normal success
- Scholars: satisfaction +1
- Recorded reward +60; reward type not established
Failure
No outcome effects recorded. This does not establish that there are none.
Special outcomes
Recorded matches to investigate. Other conditions may apply; these are not guaranteed triggers.
Outcome 1 · Arron
Knight match: Arron.
- Scholars: satisfaction +2
- Population group not established: satisfaction +1
- Arron: affinity +1
- Recorded reward +50; reward type not established
019Creature of the lakeAvalon · ScoutingView record+
- Location
- Avalon
- Knights needed
- Not established by this snapshot
- Duration
- 3 cycles
- Deadline
- Not established by this snapshot
- Damage range
- 0–1
- Requested Knights
- Not established by this snapshot
Recorded stat requirements
These are recorded base values, not a guaranteed success formula.
Unlock conditions: Not established by this snapshot.
Task themes: Magic Involved, Water. These labels are not simultaneous requirements or a complete unlock route.
Normal success
- Scholars: satisfaction +1
- Recorded reward +60; reward type not established
Failure
No outcome effects recorded. This does not establish that there are none.
020The old sorcererAvalon · AssassinationView record+
- Location
- Avalon
- Knights needed
- 3
- Duration
- 3 cycles
- Deadline
- Not established by this snapshot
- Damage range
- 3–5
- Requested Knights
- Not established by this snapshot
Recorded stat requirements
These are recorded base values, not a guaranteed success formula.
Unlock conditions: Not established by this snapshot.
Task themes: Magic Involved, Unethical. These labels are not simultaneous requirements or a complete unlock route.
Normal success
- Consumable: Blue Mana Potion
- Consumable: Pack Of Serpent Oil Vials
- Recorded reward +40; reward type not established
Failure
No outcome effects recorded. This does not establish that there are none.
021The barrel of salted codGrest · Relic RecoveryView record+
- Location
- Grest
- Knights needed
- Not established by this snapshot
- Duration
- 2 cycles
- Deadline
- Not established by this snapshot
- Damage range
- 2–3
- Requested Knights
- Not established by this snapshot
Recorded stat requirements
These are recorded base values, not a guaranteed success formula.
Unlock conditions: Not established by this snapshot.
Task themes: Cave, Heavy Lifting, Investigation. These labels are not simultaneous requirements or a complete unlock route.
Normal success
- Merchants: satisfaction +1
- Consumable: Salted Cod
Failure
No outcome effects recorded. This does not establish that there are none.
022Murder of the pirate leaderIsle Of Basalt · AssassinationView record+
- Location
- Isle Of Basalt
- Knights needed
- 2
- Duration
- 3 cycles
- Deadline
- Not established by this snapshot
- Damage range
- 3–5
- Requested Knights
- Not established by this snapshot
Recorded stat requirements
These are recorded base values, not a guaranteed success formula.
Unlock conditions: Not established by this snapshot.
Task themes: Water, Unethical, Investigation. These labels are not simultaneous requirements or a complete unlock route.
Normal success
- Nobles: satisfaction +1
- Recorded reward +50; reward type not established
- Consumable: Spiced Hypocras
Failure
No outcome effects recorded. This does not establish that there are none.
023The Dark SpiritBeaconsburySpecial outcome+
- Location
- Beaconsbury
- Knights needed
- 2
- Duration
- Not established by this snapshot
- Deadline
- Not established by this snapshot
- Damage range
- 2–5
- Requested Knights
- Not established by this snapshot
Recorded stat requirements
These are recorded base values, not a guaranteed success formula.
Unlock conditions: Not established by this snapshot.
Task themes: Magic Involved, At Night, Investigation. These labels are not simultaneous requirements or a complete unlock route.
Normal success
- Recorded reward +50; reward type not established
- Population group not established: satisfaction +1
Failure
No outcome effects recorded. This does not establish that there are none.
Special outcomes
Recorded matches to investigate. Other conditions may apply; these are not guaranteed triggers.
Outcome 1 · Ursule
Knight match: Ursule.
- Population group not established: satisfaction +2
- Recorded reward +65; reward type not established
- Consumable: Gargoyle Soup
024Beaconsbury's huntBeaconsburyView record+
- Location
- Beaconsbury
- Knights needed
- Not established by this snapshot
- Duration
- 2 cycles
- Deadline
- Not established by this snapshot
- Damage range
- 1–3
- Requested Knights
- Not established by this snapshot
Recorded stat requirements
These are recorded base values, not a guaranteed success formula.
Unlock conditions: Not established by this snapshot.
Task themes: Woods, Track. These labels are not simultaneous requirements or a complete unlock route.
Normal success
- Recorded reward +40; reward type not established
- Consumable: Provisions
Failure
No outcome effects recorded. This does not establish that there are none.
025Hunter duelBeaconsbury · DuelView record+
- Location
- Beaconsbury
- Knights needed
- Not established by this snapshot
- Duration
- 3 cycles
- Deadline
- Not established by this snapshot
- Damage range
- 1–3
- Requested Knights
- Not established by this snapshot
Recorded stat requirements
These are recorded base values, not a guaranteed success formula.
Unlock conditions: Not established by this snapshot.
Task themes: Woods, Track. These labels are not simultaneous requirements or a complete unlock route.
Normal success
- Population group not established: satisfaction +1
- Consumable: Rabbit Meat
- Recorded reward +45; reward type not established
- Nobles: satisfaction +1
Failure
No outcome effects recorded. This does not establish that there are none.
026Getting rid of the pixiesBeaconsburyView record+
- Location
- Beaconsbury
- Knights needed
- 2
- Duration
- Not established by this snapshot
- Deadline
- Not established by this snapshot
- Damage range
- 1–3
- Requested Knights
- Not established by this snapshot
Recorded stat requirements
These are recorded base values, not a guaranteed success formula.
Unlock conditions: Not established by this snapshot.
Task themes: Flying Creature, Magic Involved. These labels are not simultaneous requirements or a complete unlock route.
Normal success
- Recorded reward +60; reward type not established
- Merchants: satisfaction +1
Failure
No outcome effects recorded. This does not establish that there are none.
027Negotiations with the pixiesBeaconsbury · DiplomacyView record+
- Location
- Beaconsbury
- Knights needed
- 2
- Duration
- Not established by this snapshot
- Deadline
- Not established by this snapshot
- Damage range
- 0–2
- Requested Knights
- Not established by this snapshot
Recorded stat requirements
These are recorded base values, not a guaranteed success formula.
Unlock conditions: Not established by this snapshot.
Task themes: Flying Creature, Magic Involved. These labels are not simultaneous requirements or a complete unlock route.
Normal success
- Recorded reward +80; reward type not established
- Merchants: satisfaction +1
Failure
No outcome effects recorded. This does not establish that there are none.
028Brush clearing in BelthornBelthorn · RescueView record+
- Location
- Belthorn
- Knights needed
- 3
- Duration
- Not established by this snapshot
- Deadline
- Not established by this snapshot
- Damage range
- 0–2
- Requested Knights
- Not established by this snapshot
Recorded stat requirements
These are recorded base values, not a guaranteed success formula.
Unlock conditions: Not established by this snapshot.
Task themes: Woods, Help. These labels are not simultaneous requirements or a complete unlock route.
Normal success
- Nobles: satisfaction +2
- Recorded reward +75; reward type not established
Failure
No outcome effects recorded. This does not establish that there are none.
029Child's dyeBelthorn · ResearchView record+
- Location
- Belthorn
- Knights needed
- 2
- Duration
- Not established by this snapshot
- Deadline
- Not established by this snapshot
- Damage range
- 1–1
- Requested Knights
- Not established by this snapshot
Recorded stat requirements
These are recorded base values, not a guaranteed success formula.
Unlock conditions: Not established by this snapshot.
Task themes: Investigation. These labels are not simultaneous requirements or a complete unlock route.
Normal success
- Recorded reward +50; reward type not established
- Population group not established: satisfaction +1
Failure
No outcome effects recorded. This does not establish that there are none.
030Fairy mistakeBelthorn · ScoutingView record+
- Location
- Belthorn
- Knights needed
- 2
- Duration
- Not established by this snapshot
- Deadline
- Not established by this snapshot
- Damage range
- 0–2
- Requested Knights
- Not established by this snapshot
Recorded stat requirements
These are recorded base values, not a guaranteed success formula.
Unlock conditions: Not established by this snapshot.
Task themes: Flying Creature, Investigation. These labels are not simultaneous requirements or a complete unlock route.
Normal success
- Recorded reward +50; reward type not established
- Merchants: satisfaction +1
Failure
No outcome effects recorded. This does not establish that there are none.
031Industrial sabotageBelthorn · DiplomacySpecial outcome+
- Location
- Belthorn
- Knights needed
- 2
- Duration
- 2 cycles
- Deadline
- Not established by this snapshot
- Damage range
- 1–3
- Requested Knights
- Not established by this snapshot
Recorded stat requirements
These are recorded base values, not a guaranteed success formula.
Unlock conditions: Not established by this snapshot.
Task themes: Investigation, People Involved. These labels are not simultaneous requirements or a complete unlock route.
Normal success
- Recorded reward +80; reward type not established
- Merchants: satisfaction +2
- Consumable: Truffle Cremeux
Failure
No outcome effects recorded. This does not establish that there are none.
Special outcomes
Recorded matches to investigate. Other conditions may apply; these are not guaranteed triggers.
Outcome 1 · Brunhilda
Knight match: Brunhilda.
- Nobles: satisfaction +2
- Recorded reward +75; reward type not established
032Biggest aligot contestMilkford · CompetitionView record+
- Location
- Milkford
- Knights needed
- Not established by this snapshot
- Duration
- 2 cycles
- Deadline
- Not established by this snapshot
- Damage range
- 0–2
- Requested Knights
- Not established by this snapshot
Recorded stat requirements
These are recorded base values, not a guaranteed success formula.
Unlock conditions: Not established by this snapshot.
Task themes: Crowd, People Involved. These labels are not simultaneous requirements or a complete unlock route.
Normal success
- Merchants: satisfaction +1
- Population group not established: satisfaction +1
- Recorded reward +25; reward type not established
- Consumable: Magic Aligot
Failure
No outcome effects recorded. This does not establish that there are none.
033The black knightVillador · DuelSpecial outcome+
- Location
- Villador
- Knights needed
- Not established by this snapshot
- Duration
- Not established by this snapshot
- Deadline
- Not established by this snapshot
- Damage range
- 2–5
- Requested Knights
- Not established by this snapshot
Recorded stat requirements
These are recorded base values, not a guaranteed success formula.
Unlock conditions: Not established by this snapshot.
Task themes: At Night. These labels are not simultaneous requirements or a complete unlock route.
Normal success
- Recorded reward +70; reward type not established
Failure
No outcome effects recorded. This does not establish that there are none.
Special outcomes
Recorded matches to investigate. Other conditions may apply; these are not guaranteed triggers.
Outcome 1 · Dulahan
Knight match: Dulahan.
- Recorded reward +100; reward type not established
- Consumable: Camembert
034Black trade's endVillador · ScoutingView record+
- Location
- Villador
- Knights needed
- Not established by this snapshot
- Duration
- 2 cycles
- Deadline
- Not established by this snapshot
- Damage range
- 1–2
- Requested Knights
- Not established by this snapshot
Recorded stat requirements
These are recorded base values, not a guaranteed success formula.
Unlock conditions: Not established by this snapshot.
Task themes: Magic Involved, Track, Unethical. These labels are not simultaneous requirements or a complete unlock route.
Normal success
- Recorded reward +35; reward type not established
- Merchants: satisfaction +2
Failure
No outcome effects recorded. This does not establish that there are none.
Recorded variations
Activation conditions are not established. Do not add these changes together or apply them to every attempt.
Reported variant 1 · activation unknown
- Strength requirement change: +3
- Agility requirement change: +1
- Knight count change: +1
- Duration change: -1 cycles
- Damage change: +2
Success changes
- Nobles: satisfaction +2
- Merchants: satisfaction -1
- Recorded reward +15; reward type not established
035Brizh internal diplomacyRozenn · DiplomacyView record+
- Location
- Rozenn
- Knights needed
- 2
- Duration
- 2 cycles
- Deadline
- Not established by this snapshot
- Damage range
- 0–0
- Requested Knights
- Not established by this snapshot
Recorded stat requirements
These are recorded base values, not a guaranteed success formula.
Unlock conditions: Not established by this snapshot.
Task themes: Investigation. These labels are not simultaneous requirements or a complete unlock route.
Normal success
- Merchants: satisfaction +3
- Recorded reward +25; reward type not established
Failure
No outcome effects recorded. This does not establish that there are none.
036Urgent delivery (smelling parcel)Isle Of Basalt · DiplomacyView record+
- Location
- Isle Of Basalt
- Knights needed
- Not established by this snapshot
- Duration
- 4 cycles
- Deadline
- Not established by this snapshot
- Damage range
- 0–2
- Requested Knights
- Not established by this snapshot
Recorded stat requirements
These are recorded base values, not a guaranteed success formula.
Unlock conditions: Not established by this snapshot.
Task themes: Help. These labels are not simultaneous requirements or a complete unlock route.
Normal success
- Consumable: Camembert
- Merchants: satisfaction +1
Failure
No outcome effects recorded. This does not establish that there are none.
Recorded variations
Activation conditions are not established. Do not add these changes together or apply them to every attempt.
Reported variant 1 · activation unknown
- Agility requirement change: +2
- Duration change: -1 cycles
- Damage change: +1
037Checking the eggChavignol · DiplomacySpecial outcome+
- Location
- Chavignol
- Knights needed
- Not established by this snapshot
- Duration
- 2 cycles
- Deadline
- Not established by this snapshot
- Damage range
- 0–0
- Requested Knights
- Not established by this snapshot
Recorded stat requirements
These are recorded base values, not a guaranteed success formula.
Unlock conditions: Not established by this snapshot.
Task themes: Investigation. These labels are not simultaneous requirements or a complete unlock route.
Normal success
- Consumable: Camembert
- Nobles: satisfaction -1
- Population group not established: satisfaction +1
- Recorded reward +20; reward type not established
Failure
No outcome effects recorded. This does not establish that there are none.
Special outcomes
Recorded matches to investigate. Other conditions may apply; these are not guaranteed triggers.
Outcome 1 · Goberto
Knight match: Goberto.
- Consumable: Goat Cheese
- Consumable: Murmuring Cheese
- Consumable: Grilled Cheese
Recorded damage: 0–0.
Outcome 2 · Gwendan
Knight match: Gwendan.
- Recorded reward +75; reward type not established
- Nobles: satisfaction +2
038Negotiate the eggsChavignol · DiplomacySpecial outcome+
- Location
- Chavignol
- Knights needed
- Not established by this snapshot
- Duration
- 2 cycles
- Deadline
- Not established by this snapshot
- Damage range
- 0–1
- Requested Knights
- Not established by this snapshot
Recorded stat requirements
These are recorded base values, not a guaranteed success formula.
Unlock conditions: Not established by this snapshot.
Task themes: Crowd. These labels are not simultaneous requirements or a complete unlock route.
Normal success
- Consumable: Blue Cheese
- Nobles: satisfaction +1
- Population group not established: satisfaction -1
- Recorded reward +25; reward type not established
Failure
No outcome effects recorded. This does not establish that there are none.
Special outcomes
Recorded matches to investigate. Other conditions may apply; these are not guaranteed triggers.
Outcome 1 · Goberto
Knight match: Goberto.
- Consumable: Goat Cheese
- Consumable: Murmuring Cheese
- Consumable: Grilled Cheese
Recorded damage: 0–0.
Outcome 2 · Gwendan
Knight match: Gwendan.
- Recorded reward +75; reward type not established
- Nobles: satisfaction +2
039Milking goatsChavignol · DiplomacyView record+
- Location
- Chavignol
- Knights needed
- Not established by this snapshot
- Duration
- 2 cycles
- Deadline
- Not established by this snapshot
- Damage range
- 0–1
- Requested Knights
- Not established by this snapshot
Recorded stat requirements
These are recorded base values, not a guaranteed success formula.
Unlock conditions: Not established by this snapshot.
Task themes: Cute Creature. These labels are not simultaneous requirements or a complete unlock route.
Normal success
- Consumable: Goat Cheese
- Merchants: satisfaction +1
- Recorded reward +20; reward type not established
Failure
No outcome effects recorded. This does not establish that there are none.
040Cursed mouldy cellarChavignol · DiplomacyView record+
- Location
- Chavignol
- Knights needed
- Not established by this snapshot
- Duration
- Not established by this snapshot
- Deadline
- Not established by this snapshot
- Damage range
- 1–2
- Requested Knights
- Not established by this snapshot
Recorded stat requirements
These are recorded base values, not a guaranteed success formula.
Unlock conditions: Not established by this snapshot.
Task themes: Magic Involved, At Night. These labels are not simultaneous requirements or a complete unlock route.
Normal success
- Consumable: Blue Cheese
- Recorded reward +20; reward type not established
Failure
No outcome effects recorded. This does not establish that there are none.
041Old cryptsChavignol · ScoutingView record+
- Location
- Chavignol
- Knights needed
- 3
- Duration
- Not established by this snapshot
- Deadline
- Not established by this snapshot
- Damage range
- 2–3
- Requested Knights
- Not established by this snapshot
Recorded stat requirements
These are recorded base values, not a guaranteed success formula.
Unlock conditions: Not established by this snapshot.
Task themes: Investigation, Cave, Ghost. These labels are not simultaneous requirements or a complete unlock route.
Normal success
- Consumable: Goat Cheese
- Consumable: Grannys Herbal Tea
- Recorded reward +75; reward type not established
- Merchants: satisfaction +1
Failure
No outcome effects recorded. This does not establish that there are none.
042Rat awarenessChavignol · DiplomacyView record+
- Location
- Chavignol
- Knights needed
- 2
- Duration
- Not established by this snapshot
- Deadline
- Not established by this snapshot
- Damage range
- 0–1
- Requested Knights
- Not established by this snapshot
Recorded stat requirements
These are recorded base values, not a guaranteed success formula.
Unlock conditions: Not established by this snapshot.
Task themes: Cute Creature, Crowd, People Involved. These labels are not simultaneous requirements or a complete unlock route.
Normal success
- Population group not established: satisfaction +2
- Consumable: Cheese
Failure
No outcome effects recorded. This does not establish that there are none.
043Rat exterminationChavignolView record+
- Location
- Chavignol
- Knights needed
- Not established by this snapshot
- Duration
- 2 cycles
- Deadline
- Not established by this snapshot
- Damage range
- 1–2
- Requested Knights
- Not established by this snapshot
Recorded stat requirements
These are recorded base values, not a guaranteed success formula.
Unlock conditions: Not established by this snapshot.
Task themes: Cute Creature, Track. These labels are not simultaneous requirements or a complete unlock route.
Normal success
- Merchants: satisfaction +1
- Consumable: Cheese
- Recorded reward +25; reward type not established
Failure
No outcome effects recorded. This does not establish that there are none.
044Cheese-maker disputeMilkford · DiplomacyView record+
- Location
- Milkford
- Knights needed
- Not established by this snapshot
- Duration
- Not established by this snapshot
- Deadline
- Not established by this snapshot
- Damage range
- 1–2
- Requested Knights
- Not established by this snapshot
Recorded stat requirements
These are recorded base values, not a guaranteed success formula.
Unlock conditions: Not established by this snapshot.
Normal success
- Recorded reward +20; reward type not established
- Consumable: Blue Cheese
Failure
No outcome effects recorded. This does not establish that there are none.
045The clean keeper goose, part 2Milkford · ScoutingSpecial outcome+
- Location
- Milkford
- Knights needed
- Not established by this snapshot
- Duration
- Not established by this snapshot
- Deadline
- Not established by this snapshot
- Damage range
- 1–3
- Requested Knights
- Not established by this snapshot
Recorded stat requirements
These are recorded base values, not a guaranteed success formula.
Unlock conditions: Not established by this snapshot.
Task themes: Flying Creature. These labels are not simultaneous requirements or a complete unlock route.
Normal success
- Recorded reward +1; reward type not established
Failure
No outcome effects recorded. This does not establish that there are none.
Recorded variations
Activation conditions are not established. Do not add these changes together or apply them to every attempt.
Reported variant 1 · activation unknown
Additional special outcomes are referenced in this variant. Their Knight matches, conditions and effects are not established by this snapshot.
Additional outcome or audience references are recorded; their full conditions are not established.
Reported variant 2 · activation unknown
Additional special outcomes are referenced in this variant. Their Knight matches, conditions and effects are not established by this snapshot.
Additional outcome or audience references are recorded; their full conditions are not established.
Reported variant 3 · activation unknown
Additional special outcomes are referenced in this variant. Their Knight matches, conditions and effects are not established by this snapshot.
Additional outcome or audience references are recorded; their full conditions are not established.
046Fabrics parasitesVilladorView record+
- Location
- Villador
- Knights needed
- 2
- Duration
- Not established by this snapshot
- Deadline
- Not established by this snapshot
- Damage range
- 0–1
- Requested Knights
- Not established by this snapshot
Recorded stat requirements
These are recorded base values, not a guaranteed success formula.
Unlock conditions: Not established by this snapshot.
Task themes: Help, Flying Creature. These labels are not simultaneous requirements or a complete unlock route.
Normal success
- Nobles: satisfaction +1
- Merchants: satisfaction +1
- Recorded reward +40; reward type not established
Failure
No outcome effects recorded. This does not establish that there are none.
047The vampire of ClovermontClovermontView record+
- Location
- Clovermont
- Knights needed
- 2
- Duration
- Not established by this snapshot
- Deadline
- Not established by this snapshot
- Damage range
- 1–3
- Requested Knights
- Not established by this snapshot
Recorded stat requirements
These are recorded base values, not a guaranteed success formula.
Unlock conditions: Not established by this snapshot.
Task themes: Magic Involved, At Night. These labels are not simultaneous requirements or a complete unlock route.
Normal success
- Recorded reward +40; reward type not established
- Scholars: satisfaction +2
Failure
No outcome effects recorded. This does not establish that there are none.
048The vampire of ClovermontClovermont · DiplomacySpecial outcome+
- Location
- Clovermont
- Knights needed
- 2
- Duration
- Not established by this snapshot
- Deadline
- Not established by this snapshot
- Damage range
- 1–2
- Requested Knights
- Not established by this snapshot
Recorded stat requirements
These are recorded base values, not a guaranteed success formula.
Unlock conditions: Not established by this snapshot.
Task themes: Magic Involved, At Night. These labels are not simultaneous requirements or a complete unlock route.
Normal success
- Recorded reward +60; reward type not established
- Population group not established: satisfaction +1
Failure
No outcome effects recorded. This does not establish that there are none.
Special outcomes
Recorded matches to investigate. Other conditions may apply; these are not guaranteed triggers.
Outcome 1
Knight match: Not established by this snapshot.
Stat check: Charisma, recorded threshold 10. The exact comparison is not established.
- Nobles: satisfaction +2
- Recorded reward +20; reward type not established
- Clovermont: tax change +5
- Consumable: Rabbit Meat
049The vampire of ClovermontClovermont · AssassinationView record+
- Location
- Clovermont
- Knights needed
- 2
- Duration
- Not established by this snapshot
- Deadline
- Not established by this snapshot
- Damage range
- 2–3
- Requested Knights
- Not established by this snapshot
Recorded stat requirements
These are recorded base values, not a guaranteed success formula.
Unlock conditions: Not established by this snapshot.
Task themes: Magic Involved, At Night. These labels are not simultaneous requirements or a complete unlock route.
Normal success
- Recorded reward +45; reward type not established
- Nobles: satisfaction +2
Failure
No outcome effects recorded. This does not establish that there are none.
050The cow's swimming poolMilkford · RescueView record+
- Location
- Milkford
- Knights needed
- Not established by this snapshot
- Duration
- Not established by this snapshot
- Deadline
- Not established by this snapshot
- Damage range
- 0–1
- Requested Knights
- Not established by this snapshot
Recorded stat requirements
These are recorded base values, not a guaranteed success formula.
Unlock conditions: Not established by this snapshot.
Task themes: Water, Help. These labels are not simultaneous requirements or a complete unlock route.
Normal success
- Population group not established: satisfaction +1
- Nobles: satisfaction +1
- Consumable: Comte
Failure
No outcome effects recorded. This does not establish that there are none.
051Curse of the bathsMilkford · ResearchView record+
- Location
- Milkford
- Knights needed
- Not established by this snapshot
- Duration
- 2 cycles
- Deadline
- Not established by this snapshot
- Damage range
- 2–3
- Requested Knights
- Not established by this snapshot
Recorded stat requirements
These are recorded base values, not a guaranteed success formula.
Unlock conditions: Not established by this snapshot.
Task themes: Magic Involved, Flying Creature, Water. These labels are not simultaneous requirements or a complete unlock route.
Normal success
- Recorded reward +25; reward type not established
- Nobles: satisfaction +1
- Scholars: satisfaction +1
Failure
No outcome effects recorded. This does not establish that there are none.
052Dairy sabotageMilkford · ScoutingView record+
- Location
- Milkford
- Knights needed
- 2
- Duration
- Not established by this snapshot
- Deadline
- Not established by this snapshot
- Damage range
- 1–3
- Requested Knights
- Not established by this snapshot
Recorded stat requirements
These are recorded base values, not a guaranteed success formula.
Unlock conditions: Not established by this snapshot.
Task themes: Investigation, Magic Involved. These labels are not simultaneous requirements or a complete unlock route.
Normal success
- Population group not established: satisfaction +1
- Merchants: satisfaction +1
- Recorded reward +15; reward type not established
Failure
No outcome effects recorded. This does not establish that there are none.
053Diplomatic assassinationRozenn · AssassinationView record+
- Location
- Rozenn
- Knights needed
- Not established by this snapshot
- Duration
- 2 cycles
- Deadline
- Not established by this snapshot
- Damage range
- 2–5
- Requested Knights
- Not established by this snapshot
Recorded stat requirements
These are recorded base values, not a guaranteed success formula.
Unlock conditions: Not established by this snapshot.
Task themes: Crowd, Track, Unethical. These labels are not simultaneous requirements or a complete unlock route.
Normal success
- Population group not established: satisfaction +3
- Nobles: satisfaction -2
- Scholars: satisfaction +1
Failure
No outcome effects recorded. This does not establish that there are none.
054Diplomatic meetingRozenn · DiplomacySpecial outcome+
- Location
- Rozenn
- Knights needed
- Not established by this snapshot
- Duration
- 2 cycles
- Deadline
- Not established by this snapshot
- Damage range
- 1–3
- Requested Knights
- Not established by this snapshot
Recorded stat requirements
These are recorded base values, not a guaranteed success formula.
Unlock conditions: Not established by this snapshot.
Task themes: Crowd. These labels are not simultaneous requirements or a complete unlock route.
Normal success
- Population group not established: satisfaction +1
- Nobles: satisfaction +1
- Scholars: satisfaction +1
Failure
No outcome effects recorded. This does not establish that there are none.
Special outcomes
Recorded matches to investigate. Other conditions may apply; these are not guaranteed triggers.
Outcome 1
Knight match: Not established by this snapshot.
Stat check: Wits, recorded threshold 8. The exact comparison is not established.
- Scholars: satisfaction +3
055Dragon huntClovermontView record+
- Location
- Clovermont
- Knights needed
- 4
- Duration
- 2 cycles
- Deadline
- Not established by this snapshot
- Damage range
- 3–6
- Requested Knights
- Not established by this snapshot
Recorded stat requirements
These are recorded base values, not a guaranteed success formula.
Unlock conditions: Not established by this snapshot.
Task themes: Flying Creature, Dragon, Big Creature. These labels are not simultaneous requirements or a complete unlock route.
Normal success
- Recorded reward +200; reward type not established
- Nobles: satisfaction +1
- Population group not established: satisfaction +1
- Merchants: satisfaction +1
- Quest item: Dragon Heart
Failure
No outcome effects recorded. This does not establish that there are none.
056The High KnightsCity Of Enberg · ConfrontationView record+
- Location
- City Of Enberg
- Knights needed
- 3
- Duration
- 3 cycles
- Deadline
- Not established by this snapshot
- Damage range
- 3–5
- Requested Knights
- Not established by this snapshot
Recorded stat requirements
These are recorded base values, not a guaranteed success formula.
Unlock conditions: Not established by this snapshot.
Task themes: Crowd. These labels are not simultaneous requirements or a complete unlock route.
Normal success
- Nobles: satisfaction +2
- Scholars: satisfaction +1
Failure
No outcome effects recorded. This does not establish that there are none.
057Ether medallionVillador · Relic RecoveryView record+
- Location
- Villador
- Knights needed
- Not established by this snapshot
- Duration
- 2 cycles
- Deadline
- Not established by this snapshot
- Damage range
- 1–2
- Requested Knights
- Not established by this snapshot
Recorded stat requirements
These are recorded base values, not a guaranteed success formula.
Unlock conditions: Not established by this snapshot.
Task themes: Investigation, Track. These labels are not simultaneous requirements or a complete unlock route.
Normal success
- Recorded reward +40; reward type not established
- Scholars: satisfaction +2
Failure
No outcome effects recorded. This does not establish that there are none.
058The cursed amuletsVillador · Relic RecoveryView record+
- Location
- Villador
- Knights needed
- 2
- Duration
- 2 cycles
- Deadline
- Not established by this snapshot
- Damage range
- 1–2
- Requested Knights
- Not established by this snapshot
Recorded stat requirements
These are recorded base values, not a guaranteed success formula.
Unlock conditions: Not established by this snapshot.
Task themes: Heavy Lifting, Magic Involved, Track. These labels are not simultaneous requirements or a complete unlock route.
Normal success
- Relic: Cursed Amulet
- Merchants: satisfaction +2
- Recorded reward +25; reward type not established
Failure
No outcome effects recorded. This does not establish that there are none.
059Find the manuscriptRozenn · DiplomacyView record+
- Location
- Rozenn
- Knights needed
- Not established by this snapshot
- Duration
- 2 cycles
- Deadline
- Not established by this snapshot
- Damage range
- 0–1
- Requested Knights
- Not established by this snapshot
Recorded stat requirements
These are recorded base values, not a guaranteed success formula.
Unlock conditions: Not established by this snapshot.
Task themes: Investigation. These labels are not simultaneous requirements or a complete unlock route.
Normal success
- Sovereign trait: Wise; recorded change +2
- Recorded reward +30; reward type not established
- Nobles: satisfaction +2
Failure
No outcome effects recorded. This does not establish that there are none.
060Spying on noblesFort Gavault · ScoutingSpecial outcome+
- Location
- Fort Gavault
- Knights needed
- 3
- Duration
- 2 cycles
- Deadline
- Not established by this snapshot
- Damage range
- 1–3
- Requested Knights
- Not established by this snapshot
Recorded stat requirements
These are recorded base values, not a guaranteed success formula.
Unlock conditions: Not established by this snapshot.
Task themes: Investigation, People Involved. These labels are not simultaneous requirements or a complete unlock route.
Normal success
- Population group not established: satisfaction +3
- Consumable: Munster
- Recorded reward +35; reward type not established
Failure
No outcome effects recorded. This does not establish that there are none.
Special outcomes
Recorded matches to investigate. Other conditions may apply; these are not guaranteed triggers.
Outcome 1 · Brunhilda
Knight match: Brunhilda.
- Population group not established: satisfaction -2
- Nobles: satisfaction -2
061Get the manuscriptRozenn · Relic RecoveryView record+
- Location
- Rozenn
- Knights needed
- Not established by this snapshot
- Duration
- 2 cycles
- Deadline
- Not established by this snapshot
- Damage range
- 0–1
- Requested Knights
- Not established by this snapshot
Recorded stat requirements
These are recorded base values, not a guaranteed success formula.
Unlock conditions: Not established by this snapshot.
Task themes: Investigation, Heavy Lifting. These labels are not simultaneous requirements or a complete unlock route.
Normal success
- Sovereign trait: Wise; recorded change -2
- Relic: Ecclesiastical Manuscript
Failure
No outcome effects recorded. This does not establish that there are none.
062The Ghost bargeClovermont · ScoutingSpecial outcome+
- Location
- Clovermont
- Knights needed
- 2
- Duration
- 2 cycles
- Deadline
- Not established by this snapshot
- Damage range
- 1–2
- Requested Knights
- Not established by this snapshot
Recorded stat requirements
These are recorded base values, not a guaranteed success formula.
Unlock conditions: Not established by this snapshot.
Task themes: Track, Water, Ghost. These labels are not simultaneous requirements or a complete unlock route.
Normal success
- Scholars: satisfaction +2
- Recorded reward +35; reward type not established
Failure
No outcome effects recorded. This does not establish that there are none.
Special outcomes
Recorded matches to investigate. Other conditions may apply; these are not guaranteed triggers.
Outcome 1 · Dulahan
Knight match: Dulahan.
- Population group not established: satisfaction +1
- Nobles: satisfaction -1
- Merchants: satisfaction +1
- Recorded reward +45; reward type not established
Recorded variations
Activation conditions are not established. Do not add these changes together or apply them to every attempt.
Reported variant 1 · activation unknown
Reported variant 2 · activation unknown
- Strength requirement change: +2
- Wits requirement change: -2
- Damage change: +1
Reported variant 3 · activation unknown
- Charisma requirement change: -1
- Wits requirement change: -2
- Luck requirement change: +1
063Ghost of the sheepfoldMilkfordView record+
- Location
- Milkford
- Knights needed
- 3
- Duration
- 2 cycles
- Deadline
- Not established by this snapshot
- Damage range
- 2–5
- Requested Knights
- Not established by this snapshot
Recorded stat requirements
These are recorded base values, not a guaranteed success formula.
Unlock conditions: Not established by this snapshot.
Task themes: Ghost, Magic Involved. These labels are not simultaneous requirements or a complete unlock route.
Normal success
- Recorded reward +175; reward type not established
- Merchants: satisfaction +2
Failure
- Merchants: satisfaction -3
064Giant cockroaches invasionRozennView record+
- Location
- Rozenn
- Knights needed
- 2
- Duration
- Not established by this snapshot
- Deadline
- Not established by this snapshot
- Damage range
- 1–3
- Requested Knights
- Not established by this snapshot
Recorded stat requirements
These are recorded base values, not a guaranteed success formula.
Unlock conditions: Not established by this snapshot.
Task themes: Flying Creature, Big Creature, Track. These labels are not simultaneous requirements or a complete unlock route.
Normal success
- Recorded reward +35; reward type not established
- Nobles: satisfaction +1
- Population group not established: satisfaction +1
Failure
No outcome effects recorded. This does not establish that there are none.
Recorded variations
Activation conditions are not established. Do not add these changes together or apply them to every attempt.
Reported variant 1 · activation unknown
- Strength requirement change: -3
- Agility requirement change: +3
- Knight count change: -1
- Damage change: -1
Reported variant 2 · activation unknown
- Strength requirement change: -4
- Magic requirement change: +3
- Knight count change: -1
- Damage change: +1
065Captain's mutinyGrest · DiplomacySpecial outcome+
- Location
- Grest
- Knights needed
- 2
- Duration
- 2 cycles
- Deadline
- Not established by this snapshot
- Damage range
- 2–3
- Requested Knights
- Not established by this snapshot
Recorded stat requirements
These are recorded base values, not a guaranteed success formula.
Unlock conditions: Not established by this snapshot.
Task themes: Intimidation, People Involved. These labels are not simultaneous requirements or a complete unlock route.
Normal success
- Merchants: satisfaction +2
- Recorded reward +40; reward type not established
Failure
No outcome effects recorded. This does not establish that there are none.
Special outcomes
Recorded matches to investigate. Other conditions may apply; these are not guaranteed triggers.
Outcome 1 · Daguez
Knight match: Daguez.
- Recorded reward +125; reward type not established
- Merchants: satisfaction +3
- Daguez: affinity +2
066Grest gargoyle huntGrestView record+
- Location
- Grest
- Knights needed
- Not established by this snapshot
- Duration
- Not established by this snapshot
- Deadline
- Not established by this snapshot
- Damage range
- 1–3
- Requested Knights
- Not established by this snapshot
Recorded stat requirements
These are recorded base values, not a guaranteed success formula.
Unlock conditions: Not established by this snapshot.
Task themes: At Night, Cave, Flying Creature. These labels are not simultaneous requirements or a complete unlock route.
Normal success
- Recorded reward +30; reward type not established
- Nobles: satisfaction +1
- Consumable: Gargoyle Soup
Failure
No outcome effects recorded. This does not establish that there are none.
067The harpiesGrestView record+
- Location
- Grest
- Knights needed
- 2
- Duration
- 2 cycles
- Deadline
- Not established by this snapshot
- Damage range
- 2–4
- Requested Knights
- Not established by this snapshot
Recorded stat requirements
These are recorded base values, not a guaranteed success formula.
Unlock conditions: Not established by this snapshot.
Task themes: Musical, Water, Flying Creature. These labels are not simultaneous requirements or a complete unlock route.
Normal success
- Merchants: satisfaction +2
- Scholars: satisfaction -1
- Consumable: Harpie Cheese
- Recorded reward +25; reward type not established
Failure
No outcome effects recorded. This does not establish that there are none.
Recorded variations
Activation conditions are not established. Do not add these changes together or apply them to every attempt.
Reported variant 1 · activation unknown
- Strength requirement change: -4
- Agility requirement change: +3
- Wits requirement change: +2
- Knight count change: -1
- Damage change: -2
Success changes
- Scholars: satisfaction +1
- Merchants: satisfaction -1
068The haunted lighthouseGrest · ScoutingView record+
- Location
- Grest
- Knights needed
- 2
- Duration
- 2 cycles
- Deadline
- Not established by this snapshot
- Damage range
- 1–2
- Requested Knights
- Not established by this snapshot
Recorded stat requirements
These are recorded base values, not a guaranteed success formula.
Unlock conditions: Not established by this snapshot.
Task themes: At Night, Water, Ghost. These labels are not simultaneous requirements or a complete unlock route.
Normal success
- Recorded reward +50; reward type not established
- Population group not established: satisfaction +1
- Consumable: Gargoyle Soup
Failure
No outcome effects recorded. This does not establish that there are none.
Recorded variations
Activation conditions are not established. Do not add these changes together or apply them to every attempt.
Reported variant 1 · activation unknown
- Magic requirement change: +2
Success changes
- Scholars: satisfaction +1
Reported variant 2 · activation unknown
- Wits requirement change: +2
Success changes
- Population group not established: satisfaction +1
069The thieving griffinClovermont · Relic RecoverySpecial outcome+
- Location
- Clovermont
- Knights needed
- 3
- Duration
- Not established by this snapshot
- Deadline
- Not established by this snapshot
- Damage range
- 1–4
- Requested Knights
- Not established by this snapshot
Recorded stat requirements
These are recorded base values, not a guaranteed success formula.
Unlock conditions: Not established by this snapshot.
Task themes: Heavy Lifting, Big Creature, Need Flying Mount, Flying Creature. These labels are not simultaneous requirements or a complete unlock route.
Normal success
- Recorded reward +160; reward type not established
- Population group not established: satisfaction +2
Failure
No outcome effects recorded. This does not establish that there are none.
Special outcomes
Recorded matches to investigate. Other conditions may apply; these are not guaranteed triggers.
Outcome 1 · Ari
Knight match: Ari.
- Recorded reward +200; reward type not established
- Ari: affinity +3
- Population group not established: satisfaction +2
Recorded damage: 0–0.
070Hydra huntGrestSpecial outcome+
- Location
- Grest
- Knights needed
- 3
- Duration
- 2 cycles
- Deadline
- Not established by this snapshot
- Damage range
- 2–3
- Requested Knights
- Not established by this snapshot
Recorded stat requirements
These are recorded base values, not a guaranteed success formula.
Unlock conditions: Not established by this snapshot.
Task themes: Water, Big Creature. These labels are not simultaneous requirements or a complete unlock route.
Normal success
- Consumable: Gruel
- Consumable: Magic Potion
- Recorded reward +100; reward type not established
Failure
- Merchants: satisfaction -3
Special outcomes
Recorded matches to investigate. Other conditions may apply; these are not guaranteed triggers.
Outcome 1
Knight match: Not established by this snapshot.
Stat check: Magic, recorded threshold 7. The exact comparison is not established.
- Recorded reward +100; reward type not established
- Consumable: Gruel
- Sovereign trait: Kind; recorded change +2
- Scholars: satisfaction +1
071The knight of the fountainRozenn · DuelView record+
- Location
- Rozenn
- Knights needed
- Not established by this snapshot
- Duration
- Not established by this snapshot
- Deadline
- Not established by this snapshot
- Damage range
- 2–4
- Requested Knights
- Not established by this snapshot
Recorded stat requirements
These are recorded base values, not a guaranteed success formula.
Unlock conditions: Not established by this snapshot.
Task themes: Water. These labels are not simultaneous requirements or a complete unlock route.
Normal success
- Recorded reward +25; reward type not established
- Population group not established: satisfaction +1
- Mount: Ennba
Failure
No outcome effects recorded. This does not establish that there are none.
072Assassinate the mutiny leaderKralgrun · AssassinationSpecial outcome+
- Location
- Kralgrun
- Knights needed
- 3
- Duration
- 3 cycles
- Deadline
- Not established by this snapshot
- Damage range
- 0–4
- Requested Knights
- Not established by this snapshot
Recorded stat requirements
These are recorded base values, not a guaranteed success formula.
Unlock conditions: Not established by this snapshot.
Task themes: Unethical, At Night, Cave. These labels are not simultaneous requirements or a complete unlock route.
Normal success
- Recorded reward +105; reward type not established
- Consumable: Homemade Tonic
- Population group not established: satisfaction +2
Failure
No outcome effects recorded. This does not establish that there are none.
Special outcomes
Recorded matches to investigate. Other conditions may apply; these are not guaranteed triggers.
Outcome 1 · Epicrate
Knight match: Epicrate.
- Population group not established: satisfaction +3
073Discredit the mutinyKralgrun · ScoutingView record+
- Location
- Kralgrun
- Knights needed
- Not established by this snapshot
- Duration
- 3 cycles
- Deadline
- Not established by this snapshot
- Damage range
- 2–4
- Requested Knights
- Not established by this snapshot
Recorded stat requirements
These are recorded base values, not a guaranteed success formula.
Unlock conditions: Not established by this snapshot.
Task themes: Unethical, Cave, Crowd. These labels are not simultaneous requirements or a complete unlock route.
Normal success
- Population group not established: satisfaction +3
- Consumable: Epicrates Cheese
- Recorded reward +65; reward type not established
Failure
No outcome effects recorded. This does not establish that there are none.
074Giant worm fightingKralgrunView record+
- Location
- Kralgrun
- Knights needed
- 3
- Duration
- 3 cycles
- Deadline
- Not established by this snapshot
- Damage range
- 2–5
- Requested Knights
- Not established by this snapshot
Recorded stat requirements
These are recorded base values, not a guaranteed success formula.
Unlock conditions: Not established by this snapshot.
Task themes: At Night, Cave, Big Creature. These labels are not simultaneous requirements or a complete unlock route.
Normal success
- Kralgrun: tax change +3
- Consumable: Epicrates Cheese
- Recorded reward +20; reward type not established
Failure
No outcome effects recorded. This does not establish that there are none.
075Giant worm reductionKralgrun · DiplomacyView record+
- Location
- Kralgrun
- Knights needed
- Not established by this snapshot
- Duration
- 3 cycles
- Deadline
- Not established by this snapshot
- Damage range
- 1–4
- Requested Knights
- Not established by this snapshot
Recorded stat requirements
These are recorded base values, not a guaranteed success formula.
Unlock conditions: Not established by this snapshot.
Task themes: Magic Involved, Big Creature, At Night, Cave. These labels are not simultaneous requirements or a complete unlock route.
Normal success
- Scholars: satisfaction +2
- Kralgrun: tax change +2
Failure
No outcome effects recorded. This does not establish that there are none.
076Mine rescueKralgrun · Relic RecoveryView record+
- Location
- Kralgrun
- Knights needed
- 3
- Duration
- 3 cycles
- Deadline
- Not established by this snapshot
- Damage range
- 1–5
- Requested Knights
- Not established by this snapshot
Recorded stat requirements
These are recorded base values, not a guaranteed success formula.
Unlock conditions: Not established by this snapshot.
Task themes: Help, People Involved, Cave. These labels are not simultaneous requirements or a complete unlock route.
Normal success
- Population group not established: satisfaction +1
- Scholars: satisfaction +1
- Merchants: satisfaction +1
- Consumable: Epicrates Cheese
- Recorded reward +20; reward type not established
Failure
No outcome effects recorded. This does not establish that there are none.
Recorded variations
Activation conditions are not established. Do not add these changes together or apply them to every attempt.
Reported variant 1 · activation unknown
- Strength requirement change: -3
- Wits requirement change: +3
- Luck requirement change: +2
- Damage change: +2
077Extracting the jackpotKralgrun · Relic RecoveryView record+
- Location
- Kralgrun
- Knights needed
- 3
- Duration
- 3 cycles
- Deadline
- Not established by this snapshot
- Damage range
- 1–4
- Requested Knights
- Not established by this snapshot
Recorded stat requirements
These are recorded base values, not a guaranteed success formula.
Unlock conditions: Not established by this snapshot.
Task themes: Cave, Heavy Lifting. These labels are not simultaneous requirements or a complete unlock route.
Normal success
- Recorded reward +65; reward type not established
- Consumable: Epicrates Cheese
Failure
No outcome effects recorded. This does not establish that there are none.
Recorded variations
Activation conditions are not established. Do not add these changes together or apply them to every attempt.
Reported variant 1 · activation unknown
Success changes
- Recorded reward +135; reward type not established
078Prevent mutinyKralgrun · DiplomacyView record+
- Location
- Kralgrun
- Knights needed
- Not established by this snapshot
- Duration
- 3 cycles
- Deadline
- Not established by this snapshot
- Damage range
- 2–3
- Requested Knights
- Not established by this snapshot
Recorded stat requirements
These are recorded base values, not a guaranteed success formula.
Unlock conditions: Not established by this snapshot.
Task themes: Crowd, Cave. These labels are not simultaneous requirements or a complete unlock route.
Normal success
- Recorded reward +110; reward type not established
- Population group not established: satisfaction +2
Failure
No outcome effects recorded. This does not establish that there are none.
079Slugs invasionKralgrun · DiplomacySpecial outcome+
- Location
- Kralgrun
- Knights needed
- 2
- Duration
- 3 cycles
- Deadline
- Not established by this snapshot
- Damage range
- 0–2
- Requested Knights
- Not established by this snapshot
Recorded stat requirements
These are recorded base values, not a guaranteed success formula.
Unlock conditions: Not established by this snapshot.
Task themes: Cave, Cute Creature. These labels are not simultaneous requirements or a complete unlock route.
Normal success
- Population group not established: satisfaction +1
- Consumable: Epicrates Cheese
- Recorded reward +50; reward type not established
Failure
No outcome effects recorded. This does not establish that there are none.
Special outcomes
Recorded matches to investigate. Other conditions may apply; these are not guaranteed triggers.
Outcome 1
Knight match: Not established by this snapshot.
Stat check: Wits, recorded threshold 8. The exact comparison is not established.
- Consumable: Gruel
- Consumable: Gruel
- Population group not established: satisfaction +3
- Recorded reward +50; reward type not established
Recorded variations
Activation conditions are not established. Do not add these changes together or apply them to every attempt.
Reported variant 1 · activation unknown
- Strength requirement change: +3
- Agility requirement change: -2
- Wits requirement change: +1
- Damage change: -1
Reported variant 2 · activation unknown
- Agility requirement change: -3
- Wits requirement change: +4
- Damage change: +1
080The mad mercenaryGrand Kutnar Caravan · AssassinationSpecial outcome+
- Location
- Grand Kutnar Caravan
- Knights needed
- 2
- Duration
- 2 cycles
- Deadline
- Not established by this snapshot
- Damage range
- 2–3
- Requested Knights
- Not established by this snapshot
Recorded stat requirements
These are recorded base values, not a guaranteed success formula.
Unlock conditions: Not established by this snapshot.
Task themes: At Night. These labels are not simultaneous requirements or a complete unlock route.
Normal success
- Recorded reward +75; reward type not established
- Population group not established: satisfaction +1
Failure
No outcome effects recorded. This does not establish that there are none.
Special outcomes
Recorded matches to investigate. Other conditions may apply; these are not guaranteed triggers.
Outcome 1 · Zolta
Knight match: Zolta.
- Recorded reward +100; reward type not established
- Population group not established: satisfaction +2
- Zolta: affinity +2
- Sovereign trait: Kind; recorded change +2
081The giant eaglesLaik ValleySpecial outcome+
- Location
- Laik Valley
- Knights needed
- Not established by this snapshot
- Duration
- 3 cycles
- Deadline
- Not established by this snapshot
- Damage range
- 1–5
- Requested Knights
- Not established by this snapshot
Recorded stat requirements
These are recorded base values, not a guaranteed success formula.
Unlock conditions: Not established by this snapshot.
Task themes: Flying Creature, Big Creature, Track. These labels are not simultaneous requirements or a complete unlock route.
Normal success
- Recorded reward +35; reward type not established
- Scholars: satisfaction +1
- Population group not established: satisfaction +1
Failure
- Laik Valley: destruction recorded
Special outcomes
Recorded matches to investigate. Other conditions may apply; these are not guaranteed triggers.
Outcome 1 · Ari
Knight match: Ari.
- Population group not established: satisfaction +2
- Recorded reward +50; reward type not established
- Consumable: Agility Potion
Recorded variations
Activation conditions are not established. Do not add these changes together or apply them to every attempt.
Reported variant 1 · activation unknown
- Wits requirement change: +2
Success changes
- Consumable: Wit Potion
082The ExplorerLaik Valley · ResearchSpecial outcome+
- Location
- Laik Valley
- Knights needed
- Not established by this snapshot
- Duration
- 3 cycles
- Deadline
- Not established by this snapshot
- Damage range
- 1–5
- Requested Knights
- Not established by this snapshot
Recorded stat requirements
These are recorded base values, not a guaranteed success formula.
Unlock conditions: Not established by this snapshot.
Task themes: Big Creature, Help. These labels are not simultaneous requirements or a complete unlock route.
Normal success
- Recorded reward +25; reward type not established
- Scholars: satisfaction +1
- Population group not established: satisfaction +1
Failure
No outcome effects recorded. This does not establish that there are none.
Special outcomes
Recorded matches to investigate. Other conditions may apply; these are not guaranteed triggers.
Outcome 1 · Silgur
Knight match: Silgur.
- Population group not established: satisfaction -2
- Merchants: satisfaction +2
- Consumable: Golden Manticore Venom
Recorded variations
Activation conditions are not established. Do not add these changes together or apply them to every attempt.
Reported variant 1 · activation unknown
- Charisma requirement change: +2
- Magic requirement change: -3
- Wits requirement change: +2
- Knight count change: +2
Success changes
- Consumable: Wit Potion
083The giant scorpionLaik ValleyView record+
- Location
- Laik Valley
- Knights needed
- 3
- Duration
- 2 cycles
- Deadline
- Not established by this snapshot
- Damage range
- 2–5
- Requested Knights
- Not established by this snapshot
Recorded stat requirements
These are recorded base values, not a guaranteed success formula.
Unlock conditions: Not established by this snapshot.
Task themes: Big Creature, Musical. These labels are not simultaneous requirements or a complete unlock route.
Normal success
- Recorded reward +100; reward type not established
- Consumable: Agility Potion
Failure
No outcome effects recorded. This does not establish that there are none.
084The bloody magpieVillador · Relic RecoverySpecial outcome+
- Location
- Villador
- Knights needed
- Not established by this snapshot
- Duration
- Not established by this snapshot
- Deadline
- Not established by this snapshot
- Damage range
- 1–2
- Requested Knights
- Not established by this snapshot
Recorded stat requirements
These are recorded base values, not a guaranteed success formula.
Unlock conditions: Not established by this snapshot.
Task themes: Flying Creature, Climbing, Woods. These labels are not simultaneous requirements or a complete unlock route.
Normal success
- Recorded reward +25; reward type not established
- Scholars: satisfaction +1
- Mount: Paul
Failure
No outcome effects recorded. This does not establish that there are none.
Special outcomes
Recorded matches to investigate. Other conditions may apply; these are not guaranteed triggers.
Outcome 1 · Goberto
Knight match: Goberto.
No outcome effects recorded. This does not establish that there are none.
Recorded damage: 100–100.
085In search of the gemMana Strala · Relic RecoverySpecial outcome+
- Location
- Mana Strala
- Knights needed
- 3
- Duration
- 3 cycles
- Deadline
- Not established by this snapshot
- Damage range
- 1–3
- Requested Knights
- Not established by this snapshot
Recorded stat requirements
These are recorded base values, not a guaranteed success formula.
Unlock conditions: Not established by this snapshot.
Task themes: Investigation, Heavy Lifting, Climbing. These labels are not simultaneous requirements or a complete unlock route.
Normal success
- Recorded reward +75; reward type not established
- Nobles: satisfaction +2
Failure
No outcome effects recorded. This does not establish that there are none.
Special outcomes
Recorded matches to investigate. Other conditions may apply; these are not guaranteed triggers.
Outcome 1
Knight match: Not established by this snapshot.
Stat check: Luck, recorded threshold 11. The exact comparison is not established.
- Nobles: satisfaction +4
- Recorded reward +125; reward type not established
086The Giant MantisMana StralaView record+
- Location
- Mana Strala
- Knights needed
- 3
- Duration
- 4 cycles
- Deadline
- Not established by this snapshot
- Damage range
- 1–3
- Requested Knights
- Not established by this snapshot
Recorded stat requirements
These are recorded base values, not a guaranteed success formula.
Unlock conditions: Not established by this snapshot.
Task themes: Crowd, Magic Involved, Big Creature. These labels are not simultaneous requirements or a complete unlock route.
Normal success
- Scholars: satisfaction +2
- Recorded reward +80; reward type not established
Failure
No outcome effects recorded. This does not establish that there are none.
087Capture the shapeshifterMana StralaView record+
- Location
- Mana Strala
- Knights needed
- 2
- Duration
- 3 cycles
- Deadline
- Not established by this snapshot
- Damage range
- 1–3
- Requested Knights
- Not established by this snapshot
Recorded stat requirements
These are recorded base values, not a guaranteed success formula.
Unlock conditions: Not established by this snapshot.
Task themes: Magic Involved, Cute Creature, Track. These labels are not simultaneous requirements or a complete unlock route.
Normal success
- Scholars: satisfaction +1
- Recorded reward +50; reward type not established
Failure
No outcome effects recorded. This does not establish that there are none.
088Kill the shapeshifterMana Strala · AssassinationView record+
- Location
- Mana Strala
- Knights needed
- 2
- Duration
- 3 cycles
- Deadline
- Not established by this snapshot
- Damage range
- 2–5
- Requested Knights
- Not established by this snapshot
Recorded stat requirements
These are recorded base values, not a guaranteed success formula.
Unlock conditions: Not established by this snapshot.
Task themes: Magic Involved, Cute Creature, Track, Unethical. These labels are not simultaneous requirements or a complete unlock route.
Normal success
- Scholars: satisfaction -1
- Recorded reward +80; reward type not established
- Sovereign trait: trait not established; recorded change +2
Failure
No outcome effects recorded. This does not establish that there are none.
089Study the shapeshifterMana Strala · DiplomacySpecial outcome+
- Location
- Mana Strala
- Knights needed
- 2
- Duration
- 3 cycles
- Deadline
- Not established by this snapshot
- Damage range
- 1–2
- Requested Knights
- Not established by this snapshot
Recorded stat requirements
These are recorded base values, not a guaranteed success formula.
Unlock conditions: Not established by this snapshot.
Task themes: Magic Involved, Cute Creature, Investigation. These labels are not simultaneous requirements or a complete unlock route.
Normal success
- Scholars: satisfaction +1
- Recorded reward +30; reward type not established
- Consumable: Agility Potion
Failure
No outcome effects recorded. This does not establish that there are none.
Special outcomes
Recorded matches to investigate. Other conditions may apply; these are not guaranteed triggers.
Outcome 1 · Rufus, The Wolf
Knight match: Rufus, The Wolf.
- Scholars: satisfaction +2
- Recorded reward +75; reward type not established
- Consumable: Powerful Tonic
090The Red WizardMana Strala · DuelView record+
- Location
- Mana Strala
- Knights needed
- 2
- Duration
- 3 cycles
- Deadline
- Not established by this snapshot
- Damage range
- 2–5
- Requested Knights
- Not established by this snapshot
Recorded stat requirements
These are recorded base values, not a guaranteed success formula.
Unlock conditions: Not established by this snapshot.
Task themes: Magic Involved, At Night. These labels are not simultaneous requirements or a complete unlock route.
Normal success
- Consumable: Murmuring Cheese
- Scholars: satisfaction +2
- Recorded reward +70; reward type not established
Failure
No outcome effects recorded. This does not establish that there are none.
091Spoil and investigateMana Strala · AssassinationSpecial outcome+
- Location
- Mana Strala
- Knights needed
- 3
- Duration
- 3 cycles
- Deadline
- Not established by this snapshot
- Damage range
- 0–1
- Requested Knights
- Not established by this snapshot
Recorded stat requirements
These are recorded base values, not a guaranteed success formula.
Unlock conditions: Not established by this snapshot.
Task themes: Track. These labels are not simultaneous requirements or a complete unlock route.
Normal success
- Population group not established: satisfaction +2
- Recorded reward +50; reward type not established
Failure
No outcome effects recorded. This does not establish that there are none.
Special outcomes
Recorded matches to investigate. Other conditions may apply; these are not guaranteed triggers.
Outcome 1 · Arron
Knight match: Arron.
- Scholars: satisfaction +2
- Recorded reward +70; reward type not established
- Consumable: Scholars Nuts
092Spoil and investigateMana Strala · ScoutingSpecial outcome+
- Location
- Mana Strala
- Knights needed
- 3
- Duration
- 3 cycles
- Deadline
- Not established by this snapshot
- Damage range
- 0–3
- Requested Knights
- Not established by this snapshot
Recorded stat requirements
These are recorded base values, not a guaranteed success formula.
Unlock conditions: Not established by this snapshot.
Task themes: Investigation, Track. These labels are not simultaneous requirements or a complete unlock route.
Normal success
- Scholars: satisfaction +2
- Recorded reward +65; reward type not established
Failure
No outcome effects recorded. This does not establish that there are none.
Special outcomes
Recorded matches to investigate. Other conditions may apply; these are not guaranteed triggers.
Outcome 1 · Arron
Knight match: Arron.
- Scholars: satisfaction +2
- Recorded reward +70; reward type not established
- Consumable: Scholars Nuts
093Spoil and investigateMana Strala · ScoutingSpecial outcome+
- Location
- Mana Strala
- Knights needed
- 2
- Duration
- 3 cycles
- Deadline
- Not established by this snapshot
- Damage range
- 0–1
- Requested Knights
- Not established by this snapshot
Recorded stat requirements
These are recorded base values, not a guaranteed success formula.
Unlock conditions: Not established by this snapshot.
Task themes: At Night, Track. These labels are not simultaneous requirements or a complete unlock route.
Normal success
- Population group not established: satisfaction +1
- Recorded reward +85; reward type not established
- Scholars: satisfaction +2
Failure
No outcome effects recorded. This does not establish that there are none.
Special outcomes
Recorded matches to investigate. Other conditions may apply; these are not guaranteed triggers.
Outcome 1 · Arron
Knight match: Arron.
- Scholars: satisfaction +2
- Recorded reward +70; reward type not established
- Consumable: Scholars Nuts
094Manticore huntClovermontView record+
- Location
- Clovermont
- Knights needed
- 2
- Duration
- 2 cycles
- Deadline
- Not established by this snapshot
- Damage range
- 2–4
- Requested Knights
- Not established by this snapshot
Recorded stat requirements
These are recorded base values, not a guaranteed success formula.
Unlock conditions: Not established by this snapshot.
Task themes: Flying Creature, Big Creature, Track. These labels are not simultaneous requirements or a complete unlock route.
Normal success
- Population group not established: satisfaction +2
- Consumable: Agility Potion
- Recorded reward +95; reward type not established
Failure
No outcome effects recorded. This does not establish that there are none.
095The centenarian TarascusMavignacView record+
- Location
- Mavignac
- Knights needed
- 4
- Duration
- Not established by this snapshot
- Deadline
- Not established by this snapshot
- Damage range
- 3–5
- Requested Knights
- Not established by this snapshot
Recorded stat requirements
These are recorded base values, not a guaranteed success formula.
Unlock conditions: Not established by this snapshot.
Task themes: Big Creature, Track. These labels are not simultaneous requirements or a complete unlock route.
Normal success
- Recorded reward +125; reward type not established
- Population group not established: satisfaction +2
Failure
No outcome effects recorded. This does not establish that there are none.
096The false bankLocation not established · ResearchSpecial outcome+
- Location
- Not established by this snapshot
- Knights needed
- Not established by this snapshot
- Duration
- 2 cycles
- Deadline
- Not established by this snapshot
- Damage range
- 1–2
- Requested Knights
- Not established by this snapshot
Recorded stat requirements
These are recorded base values, not a guaranteed success formula.
Unlock conditions: Not established by this snapshot.
Task themes: Heavy Lifting, Investigation. These labels are not simultaneous requirements or a complete unlock route.
Normal success
- Merchants: satisfaction +1
- Recorded reward +35; reward type not established
Failure
No outcome effects recorded. This does not establish that there are none.
Special outcomes
Recorded matches to investigate. Other conditions may apply; these are not guaranteed triggers.
Outcome 1
Knight match: Not established by this snapshot.
Stat check: Wits, recorded threshold 3. The exact comparison is not established.
- Nobles: satisfaction -2
Recorded variations
Activation conditions are not established. Do not add these changes together or apply them to every attempt.
Reported variant 1 · activation unknown
Reported variant 2 · activation unknown
Success changes
- Recorded reward +100; reward type not established
- Merchants: satisfaction -2
097Watching over the chapelClovermont · ScoutingView record+
- Location
- Clovermont
- Knights needed
- 2
- Duration
- Not established by this snapshot
- Deadline
- Not established by this snapshot
- Damage range
- 1–1
- Requested Knights
- Not established by this snapshot
Recorded stat requirements
These are recorded base values, not a guaranteed success formula.
Unlock conditions: Not established by this snapshot.
Task themes: Magic Involved, At Night, Crowd, Investigation. These labels are not simultaneous requirements or a complete unlock route.
Normal success
- Nobles: satisfaction -2
- Population group not established: satisfaction +3
- Recorded reward +35; reward type not established
Failure
No outcome effects recorded. This does not establish that there are none.
098Spying on the Magical CouncilMoonvale Citadel · ScoutingSpecial outcome+
- Location
- Moonvale Citadel
- Knights needed
- 2
- Duration
- 3 cycles
- Deadline
- Not established by this snapshot
- Damage range
- 0–1
- Requested Knights
- Not established by this snapshot
Recorded stat requirements
These are recorded base values, not a guaranteed success formula.
Unlock conditions: Not established by this snapshot.
Task themes: Investigation, People Involved. These labels are not simultaneous requirements or a complete unlock route.
Normal success
- Population group not established: satisfaction +1
- Consumable: Scholars Nuts
- Scholars: satisfaction -1
- Recorded reward +30; reward type not established
Failure
No outcome effects recorded. This does not establish that there are none.
Special outcomes
Recorded matches to investigate. Other conditions may apply; these are not guaranteed triggers.
Outcome 1 · Oliver
Knight match: Oliver.
- Scholars: satisfaction +2
- Population group not established: satisfaction +1
- Consumable: Scholars Nuts
- Oliver: affinity +2
- Recorded reward +30; reward type not established
099Mysterious disappearancesClovermont · ScoutingView record+
- Location
- Clovermont
- Knights needed
- Not established by this snapshot
- Duration
- 2 cycles
- Deadline
- Not established by this snapshot
- Damage range
- 1–2
- Requested Knights
- Not established by this snapshot
Recorded stat requirements
These are recorded base values, not a guaranteed success formula.
Unlock conditions: Not established by this snapshot.
Task themes: Crowd, Investigation, Magic Involved. These labels are not simultaneous requirements or a complete unlock route.
Normal success
- Recorded reward +25; reward type not established
- Population group not established: satisfaction +2
Failure
No outcome effects recorded. This does not establish that there are none.
100Mysterious goatsClovermont · ResearchView record+
- Location
- Clovermont
- Knights needed
- Not established by this snapshot
- Duration
- Not established by this snapshot
- Deadline
- Not established by this snapshot
- Damage range
- 1–2
- Requested Knights
- Not established by this snapshot
Recorded stat requirements
These are recorded base values, not a guaranteed success formula.
Unlock conditions: Not established by this snapshot.
Task themes: Cute Creature, Magic Involved, Investigation. These labels are not simultaneous requirements or a complete unlock route.
Normal success
- Consumable: Cheese
- Population group not established: satisfaction +1
- Recorded reward +10; reward type not established
Failure
No outcome effects recorded. This does not establish that there are none.
101The mystic wellRozenn · DiplomacyView record+
- Location
- Rozenn
- Knights needed
- 2
- Duration
- Not established by this snapshot
- Deadline
- Not established by this snapshot
- Damage range
- 0–2
- Requested Knights
- Not established by this snapshot
Recorded stat requirements
These are recorded base values, not a guaranteed success formula.
Unlock conditions: Not established by this snapshot.
Task themes: Crowd, Magic Involved. These labels are not simultaneous requirements or a complete unlock route.
Normal success
- Recorded reward +20; reward type not established
- Population group not established: satisfaction +1
- Merchants: satisfaction +1
- Consumable: Provisions
Failure
No outcome effects recorded. This does not establish that there are none.
102Giant spidersNaonedView record+
- Location
- Naoned
- Knights needed
- 2
- Duration
- 2 cycles
- Deadline
- Not established by this snapshot
- Damage range
- 1–3
- Requested Knights
- Not established by this snapshot
Recorded stat requirements
These are recorded base values, not a guaranteed success formula.
Unlock conditions: Not established by this snapshot.
Task themes: Big Creature, Magic Involved, Cave. These labels are not simultaneous requirements or a complete unlock route.
Normal success
- Consumable: Gruel
- Recorded reward +50; reward type not established
- Nobles: satisfaction +1
Failure
No outcome effects recorded. This does not establish that there are none.
103Troop trainingNaoned · CompetitionSpecial outcome+
- Location
- Naoned
- Knights needed
- 2
- Duration
- 4 cycles
- Deadline
- Not established by this snapshot
- Damage range
- 1–3
- Requested Knights
- Not established by this snapshot
Recorded stat requirements
These are recorded base values, not a guaranteed success formula.
Unlock conditions: Not established by this snapshot.
Task themes: Help, People Involved, Heavy Lifting. These labels are not simultaneous requirements or a complete unlock route.
Normal success
- Nobles: satisfaction +2
- Population group not established: satisfaction +1
- Recorded reward +80; reward type not established
Failure
No outcome effects recorded. This does not establish that there are none.
Special outcomes
Recorded matches to investigate. Other conditions may apply; these are not guaranteed triggers.
Outcome 1 · Goberto
Knight match: Goberto.
- Population group not established: satisfaction +2
- Recorded reward +90; reward type not established
- Consumable: Strength Potion
104The wyverns of NaonedNaonedView record+
- Location
- Naoned
- Knights needed
- 2
- Duration
- 3 cycles
- Deadline
- Not established by this snapshot
- Damage range
- 1–3
- Requested Knights
- Not established by this snapshot
Recorded stat requirements
These are recorded base values, not a guaranteed success formula.
Unlock conditions: Not established by this snapshot.
Task themes: Flying Creature, Big Creature, Climbing. These labels are not simultaneous requirements or a complete unlock route.
Normal success
- Population group not established: satisfaction +1
- Merchants: satisfaction +1
- Recorded reward +50; reward type not established
Failure
No outcome effects recorded. This does not establish that there are none.
Recorded variations
Activation conditions are not established. Do not add these changes together or apply them to every attempt.
Reported variant 1 · activation unknown
- Magic requirement change: +2
Success changes
- Nobles: satisfaction +1
- Recorded reward +20; reward type not established
106The oracular cheeseMilkford · DiplomacyView record+
- Location
- Milkford
- Knights needed
- Not established by this snapshot
- Duration
- Not established by this snapshot
- Deadline
- Not established by this snapshot
- Damage range
- 1–3
- Requested Knights
- Not established by this snapshot
Recorded stat requirements
These are recorded base values, not a guaranteed success formula.
Unlock conditions: Not established by this snapshot.
Task themes: Magic Involved. These labels are not simultaneous requirements or a complete unlock route.
Normal success
- Scholars: satisfaction +1
- Merchants: satisfaction +1
- Consumable: Murmuring Cheese
Failure
No outcome effects recorded. This does not establish that there are none.
107People's assemblyRozenn · DiplomacyView record+
- Location
- Rozenn
- Knights needed
- Not established by this snapshot
- Duration
- 2 cycles
- Deadline
- Not established by this snapshot
- Damage range
- 0–1
- Requested Knights
- Not established by this snapshot
Recorded stat requirements
These are recorded base values, not a guaranteed success formula.
Unlock conditions: Not established by this snapshot.
Task themes: Crowd, People Involved. These labels are not simultaneous requirements or a complete unlock route.
Normal success
- Recorded reward +25; reward type not established
- Nobles: satisfaction +1
- Population group not established: satisfaction +1
Failure
No outcome effects recorded. This does not establish that there are none.
108Pest-free bakeryGrestView record+
- Location
- Grest
- Knights needed
- 2
- Duration
- Not established by this snapshot
- Deadline
- Not established by this snapshot
- Damage range
- 2–2
- Requested Knights
- Not established by this snapshot
Recorded stat requirements
These are recorded base values, not a guaranteed success formula.
Unlock conditions: Not established by this snapshot.
Task themes: At Night, Track, Flying Creature. These labels are not simultaneous requirements or a complete unlock route.
Normal success
- Merchants: satisfaction +1
- Scholars: satisfaction -1
- Consumable: Kouign Amann
- Recorded reward +20; reward type not established
Failure
No outcome effects recorded. This does not establish that there are none.
109The Stolen RecipePince Harbor · ConfrontationView record+
- Location
- Pince Harbor
- Knights needed
- 2
- Duration
- 3 cycles
- Deadline
- Not established by this snapshot
- Damage range
- 1–4
- Requested Knights
- Not established by this snapshot
Recorded stat requirements
These are recorded base values, not a guaranteed success formula.
Unlock conditions: Not established by this snapshot.
Task themes: Crowd, Intimidation. These labels are not simultaneous requirements or a complete unlock route.
Normal success
- Population group not established: satisfaction +1
- Recorded reward +40; reward type not established
- Consumable: Kouign Amann
Failure
No outcome effects recorded. This does not establish that there are none.
110ParlayPince Harbor · DiplomacySpecial outcome+
- Location
- Pince Harbor
- Knights needed
- 2
- Duration
- 3 cycles
- Deadline
- Not established by this snapshot
- Damage range
- 1–3
- Requested Knights
- Not established by this snapshot
Recorded stat requirements
These are recorded base values, not a guaranteed success formula.
Unlock conditions: Not established by this snapshot.
Task themes: People Involved, Intimidation, Help. These labels are not simultaneous requirements or a complete unlock route.
Normal success
- Population group not established: satisfaction +1
- Recorded reward +40; reward type not established
- Consumable: Kouign Amann
Failure
No outcome effects recorded. This does not establish that there are none.
Special outcomes
Recorded matches to investigate. Other conditions may apply; these are not guaranteed triggers.
Outcome 1 · Ursule
Knight match: Ursule.
- Population group not established: satisfaction +1
- Merchants: satisfaction +1
- Consumable: Kouign Amann
- Recorded reward +25; reward type not established
111Sea shanties competitionPince Harbor · CompetitionView record+
- Location
- Pince Harbor
- Knights needed
- 3
- Duration
- 2 cycles
- Deadline
- Not established by this snapshot
- Damage range
- 0–1
- Requested Knights
- Not established by this snapshot
Recorded stat requirements
These are recorded base values, not a guaranteed success formula.
Unlock conditions: Not established by this snapshot.
Task themes: Musical, Water. These labels are not simultaneous requirements or a complete unlock route.
Normal success
- Consumable: Powerful Tonic
- Merchants: satisfaction +2
- Recorded reward +40; reward type not established
Failure
No outcome effects recorded. This does not establish that there are none.
112The flying sirensPince HarborSpecial outcome+
- Location
- Pince Harbor
- Knights needed
- 2
- Duration
- 2 cycles
- Deadline
- Not established by this snapshot
- Damage range
- 1–3
- Requested Knights
- Not established by this snapshot
Recorded stat requirements
These are recorded base values, not a guaranteed success formula.
Unlock conditions: Not established by this snapshot.
Task themes: Flying Creature, Water, Magic Involved. These labels are not simultaneous requirements or a complete unlock route.
Normal success
- Population group not established: satisfaction +1
- Recorded reward +60; reward type not established
Failure
No outcome effects recorded. This does not establish that there are none.
Special outcomes
Recorded matches to investigate. Other conditions may apply; these are not guaranteed triggers.
Outcome 1 · Dulahan
Knight match: Dulahan.
- Population group not established: satisfaction +1
- Pince Harbor: tax change +3
- Recorded reward +50; reward type not established
113Alchemy TournamentPinemaze · CompetitionSpecial outcome+
- Location
- Pinemaze
- Knights needed
- 2
- Duration
- 4 cycles
- Deadline
- Not established by this snapshot
- Damage range
- 0–4
- Requested Knights
- Not established by this snapshot
Recorded stat requirements
These are recorded base values, not a guaranteed success formula.
Unlock conditions: Not established by this snapshot.
Task themes: Magic Involved. These labels are not simultaneous requirements or a complete unlock route.
Normal success
- Scholars: satisfaction +2
- Consumable: Ambrosia
- Recorded reward +50; reward type not established
Failure
No outcome effects recorded. This does not establish that there are none.
Special outcomes
Recorded matches to investigate. Other conditions may apply; these are not guaranteed triggers.
Outcome 1 · Ursule
Knight match: Ursule.
- Ursule: affinity -1
- Consumable: Ambrosia
- Scholars: satisfaction +2
- Recorded reward +25; reward type not established
Outcome 2 · Gwendan
Knight match: Gwendan.
- Consumable: Ambrosia
- Scholars: satisfaction +2
- Recorded reward +50; reward type not established
Recorded variations
Activation conditions are not established. Do not add these changes together or apply them to every attempt.
Reported variant 1 · activation unknown
- Agility requirement change: -1
- Charisma requirement change: -1
- Magic requirement change: -2
- Wits requirement change: -2
- Knight count change: -1
114Bicorn's femicidePinemaze · ScoutingView record+
- Location
- Pinemaze
- Knights needed
- 3
- Duration
- 3 cycles
- Deadline
- Not established by this snapshot
- Damage range
- 2–4
- Requested Knights
- Not established by this snapshot
Recorded stat requirements
These are recorded base values, not a guaranteed success formula.
Unlock conditions: Not established by this snapshot.
Task themes: Investigation, Woods, Magic Involved. These labels are not simultaneous requirements or a complete unlock route.
Normal success
- Consumable: Stone Skin Balm
- Recorded reward +50; reward type not established
Failure
No outcome effects recorded. This does not establish that there are none.
Recorded variations
Activation conditions are not established. Do not add these changes together or apply them to every attempt.
Reported variant 1 · activation unknown
- Magic requirement change: -1
- Wits requirement change: -1
- Luck requirement change: -1
- Knight count change: -1
Success changes
- Scholars: satisfaction +1
115The giant gargoylePinemazeView record+
- Location
- Pinemaze
- Knights needed
- 3
- Duration
- 3 cycles
- Deadline
- Not established by this snapshot
- Damage range
- 2–5
- Requested Knights
- Not established by this snapshot
Recorded stat requirements
These are recorded base values, not a guaranteed success formula.
Unlock conditions: Not established by this snapshot.
Task themes: Big Creature, Woods. These labels are not simultaneous requirements or a complete unlock route.
Normal success
- Recorded reward +100; reward type not established
- Scholars: satisfaction +1
Failure
No outcome effects recorded. This does not establish that there are none.
Recorded variations
Activation conditions are not established. Do not add these changes together or apply them to every attempt.
Reported variant 1 · activation unknown
- Strength requirement change: -3
- Magic requirement change: -2
- Knight count change: -1
- Damage change: -2
Success changes
- Consumable: Gargoyle Soup
116The Wizard LizardPinemazeView record+
- Location
- Pinemaze
- Knights needed
- 3
- Duration
- 3 cycles
- Deadline
- Not established by this snapshot
- Damage range
- 2–4
- Requested Knights
- Not established by this snapshot
Recorded stat requirements
These are recorded base values, not a guaranteed success formula.
Unlock conditions: Not established by this snapshot.
Task themes: Woods, Track, Magic Involved. These labels are not simultaneous requirements or a complete unlock route.
Normal success
- Recorded reward +75; reward type not established
- Consumable: Arsenic Vial
Failure
No outcome effects recorded. This does not establish that there are none.
117Pinemaze Magic CouncilPinemaze · DiplomacyView record+
- Location
- Pinemaze
- Knights needed
- 3
- Duration
- 3 cycles
- Deadline
- Not established by this snapshot
- Damage range
- 0–1
- Requested Knights
- Not established by this snapshot
Recorded stat requirements
These are recorded base values, not a guaranteed success formula.
Unlock conditions: Not established by this snapshot.
Task themes: Crowd, Magic Involved. These labels are not simultaneous requirements or a complete unlock route.
Normal success
- Consumable: Charisma Potion
- Consumable: Powerful Tonic
- Recorded reward +50; reward type not established
Failure
No outcome effects recorded. This does not establish that there are none.
Recorded variations
Activation conditions are not established. Do not add these changes together or apply them to every attempt.
Reported variant 1 · activation unknown
- Magic requirement change: -2
- Knight count change: -2
Success changes
- Scholars: satisfaction +1
Reported variant 2 · activation unknown
- Charisma requirement change: -2
- Knight count change: -2
Success changes
- Nobles: satisfaction +1
118Mushroom invasionPinemazeView record+
- Location
- Pinemaze
- Knights needed
- 3
- Duration
- 3 cycles
- Deadline
- Not established by this snapshot
- Damage range
- 2–3
- Requested Knights
- Not established by this snapshot
Recorded stat requirements
These are recorded base values, not a guaranteed success formula.
Unlock conditions: Not established by this snapshot.
Task themes: Magic Involved, Musical, Woods. These labels are not simultaneous requirements or a complete unlock route.
Normal success
No outcome effects recorded. This does not establish that there are none.
Failure
No outcome effects recorded. This does not establish that there are none.
119Will-o'-wisps invasionPinemazeSpecial outcome+
- Location
- Pinemaze
- Knights needed
- 3
- Duration
- 3 cycles
- Deadline
- Not established by this snapshot
- Damage range
- 2–5
- Requested Knights
- Not established by this snapshot
Recorded stat requirements
These are recorded base values, not a guaranteed success formula.
Unlock conditions: Not established by this snapshot.
Task themes: Cave, Magic Involved, At Night. These labels are not simultaneous requirements or a complete unlock route.
Normal success
- Scholars: satisfaction +2
- Consumable: Powerful Tonic
- Recorded reward +35; reward type not established
Failure
No outcome effects recorded. This does not establish that there are none.
Special outcomes
Recorded matches to investigate. Other conditions may apply; these are not guaranteed triggers.
Outcome 1 · Ursule
Knight match: Ursule.
- Ursule: affinity -1
- Consumable: Powerful Tonic
- Scholars: satisfaction +1
- Recorded reward +35; reward type not established
Recorded variations
Activation conditions are not established. Do not add these changes together or apply them to every attempt.
Reported variant 1 · activation unknown
- Magic requirement change: -2
- Wits requirement change: -2
- Luck requirement change: -1
- Knight count change: -1
Success changes
- Scholars: satisfaction -1
- Merchants: satisfaction +1
Outcome 1 · Ursule
Knight match: Ursule.
- Ursule: affinity -1
- Consumable: Powerful Tonic
- Scholars: satisfaction +1
- Recorded reward +35; reward type not established
Additional outcome or audience references are recorded; their full conditions are not established.
120Will-o'-wisps invasionPinemazeView record+
- Location
- Pinemaze
- Knights needed
- 2
- Duration
- 3 cycles
- Deadline
- Not established by this snapshot
- Damage range
- 2–5
- Requested Knights
- Ursule
Recorded stat requirements
These are recorded base values, not a guaranteed success formula.
Unlock conditions: Not established by this snapshot.
Task themes: Cave, Magic Involved, At Night. These labels are not simultaneous requirements or a complete unlock route.
Normal success
- Ursule: affinity -2
- Scholars: satisfaction +2
- Consumable: Powerful Tonic
- Recorded reward +50; reward type not established
Failure
No outcome effects recorded. This does not establish that there are none.
121Animal bodyguardsPopota Isles · RescueSpecial outcome+
- Location
- Popota Isles
- Knights needed
- 2
- Duration
- 3 cycles
- Deadline
- Not established by this snapshot
- Damage range
- 1–3
- Requested Knights
- Not established by this snapshot
Recorded stat requirements
These are recorded base values, not a guaranteed success formula.
Unlock conditions: Not established by this snapshot.
Task themes: Magic Involved, Big Creature. These labels are not simultaneous requirements or a complete unlock route.
Normal success
- Population group not established: satisfaction +1
- Recorded reward +50; reward type not established
Failure
No outcome effects recorded. This does not establish that there are none.
Special outcomes
Recorded matches to investigate. Other conditions may apply; these are not guaranteed triggers.
Outcome 1
Knight match: Not established by this snapshot.
- Population group not established: satisfaction +3
- Recorded reward +50; reward type not established
122Griffin-sittingPopota Isles · RescueSpecial outcome+
- Location
- Popota Isles
- Knights needed
- 2
- Duration
- 3 cycles
- Deadline
- Not established by this snapshot
- Damage range
- 0–3
- Requested Knights
- Not established by this snapshot
Recorded stat requirements
These are recorded base values, not a guaranteed success formula.
Unlock conditions: Not established by this snapshot.
Task themes: Cute Creature, Help, Magic Involved. These labels are not simultaneous requirements or a complete unlock route.
Normal success
- Population group not established: satisfaction +1
- Recorded reward +50; reward type not established
Failure
No outcome effects recorded. This does not establish that there are none.
Special outcomes
Recorded matches to investigate. Other conditions may apply; these are not guaranteed triggers.
Outcome 1 · The Wolf
Knight match: The Wolf.
- Population group not established: satisfaction -2
123Rozenn local customRozenn · DiplomacySpecial outcome+
- Location
- Rozenn
- Knights needed
- Not established by this snapshot
- Duration
- 2 cycles
- Deadline
- Not established by this snapshot
- Damage range
- 1–3
- Requested Knights
- Not established by this snapshot
Recorded stat requirements
These are recorded base values, not a guaranteed success formula.
Unlock conditions: Not established by this snapshot.
Task themes: Crowd, Magic Involved, People Involved. These labels are not simultaneous requirements or a complete unlock route.
Normal success
- Population group not established: satisfaction +1
- Scholars: satisfaction +2
- Recorded reward +10; reward type not established
Failure
No outcome effects recorded. This does not establish that there are none.
Special outcomes
Recorded matches to investigate. Other conditions may apply; these are not guaranteed triggers.
Outcome 1 · Gideon
Knight match: Gideon.
- Nobles: satisfaction +1
- Scholars: satisfaction +1
- Population group not established: satisfaction +1
- Consumable: Murmuring Cheese
Outcome 2 · Rufus
Knight match: Rufus.
- Population group not established: satisfaction -1
- Scholars: satisfaction +1
- Nobles: satisfaction -1
124Music competitionRozenn · CompetitionSpecial outcome+
- Location
- Rozenn
- Knights needed
- 3
- Duration
- 2 cycles
- Deadline
- Not established by this snapshot
- Damage range
- 0–1
- Requested Knights
- Not established by this snapshot
Recorded stat requirements
These are recorded base values, not a guaranteed success formula.
Unlock conditions: Not established by this snapshot.
Task themes: Musical. These labels are not simultaneous requirements or a complete unlock route.
Normal success
- Recorded reward +75; reward type not established
- Consumable: Kouign Amann
- Population group not established: satisfaction +2
Failure
No outcome effects recorded. This does not establish that there are none.
Special outcomes
Recorded matches to investigate. Other conditions may apply; these are not guaranteed triggers.
Outcome 1 · Gideon
Knight match: Gideon.
- Consumable: Kouign Amann
- Recorded reward +100; reward type not established
- Population group not established: satisfaction +2
- Consumable: Ginger Chocolate
125Rozenn peace treatyRozenn · DiplomacyView record+
- Location
- Rozenn
- Knights needed
- 2
- Duration
- Not established by this snapshot
- Deadline
- Not established by this snapshot
- Damage range
- 0–0
- Requested Knights
- Not established by this snapshot
Recorded stat requirements
These are recorded base values, not a guaranteed success formula.
Unlock conditions: Not established by this snapshot.
Task themes: Help. These labels are not simultaneous requirements or a complete unlock route.
Normal success
- Scholars: satisfaction +2
Failure
No outcome effects recorded. This does not establish that there are none.
126A thesis thiefLocation not established · ResearchSpecial outcome+
- Location
- Not established by this snapshot
- Knights needed
- Not established by this snapshot
- Duration
- 2 cycles
- Deadline
- Not established by this snapshot
- Damage range
- 0–1
- Requested Knights
- Not established by this snapshot
Recorded stat requirements
These are recorded base values, not a guaranteed success formula.
Unlock conditions: Not established by this snapshot.
Task themes: Magic Involved, Investigation. These labels are not simultaneous requirements or a complete unlock route.
Normal success
- Nobles: satisfaction +1
- Consumable: Scholars Nuts
Failure
No outcome effects recorded. This does not establish that there are none.
Special outcomes
Recorded matches to investigate. Other conditions may apply; these are not guaranteed triggers.
Outcome 1
Knight match: Not established by this snapshot.
Stat check: Magic, recorded threshold 10. The exact comparison is not established.
- Scholars: satisfaction +2
- Recorded reward +50; reward type not established
- Consumable: Magic Potion
Recorded variations
Activation conditions are not established. Do not add these changes together or apply them to every attempt.
Reported variant 1 · activation unknown
- Charisma requirement change: -1
- Wits requirement change: -1
- Knight count change: +1
Success changes
- Recorded reward +25; reward type not established
Reported variant 2 · activation unknown
- Duration change: -1 cycles
Success changes
- Recorded reward +25; reward type not established
- Scholars: satisfaction +1
Reported variant 3 · activation unknown
Success changes
- Scholars: satisfaction +2
127Four-eyes escortAvalon · DiplomacyView record+
- Location
- Avalon
- Knights needed
- 3
- Duration
- 3 cycles
- Deadline
- 3 cycles
- Damage range
- 1–3
- Requested Knights
- Not established by this snapshot
Recorded stat requirements
These are recorded base values, not a guaranteed success formula.
Unlock conditions: Not established by this snapshot.
Task themes: Crowd. These labels are not simultaneous requirements or a complete unlock route.
Normal success
- Scholars: satisfaction +2
- Recorded reward +15; reward type not established
Failure
No outcome effects recorded. This does not establish that there are none.
Follow-up audience recorded after failure; the dialogue route is not established.
128Striking ScholarsGrest · DiplomacyView record+
- Location
- Grest
- Knights needed
- 2
- Duration
- 2 cycles
- Deadline
- Not established by this snapshot
- Damage range
- 1–2
- Requested Knights
- Not established by this snapshot
Recorded stat requirements
These are recorded base values, not a guaranteed success formula.
Unlock conditions: Not established by this snapshot.
Task themes: Crowd. These labels are not simultaneous requirements or a complete unlock route.
Normal success
- Recorded reward +60; reward type not established
- Merchants: satisfaction +1
Failure
No outcome effects recorded. This does not establish that there are none.
129A spider in a caveGrestSpecial outcome+
- Location
- Grest
- Knights needed
- 2
- Duration
- Not established by this snapshot
- Deadline
- Not established by this snapshot
- Damage range
- 2–5
- Requested Knights
- Not established by this snapshot
Recorded stat requirements
These are recorded base values, not a guaranteed success formula.
Unlock conditions: Not established by this snapshot.
Task themes: Big Creature, Cave. These labels are not simultaneous requirements or a complete unlock route.
Normal success
- Merchants: satisfaction +1
- Scholars: satisfaction +1
- Recorded reward +110; reward type not established
Failure
No outcome effects recorded. This does not establish that there are none.
Special outcomes
Recorded matches to investigate. Other conditions may apply; these are not guaranteed triggers.
Outcome 1 · Gwendan
Knight match: Gwendan.
- Merchants: satisfaction +1
- Scholars: satisfaction +1
- Recorded reward +45; reward type not established
Recorded damage: 2–5.
A follow-up audience is referenced; its choices are not reconstructed here.
130Merchants guild traitorGrest · DiplomacyView record+
- Location
- Grest
- Knights needed
- 2
- Duration
- 2 cycles
- Deadline
- Not established by this snapshot
- Damage range
- 1–3
- Requested Knights
- Not established by this snapshot
Recorded stat requirements
These are recorded base values, not a guaranteed success formula.
Unlock conditions: Not established by this snapshot.
Task themes: Intimidation, Investigation. These labels are not simultaneous requirements or a complete unlock route.
Normal success
- Recorded reward +80; reward type not established
Failure
No outcome effects recorded. This does not establish that there are none.
131Poisoning powderShellington · ScoutingView record+
- Location
- Shellington
- Knights needed
- 2
- Duration
- 3 cycles
- Deadline
- Not established by this snapshot
- Damage range
- 1–2
- Requested Knights
- Not established by this snapshot
Recorded stat requirements
These are recorded base values, not a guaranteed success formula.
Unlock conditions: Not established by this snapshot.
Task themes: Investigation, At Night. These labels are not simultaneous requirements or a complete unlock route.
Normal success
- Merchants: satisfaction +1
- Recorded reward +75; reward type not established
Failure
No outcome effects recorded. This does not establish that there are none.
132A merchant merchandizingShellington · DiplomacySpecial outcome+
- Location
- Shellington
- Knights needed
- 2
- Duration
- 3 cycles
- Deadline
- Not established by this snapshot
- Damage range
- 1–2
- Requested Knights
- Not established by this snapshot
Recorded stat requirements
These are recorded base values, not a guaranteed success formula.
Unlock conditions: Not established by this snapshot.
Task themes: People Involved, Track, At Night. These labels are not simultaneous requirements or a complete unlock route.
Normal success
- Merchants: satisfaction +1
- Recorded reward +75; reward type not established
Failure
No outcome effects recorded. This does not establish that there are none.
Special outcomes
Recorded matches to investigate. Other conditions may apply; these are not guaranteed triggers.
Outcome 1 · Oliver
Knight match: Oliver.
- Merchants: satisfaction -1
133The giant pearlShellington · Relic RecoveryView record+
- Location
- Shellington
- Knights needed
- 2
- Duration
- 2 cycles
- Deadline
- Not established by this snapshot
- Damage range
- 1–2
- Requested Knights
- Not established by this snapshot
Recorded stat requirements
These are recorded base values, not a guaranteed success formula.
Unlock conditions: Not established by this snapshot.
Task themes: Heavy Lifting, Investigation. These labels are not simultaneous requirements or a complete unlock route.
Normal success
- Population group not established: satisfaction +1
- Recorded reward +75; reward type not established
Failure
No outcome effects recorded. This does not establish that there are none.
134Reef cleaningShellington · DiplomacySpecial outcome+
- Location
- Shellington
- Knights needed
- 3
- Duration
- 2 cycles
- Deadline
- Not established by this snapshot
- Damage range
- 0–2
- Requested Knights
- Not established by this snapshot
Recorded stat requirements
These are recorded base values, not a guaranteed success formula.
Unlock conditions: Not established by this snapshot.
Task themes: Water, Help, People Involved. These labels are not simultaneous requirements or a complete unlock route.
Normal success
- Consumable: Powerful Tonic
- Population group not established: satisfaction +1
- Sovereign trait: Kind; recorded change +1
- Recorded reward +80; reward type not established
Failure
No outcome effects recorded. This does not establish that there are none.
Special outcomes
Recorded matches to investigate. Other conditions may apply; these are not guaranteed triggers.
Outcome 1 · Ligia
Knight match: Ligia.
- Ligia: affinity +2
- Relic: Spurs Of Swiftness 2
- Sovereign trait: Kind; recorded change +1
- Population group not established: satisfaction +2
- Recorded reward +80; reward type not established
135Snake invasionClovermontView record+
- Location
- Clovermont
- Knights needed
- 2
- Duration
- Not established by this snapshot
- Deadline
- Not established by this snapshot
- Damage range
- 2–4
- Requested Knights
- Not established by this snapshot
Recorded stat requirements
These are recorded base values, not a guaranteed success formula.
Unlock conditions: Not established by this snapshot.
Task themes: Cute Creature, Track. These labels are not simultaneous requirements or a complete unlock route.
Normal success
- Recorded reward +65; reward type not established
- Population group not established: satisfaction +3
Failure
No outcome effects recorded. This does not establish that there are none.
136The snake kingClovermontView record+
- Location
- Clovermont
- Knights needed
- 2
- Duration
- 2 cycles
- Deadline
- Not established by this snapshot
- Damage range
- 2–4
- Requested Knights
- Not established by this snapshot
Recorded stat requirements
These are recorded base values, not a guaranteed success formula.
Unlock conditions: Not established by this snapshot.
Task themes: Track, Big Creature. These labels are not simultaneous requirements or a complete unlock route.
Normal success
- Population group not established: satisfaction +1
- Nobles: satisfaction +1
- Merchants: satisfaction +1
- Recorded reward +35; reward type not established
Failure
No outcome effects recorded. This does not establish that there are none.
Recorded variations
Activation conditions are not established. Do not add these changes together or apply them to every attempt.
Reported variant 1 · activation unknown
- Strength requirement change: -4
- Agility requirement change: -2
- Wits requirement change: +5
- Damage change: -2
Success changes
- Scholars: satisfaction +1
- Nobles: satisfaction -1
- Population group not established: satisfaction -1
137Song of the dryadsClovermont · DiplomacySpecial outcome+
- Location
- Clovermont
- Knights needed
- Not established by this snapshot
- Duration
- Not established by this snapshot
- Deadline
- Not established by this snapshot
- Damage range
- 1–2
- Requested Knights
- Not established by this snapshot
Recorded stat requirements
These are recorded base values, not a guaranteed success formula.
Unlock conditions: Not established by this snapshot.
Task themes: Cute Creature, Musical. These labels are not simultaneous requirements or a complete unlock route.
Normal success
- Recorded reward +40; reward type not established
- Population group not established: satisfaction +1
Failure
No outcome effects recorded. This does not establish that there are none.
Special outcomes
Recorded matches to investigate. Other conditions may apply; these are not guaranteed triggers.
Outcome 1 · Gideon
Knight match: Gideon.
- Recorded reward +65; reward type not established
- Consumable: Agility Potion
- Population group not established: satisfaction -1
Recorded damage: 0–0.
138Bridge reconstructionSouthbay Gate · DiplomacySpecial outcome+
- Location
- Southbay Gate
- Knights needed
- 3
- Duration
- 2 cycles
- Deadline
- Not established by this snapshot
- Damage range
- 1–2
- Requested Knights
- Not established by this snapshot
Recorded stat requirements
These are recorded base values, not a guaranteed success formula.
Unlock conditions: Not established by this snapshot.
Task themes: Help, Water. These labels are not simultaneous requirements or a complete unlock route.
Normal success
- Consumable: Fine Wine
- Merchants: satisfaction +1
- Recorded reward +40; reward type not established
Failure
No outcome effects recorded. This does not establish that there are none.
Special outcomes
Recorded matches to investigate. Other conditions may apply; these are not guaranteed triggers.
Outcome 1 · Ligia
Knight match: Ligia.
- Merchants: satisfaction +1
- Merchants: satisfaction +3
- Ligia: affinity +2
139Spearfishing competitionGrest · CompetitionSpecial outcome+
- Location
- Grest
- Knights needed
- 2
- Duration
- 2 cycles
- Deadline
- Not established by this snapshot
- Damage range
- 1–3
- Requested Knights
- Not established by this snapshot
Recorded stat requirements
These are recorded base values, not a guaranteed success formula.
Unlock conditions: Not established by this snapshot.
Task themes: Water. These labels are not simultaneous requirements or a complete unlock route.
Normal success
- Consumable: Salted Cod
- Merchants: satisfaction +2
- Recorded reward +50; reward type not established
Failure
No outcome effects recorded. This does not establish that there are none.
Special outcomes
Recorded matches to investigate. Other conditions may apply; these are not guaranteed triggers.
Outcome 1 · Silgur
Knight match: Silgur.
- Consumable: Salted Cod
- Merchants: satisfaction +1
- Consumable: Fine Wine
140The stolen tiaraVillador · Relic RecoverySpecial outcome+
- Location
- Villador
- Knights needed
- 2
- Duration
- 3 cycles
- Deadline
- Not established by this snapshot
- Damage range
- 1–2
- Requested Knights
- Not established by this snapshot
Recorded stat requirements
These are recorded base values, not a guaranteed success formula.
Unlock conditions: Not established by this snapshot.
Task themes: Investigation, Track. These labels are not simultaneous requirements or a complete unlock route.
Normal success
- Recorded reward +75; reward type not established
- Nobles: satisfaction +2
Failure
No outcome effects recorded. This does not establish that there are none.
Special outcomes
Recorded matches to investigate. Other conditions may apply; these are not guaranteed triggers.
Outcome 1 · Gwendan
Knight match: Gwendan.
- Nobles: satisfaction -2
141The bat charmerGrest · RescueSpecial outcome+
- Location
- Grest
- Knights needed
- Not established by this snapshot
- Duration
- Not established by this snapshot
- Deadline
- Not established by this snapshot
- Damage range
- 1–3
- Requested Knights
- Not established by this snapshot
Recorded stat requirements
These are recorded base values, not a guaranteed success formula.
Unlock conditions: Not established by this snapshot.
Task themes: Magic Involved, Track. These labels are not simultaneous requirements or a complete unlock route.
Normal success
- Merchants: satisfaction +1
- Scholars: satisfaction +1
Failure
No outcome effects recorded. This does not establish that there are none.
Special outcomes
Recorded matches to investigate. Other conditions may apply; these are not guaranteed triggers.
Outcome 1 · Ursule
Knight match: Ursule.
- Scholars: satisfaction +2
- Consumable: Kouign Amann
- Consumable: Kouign Amann
Recorded damage: 0–0.
142The clean keeper gooseMilkford · ScoutingSpecial outcome+
- Location
- Milkford
- Knights needed
- Not established by this snapshot
- Duration
- Not established by this snapshot
- Deadline
- Not established by this snapshot
- Damage range
- 0–2
- Requested Knights
- Not established by this snapshot
Recorded stat requirements
These are recorded base values, not a guaranteed success formula.
Unlock conditions: Not established by this snapshot.
Task themes: Flying Creature, Water. These labels are not simultaneous requirements or a complete unlock route.
Normal success
- Recorded reward +5; reward type not established
Failure
No outcome effects recorded. This does not establish that there are none.
Special outcomes
Recorded matches to investigate. Other conditions may apply; these are not guaranteed triggers.
Outcome 1 · Angelica
Knight match: Angelica.
- Population group not established: satisfaction +1
- Recorded reward +25; reward type not established
Recorded damage: 0–0.
A follow-up audience is referenced; its choices are not reconstructed here.
Follow-up audience recorded after success and failure; the dialogue route is not established.
143The clean keeper henMilkfordView record+
- Location
- Milkford
- Knights needed
- Not established by this snapshot
- Duration
- Not established by this snapshot
- Deadline
- Not established by this snapshot
- Damage range
- 2–4
- Requested Knights
- Not established by this snapshot
Recorded stat requirements
These are recorded base values, not a guaranteed success formula.
Unlock conditions: Not established by this snapshot.
Task themes: Flying Creature, Water. These labels are not simultaneous requirements or a complete unlock route.
Normal success
- Nobles: satisfaction +2
- Recorded reward +20; reward type not established
Failure
No outcome effects recorded. This does not establish that there are none.
144The cursed soilsLocation not established · ResearchView record+
- Location
- Not established by this snapshot
- Knights needed
- 2
- Duration
- Not established by this snapshot
- Deadline
- Not established by this snapshot
- Damage range
- 3–5
- Requested Knights
- Not established by this snapshot
Recorded stat requirements
These are recorded base values, not a guaranteed success formula.
Unlock conditions: Not established by this snapshot.
Task themes: Magic Involved, Help, Investigation. These labels are not simultaneous requirements or a complete unlock route.
Normal success
- Merchants: satisfaction +2
- Recorded reward +25; reward type not established
Failure
No outcome effects recorded. This does not establish that there are none.
145The Killer RabbitRozennView record+
- Location
- Rozenn
- Knights needed
- Not established by this snapshot
- Duration
- 2 cycles
- Deadline
- Not established by this snapshot
- Damage range
- 1–3
- Requested Knights
- Not established by this snapshot
Recorded stat requirements
These are recorded base values, not a guaranteed success formula.
Unlock conditions: Not established by this snapshot.
Task themes: Cute Creature, Track. These labels are not simultaneous requirements or a complete unlock route.
Normal success
- Recorded reward +35; reward type not established
- Nobles: satisfaction +1
- Population group not established: satisfaction +1
Failure
No outcome effects recorded. This does not establish that there are none.
146The Possessed ReverendRozenn · DuelSpecial outcome+
- Location
- Rozenn
- Knights needed
- Not established by this snapshot
- Duration
- Not established by this snapshot
- Deadline
- Not established by this snapshot
- Damage range
- 1–3
- Requested Knights
- Not established by this snapshot
Recorded stat requirements
These are recorded base values, not a guaranteed success formula.
Unlock conditions: Not established by this snapshot.
Task themes: Magic Involved. These labels are not simultaneous requirements or a complete unlock route.
Normal success
- Recorded reward +35; reward type not established
- Scholars: satisfaction +1
- Consumable: Homemade Tonic
Failure
No outcome effects recorded. This does not establish that there are none.
Special outcomes
Recorded matches to investigate. Other conditions may apply; these are not guaranteed triggers.
Outcome 1
Knight match: Not established by this snapshot.
Stat check: Magic, recorded threshold 7. The exact comparison is not established.
- Sovereign trait: Kind; recorded change +2
- Recorded reward +90; reward type not established
- Scholars: satisfaction +2
147The silver catRozennSpecial outcome+
- Location
- Rozenn
- Knights needed
- Not established by this snapshot
- Duration
- Not established by this snapshot
- Deadline
- Not established by this snapshot
- Damage range
- 2–4
- Requested Knights
- Not established by this snapshot
Recorded stat requirements
These are recorded base values, not a guaranteed success formula.
Unlock conditions: Not established by this snapshot.
Task themes: Cute Creature, Magic Involved, Track, At Night. These labels are not simultaneous requirements or a complete unlock route.
Normal success
- Merchants: satisfaction +2
- Scholars: satisfaction -1
- Recorded reward +30; reward type not established
Failure
No outcome effects recorded. This does not establish that there are none.
Special outcomes
Recorded matches to investigate. Other conditions may apply; these are not guaranteed triggers.
Outcome 1 · Angelica
Knight match: Angelica.
- Scholars: satisfaction +1
- Merchants: satisfaction +1
- Angelica: affinity +1
Recorded variations
Activation conditions are not established. Do not add these changes together or apply them to every attempt.
Reported variant 1 · activation unknown
- Strength requirement change: -2
- Magic requirement change: +2
- Duration change: +1 cycles
- Damage change: -2
Success changes
- Relic: Silver Cat Skin
- Scholars: satisfaction -1
- Merchants: satisfaction -1
148The Silver CatRozenn · DuelView record+
- Location
- Rozenn
- Knights needed
- Not established by this snapshot
- Duration
- Not established by this snapshot
- Deadline
- Not established by this snapshot
- Damage range
- 1–5
- Requested Knights
- Not established by this snapshot
Recorded stat requirements
These are recorded base values, not a guaranteed success formula.
Unlock conditions: Not established by this snapshot.
Task themes: Magic Involved, At Night. These labels are not simultaneous requirements or a complete unlock route.
Normal success
- Merchants: satisfaction +1
- Scholars: satisfaction +2
- Recorded reward +25; reward type not established
Failure
No outcome effects recorded. This does not establish that there are none.
Recorded variations
Activation conditions are not established. Do not add these changes together or apply them to every attempt.
Reported variant 1 · activation unknown
- Strength requirement change: -2
- Magic requirement change: +2
- Duration change: +1 cycles
- Damage change: -2
Success changes
- Relic: Silver Cat Skin
- Scholars: satisfaction -1
- Merchants: satisfaction -1
149The silver feathersBeaconsburySpecial outcome+
- Location
- Beaconsbury
- Knights needed
- Not established by this snapshot
- Duration
- 2 cycles
- Deadline
- Not established by this snapshot
- Damage range
- 1–2
- Requested Knights
- Not established by this snapshot
Recorded stat requirements
These are recorded base values, not a guaranteed success formula.
Unlock conditions: Not established by this snapshot.
Task themes: Flying Creature, Woods, Climbing. These labels are not simultaneous requirements or a complete unlock route.
Normal success
- Nobles: satisfaction +1
- Recorded reward +35; reward type not established
Failure
No outcome effects recorded. This does not establish that there are none.
Special outcomes
Recorded matches to investigate. Other conditions may apply; these are not guaranteed triggers.
Outcome 1 · Silgur
Knight match: Silgur.
- Nobles: satisfaction +2
- Consumable: Kouign Amann
- Recorded reward +100; reward type not established
Recorded variations
Activation conditions are not established. Do not add these changes together or apply them to every attempt.
Reported variant 1 · activation unknown
- Duration change: -1 cycles
- Location: Clovermont
150The sheep of drowsinessMilkford · ResearchView record+
- Location
- Milkford
- Knights needed
- Not established by this snapshot
- Duration
- 2 cycles
- Deadline
- Not established by this snapshot
- Damage range
- 0–2
- Requested Knights
- Not established by this snapshot
Recorded stat requirements
These are recorded base values, not a guaranteed success formula.
Unlock conditions: Not established by this snapshot.
Task themes: Magic Involved, Cute Creature. These labels are not simultaneous requirements or a complete unlock route.
Normal success
- Scholars: satisfaction +1
- Recorded reward +35; reward type not established
Failure
No outcome effects recorded. This does not establish that there are none.
Recorded variations
Activation conditions are not established. Do not add these changes together or apply them to every attempt.
Reported variant 1 · activation unknown
- Strength requirement change: +4
- Damage change: +2
Success changes
- Scholars: satisfaction -1
- Merchants: satisfaction +1
151The squash festivalMilkford · DiplomacySpecial outcome+
- Location
- Milkford
- Knights needed
- 2
- Duration
- Not established by this snapshot
- Deadline
- Not established by this snapshot
- Damage range
- 0–1
- Requested Knights
- Not established by this snapshot
Recorded stat requirements
These are recorded base values, not a guaranteed success formula.
Unlock conditions: Not established by this snapshot.
Task themes: Crowd, People Involved. These labels are not simultaneous requirements or a complete unlock route.
Normal success
- Population group not established: satisfaction +1
- Consumable: Provisions
- Recorded reward +20; reward type not established
Failure
No outcome effects recorded. This does not establish that there are none.
Special outcomes
Recorded matches to investigate. Other conditions may apply; these are not guaranteed triggers.
Outcome 1 · The Wolf
Knight match: The Wolf.
- Population group not established: satisfaction +2
- Consumable: Provisions
- Consumable: Homemade Tonic
152The stolen « snake »Grest · Relic RecoveryView record+
- Location
- Grest
- Knights needed
- 2
- Duration
- 2 cycles
- Deadline
- Not established by this snapshot
- Damage range
- 1–4
- Requested Knights
- Not established by this snapshot
Recorded stat requirements
These are recorded base values, not a guaranteed success formula.
Unlock conditions: Not established by this snapshot.
Task themes: Heavy Lifting, Water. These labels are not simultaneous requirements or a complete unlock route.
Normal success
- Merchants: satisfaction +2
- Recorded reward +45; reward type not established
- Consumable: Reblochon
Failure
No outcome effects recorded. This does not establish that there are none.
153The thief harpyRozenn · Relic RecoverySpecial outcome+
- Location
- Rozenn
- Knights needed
- Not established by this snapshot
- Duration
- 2 cycles
- Deadline
- Not established by this snapshot
- Damage range
- 0–1
- Requested Knights
- Not established by this snapshot
Recorded stat requirements
These are recorded base values, not a guaranteed success formula.
Unlock conditions: Not established by this snapshot.
Task themes: Flying Creature, Cave, Magic Involved. These labels are not simultaneous requirements or a complete unlock route.
Normal success
- Nobles: satisfaction +1
- Recorded reward +30; reward type not established
Failure
No outcome effects recorded. This does not establish that there are none.
Special outcomes
Recorded matches to investigate. Other conditions may apply; these are not guaranteed triggers.
Outcome 1
Knight match: Not established by this snapshot.
Trait match: Demon.
- Scholars: satisfaction -2
- Consumable: Gargoyle Soup
- Consumable: Harpie Cheese
Recorded variations
Activation conditions are not established. Do not add these changes together or apply them to every attempt.
Reported variant 1 · activation unknown
- Strength requirement change: -2
- Magic requirement change: +2
Success changes
- Mount: Night Mare
- Scholars: satisfaction +1
Reported variant 2 · activation unknown
- Strength requirement change: -1
- Magic requirement change: -2
- Wits requirement change: +2
Success changes
- Scholars: satisfaction -1
- Population group not established: satisfaction +1
Reported variant 3 · activation unknown
- Strength requirement change: +1
- Magic requirement change: -1
- Wits requirement change: -1
Success changes
- Scholars: satisfaction +1
- Population group not established: satisfaction -1
154Capture the VelueClovermont · ScoutingView record+
- Location
- Clovermont
- Knights needed
- Not established by this snapshot
- Duration
- Not established by this snapshot
- Deadline
- Not established by this snapshot
- Damage range
- 0–2
- Requested Knights
- Not established by this snapshot
Recorded stat requirements
These are recorded base values, not a guaranteed success formula.
Unlock conditions: Not established by this snapshot.
Task themes: Big Creature, Water. These labels are not simultaneous requirements or a complete unlock route.
Normal success
- Scholars: satisfaction +2
- Recorded reward +25; reward type not established
Failure
No outcome effects recorded. This does not establish that there are none.
155Kill the VelueClovermontView record+
- Location
- Clovermont
- Knights needed
- Not established by this snapshot
- Duration
- Not established by this snapshot
- Deadline
- Not established by this snapshot
- Damage range
- 2–3
- Requested Knights
- Not established by this snapshot
Recorded stat requirements
These are recorded base values, not a guaranteed success formula.
Unlock conditions: Not established by this snapshot.
Task themes: Water, Big Creature. These labels are not simultaneous requirements or a complete unlock route.
Normal success
- Scholars: satisfaction -1
- Nobles: satisfaction +1
- Population group not established: satisfaction +1
- Recorded reward +15; reward type not established
Failure
No outcome effects recorded. This does not establish that there are none.
156A sacrifice for the VelueClovermontView record+
- Location
- Clovermont
- Knights needed
- Not established by this snapshot
- Duration
- Not established by this snapshot
- Deadline
- Not established by this snapshot
- Damage range
- 1–4
- Requested Knights
- Not established by this snapshot
Recorded stat requirements
These are recorded base values, not a guaranteed success formula.
Unlock conditions: Not established by this snapshot.
Task themes: Woods, Track, Water. These labels are not simultaneous requirements or a complete unlock route.
Normal success
- Population group not established: satisfaction -1
- Nobles: satisfaction -1
- Scholars: satisfaction +3
- Recorded reward +15; reward type not established
Failure
No outcome effects recorded. This does not establish that there are none.
157Giant sea snakeTortosa Isles · RescueView record+
- Location
- Tortosa Isles
- Knights needed
- 2
- Duration
- 3 cycles
- Deadline
- Not established by this snapshot
- Damage range
- 2–4
- Requested Knights
- Not established by this snapshot
Recorded stat requirements
These are recorded base values, not a guaranteed success formula.
Unlock conditions: Not established by this snapshot.
Task themes: Heavy Lifting, Big Creature, Water. These labels are not simultaneous requirements or a complete unlock route.
Normal success
- Scholars: satisfaction +2
- Relic: Oyster Knife
- Recorded reward +50; reward type not established
Failure
No outcome effects recorded. This does not establish that there are none.
158Giant sea snakeTortosa IslesView record+
- Location
- Tortosa Isles
- Knights needed
- 3
- Duration
- 3 cycles
- Deadline
- Not established by this snapshot
- Damage range
- 2–5
- Requested Knights
- Not established by this snapshot
Recorded stat requirements
These are recorded base values, not a guaranteed success formula.
Unlock conditions: Not established by this snapshot.
Task themes: Water, Big Creature. These labels are not simultaneous requirements or a complete unlock route.
Normal success
- Nobles: satisfaction +2
- Recorded reward +50; reward type not established
- Recorded reward +50; reward type not established
Failure
No outcome effects recorded. This does not establish that there are none.
159Giant sea snakeTortosa IslesView record+
- Location
- Tortosa Isles
- Knights needed
- 4
- Duration
- 3 cycles
- Deadline
- Not established by this snapshot
- Damage range
- 1–3
- Requested Knights
- Not established by this snapshot
Recorded stat requirements
These are recorded base values, not a guaranteed success formula.
Unlock conditions: Not established by this snapshot.
Task themes: Big Creature, Water. These labels are not simultaneous requirements or a complete unlock route.
Normal success
- Population group not established: satisfaction +1
- Tortosa Isles: tax change +2
- Relic: Oyster Knife
- Recorded reward +65; reward type not established
Failure
No outcome effects recorded. This does not establish that there are none.
160The griffin fossilTortosa Isles · Relic RecoveryView record+
- Location
- Tortosa Isles
- Knights needed
- 2
- Duration
- 3 cycles
- Deadline
- Not established by this snapshot
- Damage range
- 2–3
- Requested Knights
- Not established by this snapshot
Recorded stat requirements
These are recorded base values, not a guaranteed success formula.
Unlock conditions: Not established by this snapshot.
Task themes: Track, Water, Investigation. These labels are not simultaneous requirements or a complete unlock route.
Normal success
- Relic: Oyster Knife
- Recorded reward +60; reward type not established
Failure
No outcome effects recorded. This does not establish that there are none.
161Griffin unionTortosa Isles · DiplomacySpecial outcome+
- Location
- Tortosa Isles
- Knights needed
- 2
- Duration
- 34 cycles
- Deadline
- Not established by this snapshot
- Damage range
- 2–4
- Requested Knights
- Not established by this snapshot
Recorded stat requirements
These are recorded base values, not a guaranteed success formula.
Unlock conditions: Not established by this snapshot.
Task themes: Flying Creature, Need Flying Mount, Intimidation. These labels are not simultaneous requirements or a complete unlock route.
Normal success
- Recorded reward +75; reward type not established
- Consumable: Salted Cod
Failure
No outcome effects recorded. This does not establish that there are none.
Special outcomes
Recorded matches to investigate. Other conditions may apply; these are not guaranteed triggers.
Outcome 1 · Daguez
Knight match: Daguez.
- Consumable: Salted Cod
- Recorded reward +150; reward type not established
- Population group not established: satisfaction +2
162Griffin unionTortosa Isles · DiplomacyView record+
- Location
- Tortosa Isles
- Knights needed
- 3
- Duration
- 3 cycles
- Deadline
- Not established by this snapshot
- Damage range
- 0–3
- Requested Knights
- Not established by this snapshot
Recorded stat requirements
These are recorded base values, not a guaranteed success formula.
Unlock conditions: Not established by this snapshot.
Task themes: Flying Creature, Crowd, Need Flying Mount. These labels are not simultaneous requirements or a complete unlock route.
Normal success
- Recorded reward +75; reward type not established
- Population group not established: satisfaction +2
Failure
No outcome effects recorded. This does not establish that there are none.
163Pirate negotiationsTortosa Isles · DiplomacyView record+
- Location
- Tortosa Isles
- Knights needed
- 3
- Duration
- 4 cycles
- Deadline
- Not established by this snapshot
- Damage range
- 1–4
- Requested Knights
- Not established by this snapshot
Recorded stat requirements
These are recorded base values, not a guaranteed success formula.
Unlock conditions: Not established by this snapshot.
Task themes: Crowd, Unethical, Intimidation. These labels are not simultaneous requirements or a complete unlock route.
Normal success
- Recorded reward +80; reward type not established
- Merchants: satisfaction +2
Failure
No outcome effects recorded. This does not establish that there are none.
Recorded variations
Activation conditions are not established. Do not add these changes together or apply them to every attempt.
Reported variant 1 · activation unknown
- Strength requirement change: +3
- Charisma requirement change: -2
- Knight count change: +1
- Duration change: -1 cycles
- Damage change: +2
Success changes
- Relic: Pirate Weapon
- Merchants: satisfaction -1
164Tower of illusionVillador · DiplomacySpecial outcome+
- Location
- Villador
- Knights needed
- 2
- Duration
- Not established by this snapshot
- Deadline
- Not established by this snapshot
- Damage range
- 1–3
- Requested Knights
- Not established by this snapshot
Recorded stat requirements
These are recorded base values, not a guaranteed success formula.
Unlock conditions: Not established by this snapshot.
Task themes: Help, Climbing. These labels are not simultaneous requirements or a complete unlock route.
Normal success
- Villador: tax change +2
- Nobles: satisfaction +2
Failure
No outcome effects recorded. This does not establish that there are none.
Special outcomes
Recorded matches to investigate. Other conditions may apply; these are not guaranteed triggers.
Outcome 1 · Rufus
Knight match: Rufus.
- Nobles: satisfaction +1
- Consumable: Homemade Tonic
- Villador: tax change +1
Recorded damage: 0–1.
165Virtual currencyVillador · ResearchSpecial outcome+
- Location
- Villador
- Knights needed
- Not established by this snapshot
- Duration
- Not established by this snapshot
- Deadline
- Not established by this snapshot
- Damage range
- 1–2
- Requested Knights
- Not established by this snapshot
Recorded stat requirements
These are recorded base values, not a guaranteed success formula.
Unlock conditions: Not established by this snapshot.
Task themes: Track, Intimidation. These labels are not simultaneous requirements or a complete unlock route.
Normal success
- Nobles: satisfaction +1
- Recorded reward +35; reward type not established
Failure
No outcome effects recorded. This does not establish that there are none.
Special outcomes
Recorded matches to investigate. Other conditions may apply; these are not guaranteed triggers.
Outcome 1 · Gwendan
Knight match: Gwendan.
- Nobles: satisfaction +1
- Recorded reward +30; reward type not established
Outcome 2 · Gwendan
Knight match: Gwendan.
- Nobles: satisfaction +2
- Recorded reward +120; reward type not established
- Villador: tax change +5
Recorded variations
Activation conditions are not established. Do not add these changes together or apply them to every attempt.
Reported variant 1 · activation unknown
- Duration change: -1 cycles
Success changes
- Recorded reward +50; reward type not established
- Nobles: satisfaction -2
Reported variant 2 · activation unknown
Success changes
- Recorded reward +100; reward type not established
- Nobles: satisfaction -3
- Population group not established: satisfaction -2
166Voices in a caveGrest · ScoutingView record+
- Location
- Grest
- Knights needed
- Not established by this snapshot
- Duration
- Not established by this snapshot
- Deadline
- Not established by this snapshot
- Damage range
- 1–2
- Requested Knights
- Not established by this snapshot
Recorded stat requirements
These are recorded base values, not a guaranteed success formula.
Unlock conditions: Not established by this snapshot.
Task themes: Cave, Ghost, Investigation. These labels are not simultaneous requirements or a complete unlock route.
Normal success
- Recorded reward +20; reward type not established
- Population group not established: satisfaction +1
- Consumable: Homemade Tonic
Failure
No outcome effects recorded. This does not establish that there are none.
167Knife throwing tournamentVolga Camp · CompetitionSpecial outcome+
- Location
- Volga Camp
- Knights needed
- 2
- Duration
- 2 cycles
- Deadline
- Not established by this snapshot
- Damage range
- 1–3
- Requested Knights
- Not established by this snapshot
Recorded stat requirements
These are recorded base values, not a guaranteed success formula.
Unlock conditions: Not established by this snapshot.
Task themes: People Involved. These labels are not simultaneous requirements or a complete unlock route.
Normal success
- Population group not established: satisfaction +1
- Recorded reward +80; reward type not established
Failure
No outcome effects recorded. This does not establish that there are none.
Special outcomes
Recorded matches to investigate. Other conditions may apply; these are not guaranteed triggers.
Outcome 1 · Victoria
Knight match: Victoria.
- Recorded reward +300; reward type not established
168Volga Camp serial killerVolga Camp · AssassinationSpecial outcome+
- Location
- Volga Camp
- Knights needed
- 2
- Duration
- 2 cycles
- Deadline
- Not established by this snapshot
- Damage range
- 1–4
- Requested Knights
- Not established by this snapshot
Recorded stat requirements
These are recorded base values, not a guaranteed success formula.
Unlock conditions: Not established by this snapshot.
Task themes: People Involved, Investigation, Track. These labels are not simultaneous requirements or a complete unlock route.
Normal success
- Recorded reward +25; reward type not established
- Scholars: satisfaction +1
- Population group not established: satisfaction +1
Failure
No outcome effects recorded. This does not establish that there are none.
Special outcomes
Recorded matches to investigate. Other conditions may apply; these are not guaranteed triggers.
Outcome 1 · Silgur
Knight match: Silgur.
- Population group not established: satisfaction +2
- Recorded reward +75; reward type not established
- Volga Camp: tax change +3
Recorded variations
Activation conditions are not established. Do not add these changes together or apply them to every attempt.
Reported variant 1 · activation unknown
- Strength requirement change: -3
- Charisma requirement change: +3
Success changes
- Consumable: Wit Potion
Reported variant 2 · activation unknown
- Strength requirement change: -3
- Agility requirement change: +3
- Wits requirement change: -2
- Luck requirement change: +2
Success changes
- Consumable: Charisma Potion
169The wild herdMilkford · ScoutingView record+
- Location
- Milkford
- Knights needed
- 2
- Duration
- Not established by this snapshot
- Deadline
- Not established by this snapshot
- Damage range
- 1–1
- Requested Knights
- Not established by this snapshot
Recorded stat requirements
These are recorded base values, not a guaranteed success formula.
Unlock conditions: Not established by this snapshot.
Task themes: Cute Creature, Track. These labels are not simultaneous requirements or a complete unlock route.
Normal success
- Recorded reward +25; reward type not established
- Consumable: Goat Cheese
Failure
No outcome effects recorded. This does not establish that there are none.
Recorded variations
Activation conditions are not established. Do not add these changes together or apply them to every attempt.
Reported variant 1 · activation unknown
Success changes
- Population group not established: satisfaction +1
Reported variant 2 · activation unknown
Success changes
- Merchants: satisfaction +1
- Recorded reward +50; reward type not established
Reported variant 3 · activation unknown
- Wits requirement change: +2
Success changes
- Population group not established: satisfaction +2
170Wolf invasionClovermontSpecial outcome+
- Location
- Clovermont
- Knights needed
- 3
- Duration
- 2 cycles
- Deadline
- Not established by this snapshot
- Damage range
- 1–4
- Requested Knights
- Not established by this snapshot
Recorded stat requirements
These are recorded base values, not a guaranteed success formula.
Unlock conditions: Not established by this snapshot.
Task themes: Woods, At Night, Intimidation. These labels are not simultaneous requirements or a complete unlock route.
Normal success
- Nobles: satisfaction +1
- Population group not established: satisfaction +1
- Scholars: satisfaction +1
- Recorded reward +50; reward type not established
Failure
No outcome effects recorded. This does not establish that there are none.
Special outcomes
Recorded matches to investigate. Other conditions may apply; these are not guaranteed triggers.
Outcome 1 · The Wolf
Knight match: The Wolf.
- The Wolf: affinity +2
- Population group not established: satisfaction -2
- Scholars: satisfaction +1
Outcome 2 · Rufus
Knight match: Rufus.
- Rufus: affinity +2
- Population group not established: satisfaction -2
- Scholars: satisfaction +1
171Woods investigationMilkford · ScoutingView record+
- Location
- Milkford
- Knights needed
- Not established by this snapshot
- Duration
- 2 cycles
- Deadline
- Not established by this snapshot
- Damage range
- 0–2
- Requested Knights
- Not established by this snapshot
Recorded stat requirements
These are recorded base values, not a guaranteed success formula.
Unlock conditions: Not established by this snapshot.
Task themes: Woods, Investigation. These labels are not simultaneous requirements or a complete unlock route.
Normal success
- Recorded reward +20; reward type not established
- Consumable: Tete De Moine
- Population group not established: satisfaction +1
Failure
No outcome effects recorded. This does not establish that there are none.
172Wyvern huntClovermontView record+
- Location
- Clovermont
- Knights needed
- 2
- Duration
- Not established by this snapshot
- Deadline
- Not established by this snapshot
- Damage range
- 2–4
- Requested Knights
- Not established by this snapshot
Recorded stat requirements
These are recorded base values, not a guaranteed success formula.
Unlock conditions: Not established by this snapshot.
Task themes: Flying Creature, Track, Woods. These labels are not simultaneous requirements or a complete unlock route.
Normal success
- Merchants: satisfaction +1
- Scholars: satisfaction -1
- Consumable: Wyvern Cheese
- Recorded reward +40; reward type not established
Failure
No outcome effects recorded. This does not establish that there are none.
173Wyvern repellingClovermont · DiplomacyView record+
- Location
- Clovermont
- Knights needed
- 2
- Duration
- Not established by this snapshot
- Deadline
- Not established by this snapshot
- Damage range
- 1–2
- Requested Knights
- Not established by this snapshot
Recorded stat requirements
These are recorded base values, not a guaranteed success formula.
Unlock conditions: Not established by this snapshot.
Task themes: Flying Creature, Woods, Track. These labels are not simultaneous requirements or a complete unlock route.
Normal success
- Merchants: satisfaction +1
- Scholars: satisfaction +1
- Recorded reward +30; reward type not established
Failure
No outcome effects recorded. This does not establish that there are none.
174The renegadeZiskov · AssassinationView record+
- Location
- Ziskov
- Knights needed
- 2
- Duration
- 3 cycles
- Deadline
- Not established by this snapshot
- Damage range
- 2–5
- Requested Knights
- Not established by this snapshot
Recorded stat requirements
These are recorded base values, not a guaranteed success formula.
Unlock conditions: Not established by this snapshot.
Task themes: Unethical, Investigation. These labels are not simultaneous requirements or a complete unlock route.
Normal success
- Nobles: satisfaction +3
- Recorded reward +80; reward type not established
Failure
No outcome effects recorded. This does not establish that there are none.
175Agricultural curseMilkford · DiplomacyView record+
- Location
- Milkford
- Knights needed
- Not established by this snapshot
- Duration
- 2 cycles
- Deadline
- Not established by this snapshot
- Damage range
- 1–3
- Requested Knights
- Not established by this snapshot
Recorded stat requirements
These are recorded base values, not a guaranteed success formula.
Unlock conditions: Not established by this snapshot.
Task themes: Magic Involved. These labels are not simultaneous requirements or a complete unlock route.
Normal success
- Recorded reward +100; reward type not established
- Scholars: satisfaction +1
- Merchants: satisfaction +1
Failure
No outcome effects recorded. This does not establish that there are none.
176Fight the cockatriceAlmora · CompetitionView record+
- Location
- Almora
- Knights needed
- Not established by this snapshot
- Duration
- 3 cycles
- Deadline
- 3 cycles
- Damage range
- 2–5
- Requested Knights
- Not established by this snapshot
Recorded stat requirements
These are recorded base values, not a guaranteed success formula.
Unlock conditions: Not established by this snapshot.
Task themes: Flying Creature. These labels are not simultaneous requirements or a complete unlock route.
Normal success
- Relic: Eye Of Petrification
- Recorded reward +35; reward type not established
Failure
No outcome effects recorded. This does not establish that there are none.
Follow-up audience recorded after success; the dialogue route is not established.
177Fight the demonAlmora · CompetitionView record+
- Location
- Almora
- Knights needed
- Not established by this snapshot
- Duration
- 3 cycles
- Deadline
- 3 cycles
- Damage range
- 3–6
- Requested Knights
- Not established by this snapshot
Recorded stat requirements
These are recorded base values, not a guaranteed success formula.
Unlock conditions: Not established by this snapshot.
Task themes: Magic Involved, At Night, Cave. These labels are not simultaneous requirements or a complete unlock route.
Normal success
- Relic: Demon Heart 3
- Recorded reward +35; reward type not established
Failure
No outcome effects recorded. This does not establish that there are none.
Follow-up audience recorded after success; the dialogue route is not established.
178Fight the dragonAlmora · CompetitionView record+
- Location
- Almora
- Knights needed
- Not established by this snapshot
- Duration
- 3 cycles
- Deadline
- 3 cycles
- Damage range
- 3–6
- Requested Knights
- Not established by this snapshot
Recorded stat requirements
These are recorded base values, not a guaranteed success formula.
Unlock conditions: Not established by this snapshot.
Task themes: Flying Creature, Big Creature, Crowd, Dragon. These labels are not simultaneous requirements or a complete unlock route.
Normal success
- Quest item: Dragon Heart
- Recorded reward +90; reward type not established
- Nobles: satisfaction +1
Failure
No outcome effects recorded. This does not establish that there are none.
Follow-up audience recorded after success; the dialogue route is not established.
179Fight the murder hareAlmora · CompetitionView record+
- Location
- Almora
- Knights needed
- Not established by this snapshot
- Duration
- 3 cycles
- Deadline
- 3 cycles
- Damage range
- 1–2
- Requested Knights
- Not established by this snapshot
Recorded stat requirements
These are recorded base values, not a guaranteed success formula.
Unlock conditions: Not established by this snapshot.
Task themes: Cute Creature, Crowd. These labels are not simultaneous requirements or a complete unlock route.
Normal success
- Consumable: Rabbit Meat
- Recorded reward +10; reward type not established
Failure
No outcome effects recorded. This does not establish that there are none.
Follow-up audience recorded after success; the dialogue route is not established.
180Political prisoner fightingAlmora · CompetitionSpecial outcome+
- Location
- Almora
- Knights needed
- Not established by this snapshot
- Duration
- 3 cycles
- Deadline
- 3 cycles
- Damage range
- 2–4
- Requested Knights
- Not established by this snapshot
Recorded stat requirements
These are recorded base values, not a guaranteed success formula.
Unlock conditions: Not established by this snapshot.
Task themes: Crowd. These labels are not simultaneous requirements or a complete unlock route.
Normal success
- Quest item: Cursed Helmet
- Recorded reward +30; reward type not established
Failure
No outcome effects recorded. This does not establish that there are none.
Special outcomes
Recorded matches to investigate. Other conditions may apply; these are not guaranteed triggers.
Outcome 1 · Dulahan
Knight match: Dulahan.
- Story state changes; its gameplay effect is not established
- Additional scripted effect; its gameplay effect is not established
Recorded damage: 0–0.
A follow-up audience is referenced; its choices are not reconstructed here.
Recorded variations
Activation conditions are not established. Do not add these changes together or apply them to every attempt.
Reported variant 1 · activation unknown
- Strength requirement change: +1
- Wits requirement change: +1
- Damage change: +2
Follow-up audience recorded after success; the dialogue route is not established.
181Fight the werewolfAlmora · CompetitionSpecial outcome+
- Location
- Almora
- Knights needed
- Not established by this snapshot
- Duration
- 3 cycles
- Deadline
- 3 cycles
- Damage range
- 3–4
- Requested Knights
- Not established by this snapshot
Recorded stat requirements
These are recorded base values, not a guaranteed success formula.
Unlock conditions: Not established by this snapshot.
Task themes: Big Creature, Magic Involved, Crowd. These labels are not simultaneous requirements or a complete unlock route.
Normal success
- Relic: Wolf Skin
- Recorded reward +35; reward type not established
Failure
No outcome effects recorded. This does not establish that there are none.
Special outcomes
Recorded matches to investigate. Other conditions may apply; these are not guaranteed triggers.
Outcome 1 · Angelica
Knight match: Angelica.
- Story state changes; its gameplay effect is not established
- Recorded reward +35; reward type not established
Recorded damage: 0–0.
A follow-up audience is referenced; its choices are not reconstructed here.
Follow-up audience recorded after success; the dialogue route is not established.
182Jousting tournamentAlmora · CompetitionSpecial outcome+
- Location
- Almora
- Knights needed
- Not established by this snapshot
- Duration
- 3 cycles
- Deadline
- 3 cycles
- Damage range
- 2–5
- Requested Knights
- Not established by this snapshot
Recorded stat requirements
These are recorded base values, not a guaranteed success formula.
Unlock conditions: Not established by this snapshot.
Task themes: Crowd. These labels are not simultaneous requirements or a complete unlock route.
Normal success
- Recorded reward +90; reward type not established
Failure
No outcome effects recorded. This does not establish that there are none.
Special outcomes
Recorded matches to investigate. Other conditions may apply; these are not guaranteed triggers.
Outcome 1
Knight match: Not established by this snapshot.
Trait match: Non Equine.
- Story state changes; its gameplay effect is not established
A follow-up audience is referenced; its choices are not reconstructed here.
Recorded variations
Activation conditions are not established. Do not add these changes together or apply them to every attempt.
Reported variant 1 · activation unknown
Success changes
- Relic: Jousting Lance
Follow-up audience recorded after success; the dialogue route is not established.
183The great duelAlmora · CompetitionSpecial outcome+
- Location
- Almora
- Knights needed
- Not established by this snapshot
- Duration
- 3 cycles
- Deadline
- 3 cycles
- Damage range
- 2–4
- Requested Knights
- Not established by this snapshot
Recorded stat requirements
These are recorded base values, not a guaranteed success formula.
Unlock conditions: Not established by this snapshot.
Normal success
- Relic: Almor Shield
- Recorded reward +200; reward type not established
- The assigned Knight leaves
- Additional scripted effect; its gameplay effect is not established
Failure
No outcome effects recorded. This does not establish that there are none.
Special outcomes
Recorded matches to investigate. Other conditions may apply; these are not guaranteed triggers.
Outcome 1 · Goberto
Knight match: Goberto.
- Story state changes; its gameplay effect is not established
- Additional scripted effect; its gameplay effect is not established
Recorded damage: 0–0.
A follow-up audience is referenced; its choices are not reconstructed here.
Outcome 2 · Chester
Knight match: Chester.
- Story state changes; its gameplay effect is not established
- The assigned Knight leaves
- Additional scripted effect; its gameplay effect is not established
- Recorded reward +200; reward type not established
- Relic: Almor Shield
A follow-up audience is referenced; its choices are not reconstructed here.
Follow-up audience recorded after success and failure; the dialogue route is not established.
184In Search for the Golden KeyAlmora · Relic RecoveryView record+
- Location
- Almora
- Knights needed
- Not established by this snapshot
- Duration
- 3 cycles
- Deadline
- Not established by this snapshot
- Damage range
- 0–0
- Requested Knights
- Angelica
Recorded stat requirements
These are recorded base values, not a guaranteed success formula.
Unlock conditions: Not established by this snapshot.
Normal success
- Story state changes; its gameplay effect is not established
- Quest item: Golden Key
- Additional scripted effect; its gameplay effect is not established
Failure
No outcome effects recorded. This does not establish that there are none.
185Army of the DeadAnveld · ConfrontationView record+
- Location
- Anveld
- Knights needed
- 3
- Duration
- 3 cycles
- Deadline
- 2 cycles
- Damage range
- 2–3
- Requested Knights
- Not established by this snapshot
Recorded stat requirements
These are recorded base values, not a guaranteed success formula.
Unlock conditions: Not established by this snapshot.
Task themes: Help, Crowd, Ghost. These labels are not simultaneous requirements or a complete unlock route.
Normal success
- Merchants: satisfaction +1
- Population group not established: satisfaction +1
- Recorded reward +80; reward type not established
Failure
- Anveld: destruction recorded
186Strange draconic ritualLocation not established · Knight QuestView record+
- Location
- Not established by this snapshot
- Knights needed
- Not established by this snapshot
- Duration
- Not established by this snapshot
- Deadline
- Not established by this snapshot
- Damage range
- 0–0
- Requested Knights
- Arron
Recorded stat requirements
These are recorded base values, not a guaranteed success formula.
Unlock conditions: Not established by this snapshot.
Task themes: Magic Involved. These labels are not simultaneous requirements or a complete unlock route.
Normal success
- Additional scripted effect; its gameplay effect is not established
Failure
No outcome effects recorded. This does not establish that there are none.
187Ice AgeAvalonView record+
- Location
- Avalon
- Knights needed
- 3
- Duration
- 3 cycles
- Deadline
- 2 cycles
- Damage range
- 3–5
- Requested Knights
- Not established by this snapshot
Recorded stat requirements
These are recorded base values, not a guaranteed success formula.
Unlock conditions: Not established by this snapshot.
Task themes: Magic Involved, Big Creature. These labels are not simultaneous requirements or a complete unlock route.
Normal success
- Scholars: satisfaction +2
- Recorded reward +90; reward type not established
Failure
- Avalon: destruction recorded
188The princes of the IslandsIsle Of Basalt · ScoutingView record+
- Location
- Isle Of Basalt
- Knights needed
- 2
- Duration
- 3 cycles
- Deadline
- 4 cycles
- Damage range
- 0–0
- Requested Knights
- Not established by this snapshot
Recorded stat requirements
These are recorded base values, not a guaranteed success formula.
Unlock conditions: Not established by this snapshot.
Task themes: Crowd, Investigation. These labels are not simultaneous requirements or a complete unlock route.
Normal success
- Nobles: satisfaction +4
- Recorded reward +95; reward type not established
- Story state changes; its gameplay effect is not established
Failure
No outcome effects recorded. This does not establish that there are none.
Follow-up audience recorded after success; the dialogue route is not established.
189The merchant's guildsIsle Of Basalt · ScoutingView record+
- Location
- Isle Of Basalt
- Knights needed
- Not established by this snapshot
- Duration
- 3 cycles
- Deadline
- 4 cycles
- Damage range
- 0–1
- Requested Knights
- Not established by this snapshot
Recorded stat requirements
These are recorded base values, not a guaranteed success formula.
Unlock conditions: Not established by this snapshot.
Task themes: Investigation, Crowd. These labels are not simultaneous requirements or a complete unlock route.
Normal success
- Story state changes; its gameplay effect is not established
- Story state changes; its gameplay effect is not established
- Recorded reward +90; reward type not established
- Merchants: satisfaction +4
Failure
No outcome effects recorded. This does not establish that there are none.
Follow-up audience recorded after success; the dialogue route is not established.
190Assault on Treasure IslandTreasure Island · Relic RecoveryView record+
- Location
- Treasure Island
- Knights needed
- 3
- Duration
- 3 cycles
- Deadline
- 4 cycles
- Damage range
- 2–5
- Requested Knights
- Not established by this snapshot
Recorded stat requirements
These are recorded base values, not a guaranteed success formula.
Unlock conditions: Not established by this snapshot.
Task themes: Heavy Lifting, Cave, Need Flying Mount, Big Creature, Crowd. These labels are not simultaneous requirements or a complete unlock route.
Normal success
- Recorded reward +2500; reward type not established
- Relic: Krakens Bane
- Story state changes; its gameplay effect is not established
Failure
No outcome effects recorded. This does not establish that there are none.
Recorded variations
Activation conditions are not established. Do not add these changes together or apply them to every attempt.
Reported variant 1 · activation unknown
- Strength requirement change: -2
- Agility requirement change: -1
- Magic requirement change: -1
- Wits requirement change: -2
- Damage change: -2
Follow-up audience recorded after success; the dialogue route is not established.
191Pirates under pressurePopota Isles · ScoutingView record+
- Location
- Popota Isles
- Knights needed
- 2
- Duration
- 3 cycles
- Deadline
- 4 cycles
- Damage range
- 1–4
- Requested Knights
- Not established by this snapshot
Recorded stat requirements
These are recorded base values, not a guaranteed success formula.
Unlock conditions: Not established by this snapshot.
Task themes: Intimidation, Investigation. These labels are not simultaneous requirements or a complete unlock route.
Normal success
- Relic: Pirate Weapon
- Recorded reward +75; reward type not established
- Nobles: satisfaction +3
- Story state changes; its gameplay effect is not established
Failure
No outcome effects recorded. This does not establish that there are none.
Follow-up audience recorded after success; the dialogue route is not established.
192Fighting Rorik's troopsIsle Of Basalt · DiplomacyView record+
- Location
- Isle Of Basalt
- Knights needed
- 4
- Duration
- 3 cycles
- Deadline
- 4 cycles
- Damage range
- 3–5
- Requested Knights
- Not established by this snapshot
Recorded stat requirements
These are recorded base values, not a guaranteed success formula.
Unlock conditions: Not established by this snapshot.
Task themes: Crowd, Intimidation. These labels are not simultaneous requirements or a complete unlock route.
Normal success
- Recorded reward +200; reward type not established
- Population group not established: satisfaction +1
- Merchants: satisfaction +1
Failure
- Additional scripted effect; its gameplay effect is not established
Follow-up audience recorded after success; the dialogue route is not established.
193Treasure Island, dressed as a crabTreasure Island · Relic RecoveryView record+
- Location
- Treasure Island
- Knights needed
- 3
- Duration
- 3 cycles
- Deadline
- 4 cycles
- Damage range
- 1–3
- Requested Knights
- Not established by this snapshot
Recorded stat requirements
These are recorded base values, not a guaranteed success formula.
Unlock conditions: Not established by this snapshot.
Task themes: Need Flying Mount, Cave, Heavy Lifting. These labels are not simultaneous requirements or a complete unlock route.
Normal success
- Recorded reward +2500; reward type not established
- Relic: Crab Armor
Failure
No outcome effects recorded. This does not establish that there are none.
Follow-up audience recorded after success; the dialogue route is not established.
194Treasure Island, through secret pathwayTreasure Island · Relic RecoveryView record+
- Location
- Treasure Island
- Knights needed
- 3
- Duration
- 3 cycles
- Deadline
- 4 cycles
- Damage range
- 1–4
- Requested Knights
- Not established by this snapshot
Recorded stat requirements
These are recorded base values, not a guaranteed success formula.
Unlock conditions: Not established by this snapshot.
Task themes: Cave, Heavy Lifting. These labels are not simultaneous requirements or a complete unlock route.
Normal success
- Relic: Harpoon Spear
- Recorded reward +2500; reward type not established
Failure
No outcome effects recorded. This does not establish that there are none.
Follow-up audience recorded after success; the dialogue route is not established.
195Search underwaterIsle Of Basalt · ScoutingSpecial outcome+
- Location
- Isle Of Basalt
- Knights needed
- 2
- Duration
- 3 cycles
- Deadline
- 4 cycles
- Damage range
- 0–2
- Requested Knights
- Not established by this snapshot
Recorded stat requirements
These are recorded base values, not a guaranteed success formula.
Unlock conditions: Not established by this snapshot.
Task themes: Water, Investigation. These labels are not simultaneous requirements or a complete unlock route.
Normal success
- Story state changes; its gameplay effect is not established
- Consumable: Salted Cod
- Recorded reward +55; reward type not established
- Story state changes; its gameplay effect is not established
Failure
No outcome effects recorded. This does not establish that there are none.
Special outcomes
Recorded matches to investigate. Other conditions may apply; these are not guaranteed triggers.
Outcome 1 · Ligia
Knight match: Ligia.
- Story state changes; its gameplay effect is not established
- Recorded reward +75; reward type not established
- Story state changes; its gameplay effect is not established
- Relic: Pirate Weapon
A follow-up audience is referenced; its choices are not reconstructed here.
Follow-up audience recorded after success; the dialogue route is not established.
196Griffin tamingIsle Of Basalt · ScoutingView record+
- Location
- Isle Of Basalt
- Knights needed
- 2
- Duration
- 3 cycles
- Deadline
- 4 cycles
- Damage range
- 1–4
- Requested Knights
- Not established by this snapshot
Recorded stat requirements
These are recorded base values, not a guaranteed success formula.
Unlock conditions: Not established by this snapshot.
Task themes: Flying Creature, Cute Creature, Investigation. These labels are not simultaneous requirements or a complete unlock route.
Normal success
- Story state changes; its gameplay effect is not established
- Mount: Old Griffin
Failure
No outcome effects recorded. This does not establish that there are none.
Follow-up audience recorded after success; the dialogue route is not established.
197The mad hunterBeaconsbury · ConfrontationView record+
- Location
- Beaconsbury
- Knights needed
- 2
- Duration
- 2 cycles
- Deadline
- Not established by this snapshot
- Damage range
- 2–5
- Requested Knights
- Not established by this snapshot
Recorded stat requirements
These are recorded base values, not a guaranteed success formula.
Unlock conditions: Not established by this snapshot.
Task themes: Investigation, Woods. These labels are not simultaneous requirements or a complete unlock route.
Normal success
- Recorded reward +115; reward type not established
- Population group not established: satisfaction +1
- Merchants: satisfaction +1
Failure
- Beaconsbury: destruction recorded
198The Skin WalkerBelthornView record+
- Location
- Belthorn
- Knights needed
- 2
- Duration
- 2 cycles
- Deadline
- 2 cycles
- Damage range
- 1–4
- Requested Knights
- Not established by this snapshot
Recorded stat requirements
These are recorded base values, not a guaranteed success formula.
Unlock conditions: Not established by this snapshot.
Task themes: Magic Involved. These labels are not simultaneous requirements or a complete unlock route.
Normal success
- Scholars: satisfaction +2
- Recorded reward +80; reward type not established
Failure
- Belthorn: destruction recorded
199Hammer lost, yet againClovermont · Relic RecoveryView record+
- Location
- Clovermont
- Knights needed
- Not established by this snapshot
- Duration
- Not established by this snapshot
- Deadline
- Not established by this snapshot
- Damage range
- 0–2
- Requested Knights
- Not established by this snapshot
Recorded stat requirements
These are recorded base values, not a guaranteed success formula.
Unlock conditions: Not established by this snapshot.
Task themes: Woods, Heavy Lifting. These labels are not simultaneous requirements or a complete unlock route.
Normal success
- Recorded reward +30; reward type not established
Failure
No outcome effects recorded. This does not establish that there are none.
Follow-up audience recorded after success; the dialogue route is not established.
200Brunhilda testimonyLocation not established · Knight QuestView record+
- Location
- Not established by this snapshot
- Knights needed
- Not established by this snapshot
- Duration
- Not established by this snapshot
- Deadline
- 4 cycles
- Damage range
- 0–0
- Requested Knights
- Brunhilda
Recorded stat requirements
These are recorded base values, not a guaranteed success formula.
Unlock conditions: Not established by this snapshot.
Normal success
No outcome effects recorded. This does not establish that there are none.
Failure
No outcome effects recorded. This does not establish that there are none.
201Chester testimonyLocation not established · Knight QuestView record+
- Location
- Not established by this snapshot
- Knights needed
- Not established by this snapshot
- Duration
- Not established by this snapshot
- Deadline
- 4 cycles
- Damage range
- 0–0
- Requested Knights
- Chester
Recorded stat requirements
These are recorded base values, not a guaranteed success formula.
Unlock conditions: Not established by this snapshot.
Normal success
No outcome effects recorded. This does not establish that there are none.
Failure
No outcome effects recorded. This does not establish that there are none.
202Epicrates escort (discreetly)Kralgrun · DiplomacyView record+
- Location
- Kralgrun
- Knights needed
- 3
- Duration
- 4 cycles
- Deadline
- 4 cycles
- Damage range
- 0–5
- Requested Knights
- Not established by this snapshot
Recorded stat requirements
These are recorded base values, not a guaranteed success formula.
Unlock conditions: Not established by this snapshot.
Task themes: Cave, Woods. These labels are not simultaneous requirements or a complete unlock route.
Normal success
- Recorded reward +120; reward type not established
Failure
No outcome effects recorded. This does not establish that there are none.
Follow-up audience recorded after success; the dialogue route is not established.
203Prove Epicrates' guiltMavignac · ScoutingView record+
- Location
- Mavignac
- Knights needed
- 2
- Duration
- 2 cycles
- Deadline
- 4 cycles
- Damage range
- 2–3
- Requested Knights
- Not established by this snapshot
Recorded stat requirements
These are recorded base values, not a guaranteed success formula.
Unlock conditions: Not established by this snapshot.
Task themes: Investigation. These labels are not simultaneous requirements or a complete unlock route.
Normal success
- Story state changes; its gameplay effect is not established
- Story state changes; its gameplay effect is not established
- Nobles: satisfaction +3
Failure
- Nobles: satisfaction -3
Follow-up audience recorded after success; the dialogue route is not established.
204Prove Epicrates' innocenceChavignol · ScoutingSpecial outcome+
- Location
- Chavignol
- Knights needed
- 2
- Duration
- 2 cycles
- Deadline
- 4 cycles
- Damage range
- 0–1
- Requested Knights
- Not established by this snapshot
Recorded stat requirements
These are recorded base values, not a guaranteed success formula.
Unlock conditions: Not established by this snapshot.
Task themes: People Involved, Investigation. These labels are not simultaneous requirements or a complete unlock route.
Normal success
- Story state changes; its gameplay effect is not established
- Story state changes; its gameplay effect is not established
- Population group not established: satisfaction +3
Failure
- Population group not established: satisfaction -3
Special outcomes
Recorded matches to investigate. Other conditions may apply; these are not guaranteed triggers.
Outcome 1 · Goberto
Knight match: Goberto.
- Story state changes; its gameplay effect is not established
- Population group not established: satisfaction +1
- Story state changes; its gameplay effect is not established
- Consumable: Goat Cheese
- Consumable: Grilled Cheese
- Consumable: Camembert
Recorded damage: 0–0.
A follow-up audience is referenced; its choices are not reconstructed here.
Follow-up audience recorded after success; the dialogue route is not established.
205Seeking Epicrates' influenceFort Gavault · ScoutingView record+
- Location
- Fort Gavault
- Knights needed
- Not established by this snapshot
- Duration
- 2 cycles
- Deadline
- 4 cycles
- Damage range
- 0–0
- Requested Knights
- Not established by this snapshot
Recorded stat requirements
These are recorded base values, not a guaranteed success formula.
Unlock conditions: Not established by this snapshot.
Task themes: People Involved, Investigation. These labels are not simultaneous requirements or a complete unlock route.
Normal success
- Story state changes; its gameplay effect is not established
- Story state changes; its gameplay effect is not established
- Scholars: satisfaction +3
Failure
- Scholars: satisfaction -3
Follow-up audience recorded after success; the dialogue route is not established.
206Epicrates escortKralgrun · DiplomacyView record+
- Location
- Kralgrun
- Knights needed
- 3
- Duration
- 4 cycles
- Deadline
- 4 cycles
- Damage range
- 1–4
- Requested Knights
- Not established by this snapshot
Recorded stat requirements
These are recorded base values, not a guaranteed success formula.
Unlock conditions: Not established by this snapshot.
Task themes: Cave. These labels are not simultaneous requirements or a complete unlock route.
Normal success
- Recorded reward +200; reward type not established
Failure
No outcome effects recorded. This does not establish that there are none.
Follow-up audience recorded after success; the dialogue route is not established.
207Free EpicratesKralgrun · DiplomacySpecial outcome+
- Location
- Kralgrun
- Knights needed
- Not established by this snapshot
- Duration
- 3 cycles
- Deadline
- 4 cycles
- Damage range
- 2–4
- Requested Knights
- Not established by this snapshot
Recorded stat requirements
These are recorded base values, not a guaranteed success formula.
Unlock conditions: Not established by this snapshot.
Task themes: At Night, Unethical, Cave. These labels are not simultaneous requirements or a complete unlock route.
Normal success
- Story state changes; its gameplay effect is not established
- Story state changes; its gameplay effect is not established
- Population group not established: satisfaction +5
Failure
No outcome effects recorded. This does not establish that there are none.
Special outcomes
Recorded matches to investigate. Other conditions may apply; these are not guaranteed triggers.
Outcome 1 · Tarcus
Knight match: Tarcus.
- Story state changes; its gameplay effect is not established
- Population group not established: satisfaction -5
- Story state changes; its gameplay effect is not established
Recorded damage: 2–4.
A follow-up audience is referenced; its choices are not reconstructed here.
Follow-up audience recorded after success; the dialogue route is not established.
208Tarcus testimonyLocation not established · Knight QuestView record+
- Location
- Not established by this snapshot
- Knights needed
- Not established by this snapshot
- Duration
- Not established by this snapshot
- Deadline
- 4 cycles
- Damage range
- 0–0
- Requested Knights
- Tarcus
Recorded stat requirements
These are recorded base values, not a guaranteed success formula.
Unlock conditions: Not established by this snapshot.
Normal success
No outcome effects recorded. This does not establish that there are none.
Failure
No outcome effects recorded. This does not establish that there are none.
209Sheepfold fireChavignol · RescueView record+
- Location
- Chavignol
- Knights needed
- 2
- Duration
- 2 cycles
- Deadline
- 2 cycles
- Damage range
- 2–3
- Requested Knights
- Not established by this snapshot
Recorded stat requirements
These are recorded base values, not a guaranteed success formula.
Unlock conditions: Not established by this snapshot.
Task themes: Help. These labels are not simultaneous requirements or a complete unlock route.
Normal success
- Population group not established: satisfaction +1
Failure
- Chavignol: destruction recorded
210Merchant assassinationLocation not established · AssassinationView record+
- Location
- Not established by this snapshot
- Knights needed
- 2
- Duration
- Not established by this snapshot
- Deadline
- Not established by this snapshot
- Damage range
- 2–4
- Requested Knights
- Not established by this snapshot
Recorded stat requirements
These are recorded base values, not a guaranteed success formula.
Unlock conditions: Not established by this snapshot.
Task themes: Unethical, Track. These labels are not simultaneous requirements or a complete unlock route.
Normal success
- Knight not established: death recorded
Failure
- Merchants: satisfaction -7
- Villador: destruction recorded
- Grest: destruction recorded
211Merchant negotiationsLocation not established · DiplomacyView record+
- Location
- Not established by this snapshot
- Knights needed
- 2
- Duration
- Not established by this snapshot
- Deadline
- Not established by this snapshot
- Damage range
- 1–3
- Requested Knights
- Not established by this snapshot
Recorded stat requirements
These are recorded base values, not a guaranteed success formula.
Unlock conditions: Not established by this snapshot.
Task themes: Crowd. These labels are not simultaneous requirements or a complete unlock route.
Normal success
No outcome effects recorded. This does not establish that there are none.
Failure
- Merchants: satisfaction -7
- Villador: destruction recorded
- Grest: destruction recorded
212Noble civil warLocation not established · ConfrontationView record+
- Location
- Not established by this snapshot
- Knights needed
- 6
- Duration
- Not established by this snapshot
- Deadline
- Not established by this snapshot
- Damage range
- 3–5
- Requested Knights
- Not established by this snapshot
Recorded stat requirements
These are recorded base values, not a guaranteed success formula.
Unlock conditions: Not established by this snapshot.
Task themes: Crowd, Intimidation. These labels are not simultaneous requirements or a complete unlock route.
Normal success
No outcome effects recorded. This does not establish that there are none.
Failure
- Nobles: satisfaction -7
- Rozenn: destruction recorded
- Villador: destruction recorded
Recorded variations
Activation conditions are not established. Do not add these changes together or apply them to every attempt.
Reported variant 1 · activation unknown
- Strength requirement change: -2
- Agility requirement change: -2
- Charisma requirement change: -2
- Wits requirement change: -2
- Knight count change: +3
- Damage change: -3
213Massacre of the BeggarsLocation not established · ConfrontationView record+
- Location
- Not established by this snapshot
- Knights needed
- 5
- Duration
- Not established by this snapshot
- Deadline
- Not established by this snapshot
- Damage range
- 3–6
- Requested Knights
- Not established by this snapshot
Recorded stat requirements
These are recorded base values, not a guaranteed success formula.
Unlock conditions: Not established by this snapshot.
Task themes: Crowd, People Involved, Unethical. These labels are not simultaneous requirements or a complete unlock route.
Normal success
- Angelica: affinity -5
- Ursule: affinity -10
- Arron: affinity -5
- Gideon: affinity -5
- Victoria: affinity +5
- Epicrate: affinity -10
- Brunhilda: affinity -5
- Ligia: affinity -5
- Goberto: affinity -5
- Ari: affinity -10
- Rufus: affinity -3
- Alwena: affinity -5
Failure
- Population group not established: satisfaction -7
- Milkford: destruction recorded
- Clovermont: destruction recorded
214Countering scholarsLocation not established · ConfrontationView record+
- Location
- Not established by this snapshot
- Knights needed
- Not established by this snapshot
- Duration
- Not established by this snapshot
- Deadline
- Not established by this snapshot
- Damage range
- 3–5
- Requested Knights
- Not established by this snapshot
Recorded stat requirements
These are recorded base values, not a guaranteed success formula.
Unlock conditions: Not established by this snapshot.
Task themes: Magic Involved, Help. These labels are not simultaneous requirements or a complete unlock route.
Normal success
No outcome effects recorded. This does not establish that there are none.
Failure
- Scholars: satisfaction -7
- Rozenn: destruction recorded
- Clovermont: destruction recorded
215Monster HuntersLocation not establishedView record+
- Location
- Not established by this snapshot
- Knights needed
- 3
- Duration
- Not established by this snapshot
- Deadline
- Not established by this snapshot
- Damage range
- 1–5
- Requested Knights
- Not established by this snapshot
Recorded stat requirements
These are recorded base values, not a guaranteed success formula.
Unlock conditions: Not established by this snapshot.
Task themes: Magic Involved, Big Creature. These labels are not simultaneous requirements or a complete unlock route.
Normal success
No outcome effects recorded. This does not establish that there are none.
Failure
- Scholars: satisfaction -7
- Rozenn: destruction recorded
- Clovermont: destruction recorded
216Let's intimidate the academicianLocation not established · DiplomacyView record+
- Location
- Not established by this snapshot
- Knights needed
- Not established by this snapshot
- Duration
- Not established by this snapshot
- Deadline
- Not established by this snapshot
- Damage range
- 0–3
- Requested Knights
- Dulahan
Recorded stat requirements
These are recorded base values, not a guaranteed success formula.
Unlock conditions: Not established by this snapshot.
Task themes: Intimidation. These labels are not simultaneous requirements or a complete unlock route.
Normal success
No outcome effects recorded. This does not establish that there are none.
Failure
- Scholars: satisfaction -7
- Rozenn: destruction recorded
- Clovermont: destruction recorded
217Let's intimidate the academicianLocation not established · DiplomacyView record+
- Location
- Not established by this snapshot
- Knights needed
- Not established by this snapshot
- Duration
- Not established by this snapshot
- Deadline
- Not established by this snapshot
- Damage range
- 0–3
- Requested Knights
- Edith
Recorded stat requirements
These are recorded base values, not a guaranteed success formula.
Unlock conditions: Not established by this snapshot.
Task themes: Intimidation. These labels are not simultaneous requirements or a complete unlock route.
Normal success
No outcome effects recorded. This does not establish that there are none.
Failure
- Scholars: satisfaction -7
- Rozenn: destruction recorded
- Clovermont: destruction recorded
218Let's intimidate the academicianLocation not established · DiplomacyView record+
- Location
- Not established by this snapshot
- Knights needed
- Not established by this snapshot
- Duration
- Not established by this snapshot
- Deadline
- Not established by this snapshot
- Damage range
- 0–3
- Requested Knights
- Victoria
Recorded stat requirements
These are recorded base values, not a guaranteed success formula.
Unlock conditions: Not established by this snapshot.
Task themes: Intimidation. These labels are not simultaneous requirements or a complete unlock route.
Normal success
No outcome effects recorded. This does not establish that there are none.
Failure
- Scholars: satisfaction -7
- Rozenn: destruction recorded
- Clovermont: destruction recorded
219Flooding in ClovermontClovermont · RescueView record+
- Location
- Clovermont
- Knights needed
- 2
- Duration
- 2 cycles
- Deadline
- 2 cycles
- Damage range
- 3–5
- Requested Knights
- Not established by this snapshot
Recorded stat requirements
These are recorded base values, not a guaranteed success formula.
Unlock conditions: Not established by this snapshot.
Task themes: Water, Help, Magic Involved. These labels are not simultaneous requirements or a complete unlock route.
Normal success
- Population group not established: satisfaction +2
Failure
- Clovermont: destruction recorded
220New vessel for DulahanLocation not established · Knight QuestSpecial outcome+
- Location
- Not established by this snapshot
- Knights needed
- Not established by this snapshot
- Duration
- Not established by this snapshot
- Deadline
- Not established by this snapshot
- Damage range
- 0–0
- Requested Knights
- Dulahan
Recorded stat requirements
These are recorded base values, not a guaranteed success formula.
Unlock conditions: Not established by this snapshot.
Normal success
No outcome effects recorded. This does not establish that there are none.
Failure
No outcome effects recorded. This does not establish that there are none.
Special outcomes
Recorded matches to investigate. Other conditions may apply; these are not guaranteed triggers.
Outcome 1 · Dulahan
Knight match: Dulahan.
- Additional scripted effect; its gameplay effect is not established
221Suspects interrogationsCity Of Enberg · ScoutingSpecial outcome+
- Location
- City Of Enberg
- Knights needed
- 3
- Duration
- 3 cycles
- Deadline
- 4 cycles
- Damage range
- 1–2
- Requested Knights
- Not established by this snapshot
Recorded stat requirements
These are recorded base values, not a guaranteed success formula.
Unlock conditions: Not established by this snapshot.
Task themes: Investigation, Intimidation. These labels are not simultaneous requirements or a complete unlock route.
Normal success
- Story state changes; its gameplay effect is not established
- Recorded reward +95; reward type not established
- Nobles: satisfaction +1
Failure
No outcome effects recorded. This does not establish that there are none.
Special outcomes
Recorded matches to investigate. Other conditions may apply; these are not guaranteed triggers.
Outcome 1 · Tarcus
Knight match: Tarcus.
- Nobles: satisfaction +3
- Story state changes; its gameplay effect is not established
- Recorded reward +135; reward type not established
- Relic: Bloody Pliers
Recorded damage: 1–3.
A follow-up audience is referenced; its choices are not reconstructed here.
Outcome 2
Knight match: Not established by this snapshot.
Stat check: Wits, recorded threshold 12. The exact comparison is not established.
- Recorded reward +120; reward type not established
- Story state changes; its gameplay effect is not established
- Story state changes; its gameplay effect is not established
A follow-up audience is referenced; its choices are not reconstructed here.
Follow-up audience recorded after success; the dialogue route is not established.
222Occult investigationCity Of Enberg · ScoutingView record+
- Location
- City Of Enberg
- Knights needed
- 2
- Duration
- 3 cycles
- Deadline
- 4 cycles
- Damage range
- 1–3
- Requested Knights
- Not established by this snapshot
Recorded stat requirements
These are recorded base values, not a guaranteed success formula.
Unlock conditions: Not established by this snapshot.
Task themes: Magic Involved, Investigation. These labels are not simultaneous requirements or a complete unlock route.
Normal success
- Scholars: satisfaction +3
- Story state changes; its gameplay effect is not established
- Recorded reward +80; reward type not established
Failure
No outcome effects recorded. This does not establish that there are none.
Follow-up audience recorded after success; the dialogue route is not established.
223Hire an assassinZiskov · ScoutingView record+
- Location
- Ziskov
- Knights needed
- 2
- Duration
- 3 cycles
- Deadline
- 4 cycles
- Damage range
- 2–4
- Requested Knights
- Not established by this snapshot
Recorded stat requirements
These are recorded base values, not a guaranteed success formula.
Unlock conditions: Not established by this snapshot.
Task themes: Unethical, Investigation. These labels are not simultaneous requirements or a complete unlock route.
Normal success
- Story state changes; its gameplay effect is not established
- Consumable: Illicit Pimento
- Recorded reward +50; reward type not established
- Story state changes; its gameplay effect is not established
Failure
No outcome effects recorded. This does not establish that there are none.
Recorded variations
Activation conditions are not established. Do not add these changes together or apply them to every attempt.
Reported variant 1 · activation unknown
Reported variant 2 · activation unknown
Success changes
- Recorded reward amount not established; reward type not established
Follow-up audience recorded after success; the dialogue route is not established.
224Dark district investigationZiskov · ScoutingView record+
- Location
- Ziskov
- Knights needed
- 2
- Duration
- 3 cycles
- Deadline
- 4 cycles
- Damage range
- 1–3
- Requested Knights
- Not established by this snapshot
Recorded stat requirements
These are recorded base values, not a guaranteed success formula.
Unlock conditions: Not established by this snapshot.
Task themes: Unethical, At Night, Investigation. These labels are not simultaneous requirements or a complete unlock route.
Normal success
- Story state changes; its gameplay effect is not established
- Recorded reward +100; reward type not established
- Nobles: satisfaction +2
Failure
No outcome effects recorded. This does not establish that there are none.
Follow-up audience recorded after success; the dialogue route is not established.
225Letters investigationCity Of Enberg · ScoutingView record+
- Location
- City Of Enberg
- Knights needed
- 2
- Duration
- 3 cycles
- Deadline
- 4 cycles
- Damage range
- 0–0
- Requested Knights
- Not established by this snapshot
Recorded stat requirements
These are recorded base values, not a guaranteed success formula.
Unlock conditions: Not established by this snapshot.
Task themes: Investigation. These labels are not simultaneous requirements or a complete unlock route.
Normal success
- Story state changes; its gameplay effect is not established
- Recorded reward +100; reward type not established
- Nobles: satisfaction +1
Failure
No outcome effects recorded. This does not establish that there are none.
Follow-up audience recorded after success; the dialogue route is not established.
226Enberg headquarters infiltrationMana Strala · ScoutingView record+
- Location
- Mana Strala
- Knights needed
- 2
- Duration
- 3 cycles
- Deadline
- 4 cycles
- Damage range
- 1–3
- Requested Knights
- Not established by this snapshot
Recorded stat requirements
These are recorded base values, not a guaranteed success formula.
Unlock conditions: Not established by this snapshot.
Task themes: Crowd, Investigation. These labels are not simultaneous requirements or a complete unlock route.
Normal success
- Story state changes; its gameplay effect is not established
- Recorded reward +105; reward type not established
- Population group not established: satisfaction +2
Failure
No outcome effects recorded. This does not establish that there are none.
Follow-up audience recorded after success; the dialogue route is not established.
227Suspects tortureCity Of Enberg · ScoutingView record+
- Location
- City Of Enberg
- Knights needed
- 2
- Duration
- 3 cycles
- Deadline
- 4 cycles
- Damage range
- 1–3
- Requested Knights
- Not established by this snapshot
Recorded stat requirements
These are recorded base values, not a guaranteed success formula.
Unlock conditions: Not established by this snapshot.
Task themes: Unethical, Intimidation, Investigation. These labels are not simultaneous requirements or a complete unlock route.
Normal success
- Nobles: satisfaction +3
- Story state changes; its gameplay effect is not established
- Recorded reward +120; reward type not established
- Relic: Bloody Pliers
Failure
No outcome effects recorded. This does not establish that there are none.
Follow-up audience recorded after success; the dialogue route is not established.
228Arrest of the CountessChavignol · DuelView record+
- Location
- Chavignol
- Knights needed
- 2
- Duration
- Not established by this snapshot
- Deadline
- 2 cycles
- Damage range
- 1–3
- Requested Knights
- Not established by this snapshot
Recorded stat requirements
These are recorded base values, not a guaranteed success formula.
Unlock conditions: Not established by this snapshot.
Normal success
- Population group not established: satisfaction +2
- Recorded reward +50; reward type not established
- Consumable: Blue Cheese
Failure
- Story state changes; its gameplay effect is not established
Follow-up audience recorded after success and failure; the dialogue route is not established.
229Arrest of the princessMavignac · DuelSpecial outcome+
- Location
- Mavignac
- Knights needed
- 2
- Duration
- Not established by this snapshot
- Deadline
- 2 cycles
- Damage range
- 2–4
- Requested Knights
- Not established by this snapshot
Recorded stat requirements
These are recorded base values, not a guaranteed success formula.
Unlock conditions: Not established by this snapshot.
Normal success
- Nobles: satisfaction +2
- Recorded reward +50; reward type not established
Failure
- Story state changes; its gameplay effect is not established
Special outcomes
Recorded matches to investigate. Other conditions may apply; these are not guaranteed triggers.
Outcome 1 · Ursule
Knight match: Ursule.
No outcome effects recorded. This does not establish that there are none.
A follow-up audience is referenced; its choices are not reconstructed here.
Follow-up audience recorded after success and failure; the dialogue route is not established.
230Defense of the Siege of GavaultFort Gavault · DiplomacyView record+
- Location
- Fort Gavault
- Knights needed
- 2
- Duration
- Not established by this snapshot
- Deadline
- 2 cycles
- Damage range
- 2–4
- Requested Knights
- Not established by this snapshot
Recorded stat requirements
These are recorded base values, not a guaranteed success formula.
Unlock conditions: Not established by this snapshot.
Task themes: Crowd, Help. These labels are not simultaneous requirements or a complete unlock route.
Normal success
- Nobles: satisfaction +2
- Recorded reward +40; reward type not established
Failure
- Story state changes; its gameplay effect is not established
Follow-up audience recorded after success and failure; the dialogue route is not established.
231Princely negotiationsMavignac · DiplomacySpecial outcome+
- Location
- Mavignac
- Knights needed
- 2
- Duration
- Not established by this snapshot
- Deadline
- 2 cycles
- Damage range
- 1–2
- Requested Knights
- Not established by this snapshot
Recorded stat requirements
These are recorded base values, not a guaranteed success formula.
Unlock conditions: Not established by this snapshot.
Normal success
- Recorded reward +60; reward type not established
- Population group not established: satisfaction +1
- Nobles: satisfaction -1
Failure
- Story state changes; its gameplay effect is not established
Special outcomes
Recorded matches to investigate. Other conditions may apply; these are not guaranteed triggers.
Outcome 1 · Tarcus
Knight match: Tarcus.
No outcome effects recorded. This does not establish that there are none.
A follow-up audience is referenced; its choices are not reconstructed here.
Follow-up audience recorded after success and failure; the dialogue route is not established.
232Noble investigationsMavignac · ScoutingView record+
- Location
- Mavignac
- Knights needed
- Not established by this snapshot
- Duration
- Not established by this snapshot
- Deadline
- 2 cycles
- Damage range
- 0–1
- Requested Knights
- Not established by this snapshot
Recorded stat requirements
These are recorded base values, not a guaranteed success formula.
Unlock conditions: Not established by this snapshot.
Task themes: Investigation, Crowd. These labels are not simultaneous requirements or a complete unlock route.
Normal success
- Population group not established: satisfaction +1
- Consumable: Provisions
- Story state changes; its gameplay effect is not established
Failure
- Story state changes; its gameplay effect is not established
Follow-up audience recorded after success and failure; the dialogue route is not established.
233Popular investigationsMavignac · ScoutingView record+
- Location
- Mavignac
- Knights needed
- Not established by this snapshot
- Duration
- Not established by this snapshot
- Deadline
- 2 cycles
- Damage range
- 0–1
- Requested Knights
- Not established by this snapshot
Recorded stat requirements
These are recorded base values, not a guaranteed success formula.
Unlock conditions: Not established by this snapshot.
Task themes: Investigation, Crowd, People Involved. These labels are not simultaneous requirements or a complete unlock route.
Normal success
- Nobles: satisfaction +1
- Story state changes; its gameplay effect is not established
Failure
- Story state changes; its gameplay effect is not established
Follow-up audience recorded after success and failure; the dialogue route is not established.
234Taking Fort GavaultFort Gavault · DiplomacyView record+
- Location
- Fort Gavault
- Knights needed
- 2
- Duration
- Not established by this snapshot
- Deadline
- 2 cycles
- Damage range
- 3–4
- Requested Knights
- Not established by this snapshot
Recorded stat requirements
These are recorded base values, not a guaranteed success formula.
Unlock conditions: Not established by this snapshot.
Task themes: Climbing, Crowd, People Involved. These labels are not simultaneous requirements or a complete unlock route.
Normal success
- Recorded reward +40; reward type not established
- Consumable: Camembert
- Population group not established: satisfaction +2
Failure
- Story state changes; its gameplay effect is not established
Follow-up audience recorded after success and failure; the dialogue route is not established.
235Taverns investigationsMavignac · ScoutingView record+
- Location
- Mavignac
- Knights needed
- Not established by this snapshot
- Duration
- Not established by this snapshot
- Deadline
- 2 cycles
- Damage range
- 0–2
- Requested Knights
- Not established by this snapshot
Recorded stat requirements
These are recorded base values, not a guaranteed success formula.
Unlock conditions: Not established by this snapshot.
Task themes: Investigation, Crowd. These labels are not simultaneous requirements or a complete unlock route.
Normal success
- Story state changes; its gameplay effect is not established
- Recorded reward +30; reward type not established
Failure
- Story state changes; its gameplay effect is not established
Follow-up audience recorded after success and failure; the dialogue route is not established.
236Gideon's originsLocation not established · Knight QuestView record+
- Location
- Not established by this snapshot
- Knights needed
- 2
- Duration
- Not established by this snapshot
- Deadline
- Not established by this snapshot
- Damage range
- 0–2
- Requested Knights
- Gideon
Recorded stat requirements
These are recorded base values, not a guaranteed success formula.
Unlock conditions: Not established by this snapshot.
Task themes: Intimidation. These labels are not simultaneous requirements or a complete unlock route.
Normal success
No outcome effects recorded. This does not establish that there are none.
Failure
- Additional scripted effect; its gameplay effect is not established
- Gideon: affinity -1
Follow-up audience recorded after success; the dialogue route is not established.
237Rest for GideonLocation not established · Knight QuestView record+
- Location
- Not established by this snapshot
- Knights needed
- Not established by this snapshot
- Duration
- Not established by this snapshot
- Deadline
- Not established by this snapshot
- Damage range
- 0–0
- Requested Knights
- Gideon
Recorded stat requirements
These are recorded base values, not a guaranteed success formula.
Unlock conditions: Not established by this snapshot.
Normal success
- Gideon: affinity +1
Failure
No outcome effects recorded. This does not establish that there are none.
238Mystical researchBelthorn · ScoutingView record+
- Location
- Belthorn
- Knights needed
- Not established by this snapshot
- Duration
- Not established by this snapshot
- Deadline
- 2 cycles
- Damage range
- 0–1
- Requested Knights
- Not established by this snapshot
Recorded stat requirements
These are recorded base values, not a guaranteed success formula.
Unlock conditions: Not established by this snapshot.
Task themes: Investigation, Magic Involved. These labels are not simultaneous requirements or a complete unlock route.
Normal success
- Recorded reward +25; reward type not established
- Scholars: satisfaction +2
- Story state changes; its gameplay effect is not established
Failure
- Story state changes; its gameplay effect is not established
Follow-up audience recorded after success and failure; the dialogue route is not established.
239Forest researchBelthorn · ScoutingView record+
- Location
- Belthorn
- Knights needed
- Not established by this snapshot
- Duration
- Not established by this snapshot
- Deadline
- 2 cycles
- Damage range
- 1–2
- Requested Knights
- Not established by this snapshot
Recorded stat requirements
These are recorded base values, not a guaranteed success formula.
Unlock conditions: Not established by this snapshot.
Task themes: Woods, Investigation, Cave. These labels are not simultaneous requirements or a complete unlock route.
Normal success
- Story state changes; its gameplay effect is not established
- Recorded reward +40; reward type not established
Failure
- Story state changes; its gameplay effect is not established
Follow-up audience recorded after success and failure; the dialogue route is not established.
240Face the hordBelthornView record+
- Location
- Belthorn
- Knights needed
- Not established by this snapshot
- Duration
- Not established by this snapshot
- Deadline
- 2 cycles
- Damage range
- 2–4
- Requested Knights
- Not established by this snapshot
Recorded stat requirements
These are recorded base values, not a guaranteed success formula.
Unlock conditions: Not established by this snapshot.
Task themes: Crowd, Woods, Big Creature. These labels are not simultaneous requirements or a complete unlock route.
Normal success
- Nobles: satisfaction +1
- Recorded reward +35; reward type not established
- Story state changes; its gameplay effect is not established
Failure
- Story state changes; its gameplay effect is not established
Follow-up audience recorded after success and failure; the dialogue route is not established.
241Farm researchBelthorn · ScoutingView record+
- Location
- Belthorn
- Knights needed
- Not established by this snapshot
- Duration
- Not established by this snapshot
- Deadline
- 2 cycles
- Damage range
- 0–2
- Requested Knights
- Not established by this snapshot
Recorded stat requirements
These are recorded base values, not a guaranteed success formula.
Unlock conditions: Not established by this snapshot.
Task themes: Investigation, Crowd. These labels are not simultaneous requirements or a complete unlock route.
Normal success
- Recorded reward +40; reward type not established
- Story state changes; its gameplay effect is not established
Failure
- Story state changes; its gameplay effect is not established
Follow-up audience recorded after success and failure; the dialogue route is not established.
242Follow the hordBelthorn · ScoutingView record+
- Location
- Belthorn
- Knights needed
- Not established by this snapshot
- Duration
- Not established by this snapshot
- Deadline
- 2 cycles
- Damage range
- 1–2
- Requested Knights
- Not established by this snapshot
Recorded stat requirements
These are recorded base values, not a guaranteed success formula.
Unlock conditions: Not established by this snapshot.
Task themes: Big Creature, Track, Crowd. These labels are not simultaneous requirements or a complete unlock route.
Normal success
- Scholars: satisfaction +1
- Recorded reward +35; reward type not established
Failure
- Story state changes; its gameplay effect is not established
Follow-up audience recorded after success and failure; the dialogue route is not established.
243Kill the BeastBelthornSpecial outcome+
- Location
- Belthorn
- Knights needed
- 2
- Duration
- Not established by this snapshot
- Deadline
- 2 cycles
- Damage range
- 2–5
- Requested Knights
- Not established by this snapshot
Recorded stat requirements
These are recorded base values, not a guaranteed success formula.
Unlock conditions: Not established by this snapshot.
Task themes: Big Creature, Cave, Water. These labels are not simultaneous requirements or a complete unlock route.
Normal success
- Population group not established: satisfaction +2
- Nobles: satisfaction +2
- Merchants: satisfaction +2
- Recorded reward +120; reward type not established
- Story state changes; its gameplay effect is not established
- Story state changes; its gameplay effect is not established
Failure
- Story state changes; its gameplay effect is not established
Special outcomes
Recorded matches to investigate. Other conditions may apply; these are not guaranteed triggers.
Outcome 1 · Angelica
Knight match: Angelica.
- Scholars: satisfaction +2
- Nobles: satisfaction -1
- Story state changes; its gameplay effect is not established
Recorded damage: 0–0.
A follow-up audience is referenced; its choices are not reconstructed here.
Recorded variations
Activation conditions are not established. Do not add these changes together or apply them to every attempt.
Reported variant 1 · activation unknown
- Strength requirement change: -1
- Agility requirement change: -1
- Wits requirement change: -1
- Damage change: -2
Follow-up audience recorded after success and failure; the dialogue route is not established.
244Curse RemovalBelthornView record+
- Location
- Belthorn
- Knights needed
- 2
- Duration
- Not established by this snapshot
- Deadline
- 2 cycles
- Damage range
- 1–5
- Requested Knights
- Not established by this snapshot
Recorded stat requirements
These are recorded base values, not a guaranteed success formula.
Unlock conditions: Not established by this snapshot.
Task themes: Cave, Big Creature, Magic Involved, Water. These labels are not simultaneous requirements or a complete unlock route.
Normal success
- Population group not established: satisfaction +2
- Nobles: satisfaction +2
- Scholars: satisfaction +2
- Recorded reward +120; reward type not established
- Story state changes; its gameplay effect is not established
Failure
- Story state changes; its gameplay effect is not established
Follow-up audience recorded after success and failure; the dialogue route is not established.
245River researchBelthorn · ScoutingView record+
- Location
- Belthorn
- Knights needed
- Not established by this snapshot
- Duration
- Not established by this snapshot
- Deadline
- 2 cycles
- Damage range
- 0–2
- Requested Knights
- Not established by this snapshot
Recorded stat requirements
These are recorded base values, not a guaranteed success formula.
Unlock conditions: Not established by this snapshot.
Task themes: Investigation, Water. These labels are not simultaneous requirements or a complete unlock route.
Normal success
- Recorded reward +40; reward type not established
- Relic: Hunter Axe
- Story state changes; its gameplay effect is not established
Failure
- Story state changes; its gameplay effect is not established
Follow-up audience recorded after success and failure; the dialogue route is not established.
246Miners' revoltKralgrun · ConfrontationView record+
- Location
- Kralgrun
- Knights needed
- 3
- Duration
- 3 cycles
- Deadline
- Not established by this snapshot
- Damage range
- 3–4
- Requested Knights
- Not established by this snapshot
Recorded stat requirements
These are recorded base values, not a guaranteed success formula.
Unlock conditions: Not established by this snapshot.
Task themes: Crowd, Intimidation, Magic Involved, Cave. These labels are not simultaneous requirements or a complete unlock route.
Normal success
- Population group not established: satisfaction +1
- Recorded reward +90; reward type not established
Failure
- Kralgrun: destruction recorded
247Cheat through treacherous mountainsGrand Kutnar Caravan · CompetitionSpecial outcome+
- Location
- Grand Kutnar Caravan
- Knights needed
- 2
- Duration
- 3 cycles
- Deadline
- 3 cycles
- Damage range
- 2–4
- Requested Knights
- Not established by this snapshot
Recorded stat requirements
These are recorded base values, not a guaranteed success formula.
Unlock conditions: Not established by this snapshot.
Task themes: Climbing, Investigation, Unethical. These labels are not simultaneous requirements or a complete unlock route.
Normal success
- Recorded reward +100; reward type not established
- Story state changes; its gameplay effect is not established
Failure
- Story state changes; its gameplay effect is not established
Special outcomes
Recorded matches to investigate. Other conditions may apply; these are not guaranteed triggers.
Outcome 1 · Tarcus
Knight match: Tarcus.
- Story state changes; its gameplay effect is not established
Recorded damage: 0–-4.
A follow-up audience is referenced; its choices are not reconstructed here.
Follow-up audience recorded after success; the dialogue route is not established.
248Race through the secret caveGrand Kutnar Caravan · CompetitionView record+
- Location
- Grand Kutnar Caravan
- Knights needed
- Not established by this snapshot
- Duration
- 3 cycles
- Deadline
- 3 cycles
- Damage range
- 1–3
- Requested Knights
- Not established by this snapshot
Recorded stat requirements
These are recorded base values, not a guaranteed success formula.
Unlock conditions: Not established by this snapshot.
Task themes: Cave. These labels are not simultaneous requirements or a complete unlock route.
Normal success
- Recorded reward +75; reward type not established
- Relic: Kutnar Bronze Shield
- Story state changes; its gameplay effect is not established
Failure
- Story state changes; its gameplay effect is not established
Follow-up audience recorded after success; the dialogue route is not established.
249Race through treacherous mountainsGrand Kutnar Caravan · CompetitionSpecial outcome+
- Location
- Grand Kutnar Caravan
- Knights needed
- Not established by this snapshot
- Duration
- 3 cycles
- Deadline
- 3 cycles
- Damage range
- 2–5
- Requested Knights
- Not established by this snapshot
Recorded stat requirements
These are recorded base values, not a guaranteed success formula.
Unlock conditions: Not established by this snapshot.
Task themes: Climbing. These labels are not simultaneous requirements or a complete unlock route.
Normal success
- Recorded reward +75; reward type not established
Failure
- Story state changes; its gameplay effect is not established
Special outcomes
Recorded matches to investigate. Other conditions may apply; these are not guaranteed triggers.
Outcome 1 · Tarcus
Knight match: Tarcus.
- Story state changes; its gameplay effect is not established
- Relic: Kutnar Bronze Shield
Recorded damage: 0–-3.
A follow-up audience is referenced; its choices are not reconstructed here.
Follow-up audience recorded after success; the dialogue route is not established.
250From forest to summitVolga Camp · CompetitionSpecial outcome+
- Location
- Volga Camp
- Knights needed
- Not established by this snapshot
- Duration
- 3 cycles
- Deadline
- 3 cycles
- Damage range
- 2–4
- Requested Knights
- Not established by this snapshot
Recorded stat requirements
These are recorded base values, not a guaranteed success formula.
Unlock conditions: Not established by this snapshot.
Task themes: Woods, Climbing. These labels are not simultaneous requirements or a complete unlock route.
Normal success
- Recorded reward +150; reward type not established
- Story state changes; its gameplay effect is not established
- Story state changes; its gameplay effect is not established
- Story state changes; its gameplay effect is not established
Failure
No outcome effects recorded. This does not establish that there are none.
Special outcomes
Recorded matches to investigate. Other conditions may apply; these are not guaranteed triggers.
Outcome 1
Knight match: Not established by this snapshot.
Trait match: Non Equine.
- Story state changes; its gameplay effect is not established
- Story state changes; its gameplay effect is not established
- Story state changes; its gameplay effect is not established
Recorded damage: 0–2.
A follow-up audience is referenced; its choices are not reconstructed here.
Recorded variations
Activation conditions are not established. Do not add these changes together or apply them to every attempt.
Reported variant 1 · activation unknown
- Agility requirement change: -2
- Charisma requirement change: -1
- Wits requirement change: -1
- Damage change: -2
Follow-up audience recorded after success; the dialogue route is not established.
251From plains to summitVolga Camp · CompetitionSpecial outcome+
- Location
- Volga Camp
- Knights needed
- Not established by this snapshot
- Duration
- 3 cycles
- Deadline
- 3 cycles
- Damage range
- 1–2
- Requested Knights
- Not established by this snapshot
Recorded stat requirements
These are recorded base values, not a guaranteed success formula.
Unlock conditions: Not established by this snapshot.
Task themes: Flying Creature, Climbing. These labels are not simultaneous requirements or a complete unlock route.
Normal success
- Recorded reward +150; reward type not established
- Story state changes; its gameplay effect is not established
- Story state changes; its gameplay effect is not established
- Story state changes; its gameplay effect is not established
Failure
No outcome effects recorded. This does not establish that there are none.
Special outcomes
Recorded matches to investigate. Other conditions may apply; these are not guaranteed triggers.
Outcome 1
Knight match: Not established by this snapshot.
Trait match: Non Equine.
- Story state changes; its gameplay effect is not established
- Story state changes; its gameplay effect is not established
- Story state changes; its gameplay effect is not established
Recorded damage: 0–2.
A follow-up audience is referenced; its choices are not reconstructed here.
Recorded variations
Activation conditions are not established. Do not add these changes together or apply them to every attempt.
Reported variant 1 · activation unknown
- Agility requirement change: -2
- Charisma requirement change: +1
- Damage change: -2
Follow-up audience recorded after success; the dialogue route is not established.
252From villages to summitVolga Camp · CompetitionSpecial outcome+
- Location
- Volga Camp
- Knights needed
- Not established by this snapshot
- Duration
- 3 cycles
- Deadline
- 3 cycles
- Damage range
- 0–4
- Requested Knights
- Not established by this snapshot
Recorded stat requirements
These are recorded base values, not a guaranteed success formula.
Unlock conditions: Not established by this snapshot.
Task themes: Crowd, Climbing. These labels are not simultaneous requirements or a complete unlock route.
Normal success
- Recorded reward +150; reward type not established
- Story state changes; its gameplay effect is not established
- Story state changes; its gameplay effect is not established
- Story state changes; its gameplay effect is not established
Failure
No outcome effects recorded. This does not establish that there are none.
Special outcomes
Recorded matches to investigate. Other conditions may apply; these are not guaranteed triggers.
Outcome 1
Knight match: Not established by this snapshot.
Trait match: Non Equine.
- Story state changes; its gameplay effect is not established
- Story state changes; its gameplay effect is not established
- Story state changes; its gameplay effect is not established
Recorded damage: 0–2.
A follow-up audience is referenced; its choices are not reconstructed here.
Recorded variations
Activation conditions are not established. Do not add these changes together or apply them to every attempt.
Reported variant 1 · activation unknown
- Strength requirement change: -1
- Agility requirement change: -2
- Charisma requirement change: +1
- Damage change: -2
Follow-up audience recorded after success; the dialogue route is not established.
253Rush in Laik ValléeLaik Valley · CompetitionSpecial outcome+
- Location
- Laik Valley
- Knights needed
- Not established by this snapshot
- Duration
- 3 cycles
- Deadline
- 3 cycles
- Damage range
- 1–2
- Requested Knights
- Not established by this snapshot
Recorded stat requirements
These are recorded base values, not a guaranteed success formula.
Unlock conditions: Not established by this snapshot.
Normal success
- Relic: Spurs Of Swiftness
- Recorded reward +20; reward type not established
Failure
- Story state changes; its gameplay effect is not established
Special outcomes
Recorded matches to investigate. Other conditions may apply; these are not guaranteed triggers.
Outcome 1 · Tarcus
Knight match: Tarcus.
- Story state changes; its gameplay effect is not established
- Recorded reward +45; reward type not established
Recorded damage: 0–1.
A follow-up audience is referenced; its choices are not reconstructed here.
Follow-up audience recorded after success; the dialogue route is not established.
254The hoof on the groundLaik ValleyView record+
- Location
- Laik Valley
- Knights needed
- 2
- Duration
- 3 cycles
- Deadline
- Not established by this snapshot
- Damage range
- 1–5
- Requested Knights
- Not established by this snapshot
Recorded stat requirements
These are recorded base values, not a guaranteed success formula.
Unlock conditions: Not established by this snapshot.
Task themes: Magic Involved, Unethical, Investigation. These labels are not simultaneous requirements or a complete unlock route.
Normal success
- Merchants: satisfaction +2
- Recorded reward +80; reward type not established
Failure
- Laik Valley: destruction recorded
255Chain explosionsMana Strala · ConfrontationView record+
- Location
- Mana Strala
- Knights needed
- 4
- Duration
- 3 cycles
- Deadline
- Not established by this snapshot
- Damage range
- 1–5
- Requested Knights
- Not established by this snapshot
Recorded stat requirements
These are recorded base values, not a guaranteed success formula.
Unlock conditions: Not established by this snapshot.
Task themes: Big Creature, Magic Involved, Help. These labels are not simultaneous requirements or a complete unlock route.
Normal success
No outcome effects recorded. This does not establish that there are none.
Failure
- Mana Strala: destruction recorded
256Technical sabotageMavignac · DiplomacyView record+
- Location
- Mavignac
- Knights needed
- 2
- Duration
- 2 cycles
- Deadline
- Not established by this snapshot
- Damage range
- 1–3
- Requested Knights
- Not established by this snapshot
Recorded stat requirements
These are recorded base values, not a guaranteed success formula.
Unlock conditions: Not established by this snapshot.
Task themes: Help, Magic Involved, People Involved. These labels are not simultaneous requirements or a complete unlock route.
Normal success
- Population group not established: satisfaction +2
Failure
- Mavignac: destruction recorded
257Kidnapping of the real mastermindMilkford · ScoutingView record+
- Location
- Milkford
- Knights needed
- 2
- Duration
- Not established by this snapshot
- Deadline
- 2 cycles
- Damage range
- 1–3
- Requested Knights
- Not established by this snapshot
Recorded stat requirements
These are recorded base values, not a guaranteed success formula.
Unlock conditions: Not established by this snapshot.
Task themes: Help, Cute Creature, Track. These labels are not simultaneous requirements or a complete unlock route.
Normal success
- Merchants: satisfaction +1
- Population group not established: satisfaction +1
- Recorded reward +50; reward type not established
Failure
- Milkford: destruction recorded
258Appease the dragonAvalon · DiplomacyView record+
- Location
- Avalon
- Knights needed
- 3
- Duration
- 4 cycles
- Deadline
- 4 cycles
- Damage range
- 2–3
- Requested Knights
- Not established by this snapshot
Recorded stat requirements
These are recorded base values, not a guaranteed success formula.
Unlock conditions: Not established by this snapshot.
Task themes: Magic Involved, Climbing. These labels are not simultaneous requirements or a complete unlock route.
Normal success
- Mount: Dragon
- Recorded reward +100; reward type not established
- Story state changes; its gameplay effect is not established
- Scholars: satisfaction +2
Failure
No outcome effects recorded. This does not establish that there are none.
Follow-up audience recorded after success; the dialogue route is not established.
259Fight the dragonAvalonView record+
- Location
- Avalon
- Knights needed
- 3
- Duration
- 3 cycles
- Deadline
- 4 cycles
- Damage range
- 3–5
- Requested Knights
- Not established by this snapshot
Recorded stat requirements
These are recorded base values, not a guaranteed success formula.
Unlock conditions: Not established by this snapshot.
Task themes: Dragon, Magic Involved, Climbing. These labels are not simultaneous requirements or a complete unlock route.
Normal success
- Recorded reward +200; reward type not established
- Quest item: Dragon Heart
- Story state changes; its gameplay effect is not established
Failure
No outcome effects recorded. This does not establish that there are none.
Recorded variations
Activation conditions are not established. Do not add these changes together or apply them to every attempt.
Reported variant 1 · activation unknown
- Strength requirement change: +1
- Agility requirement change: +1
- Magic requirement change: +1
- Wits requirement change: +1
- Luck requirement change: +1
- Damage change: +2
Follow-up audience recorded after success; the dialogue route is not established.
260Fight the dragon, keep the eggAvalonView record+
- Location
- Avalon
- Knights needed
- 3
- Duration
- 4 cycles
- Deadline
- 4 cycles
- Damage range
- 3–5
- Requested Knights
- Not established by this snapshot
Recorded stat requirements
These are recorded base values, not a guaranteed success formula.
Unlock conditions: Not established by this snapshot.
Task themes: Dragon, Unethical, Magic Involved, Climbing. These labels are not simultaneous requirements or a complete unlock route.
Normal success
- Quest item: Dragon Heart
- Recorded reward +100; reward type not established
- Story state changes; its gameplay effect is not established
- Quest item: Dragon Egg
Failure
No outcome effects recorded. This does not establish that there are none.
Recorded variations
Activation conditions are not established. Do not add these changes together or apply them to every attempt.
Reported variant 1 · activation unknown
- Strength requirement change: +1
- Agility requirement change: +1
- Charisma requirement change: +1
- Magic requirement change: +1
- Wits requirement change: +1
- Luck requirement change: +1
- Damage change: +2
Follow-up audience recorded after success; the dialogue route is not established.
261Repel the dragonPinemazeSpecial outcome+
- Location
- Pinemaze
- Knights needed
- 3
- Duration
- 4 cycles
- Deadline
- 4 cycles
- Damage range
- 2–5
- Requested Knights
- Not established by this snapshot
Recorded stat requirements
These are recorded base values, not a guaranteed success formula.
Unlock conditions: Not established by this snapshot.
Task themes: Flying Creature, Big Creature, Magic Involved, Woods. These labels are not simultaneous requirements or a complete unlock route.
Normal success
- Recorded reward +120; reward type not established
- Scholars: satisfaction +3
Failure
No outcome effects recorded. This does not establish that there are none.
Special outcomes
Recorded matches to investigate. Other conditions may apply; these are not guaranteed triggers.
Outcome 1
Knight match: Not established by this snapshot.
Stat check: Magic, recorded threshold 14. The exact comparison is not established.
- Story state changes; its gameplay effect is not established
- Scholars: satisfaction +3
- Recorded reward +120; reward type not established
A follow-up audience is referenced; its choices are not reconstructed here.
Follow-up audience recorded after success; the dialogue route is not established.
262Steal the egg, then return itAvalon · DiplomacyView record+
- Location
- Avalon
- Knights needed
- Not established by this snapshot
- Duration
- 4 cycles
- Deadline
- 4 cycles
- Damage range
- 2–5
- Requested Knights
- Not established by this snapshot
Recorded stat requirements
These are recorded base values, not a guaranteed success formula.
Unlock conditions: Not established by this snapshot.
Task themes: Unethical, At Night, Climbing, Magic Involved. These labels are not simultaneous requirements or a complete unlock route.
Normal success
- Mount: Dragon
- Recorded reward +100; reward type not established
- Story state changes; its gameplay effect is not established
Failure
No outcome effects recorded. This does not establish that there are none.
Follow-up audience recorded after success; the dialogue route is not established.
263Stop the baby dragonMoonvale CitadelSpecial outcome+
- Location
- Moonvale Citadel
- Knights needed
- 2
- Duration
- 3 cycles
- Deadline
- 4 cycles
- Damage range
- 2–4
- Requested Knights
- Not established by this snapshot
Recorded stat requirements
These are recorded base values, not a guaranteed success formula.
Unlock conditions: Not established by this snapshot.
Task themes: Flying Creature, Track, Cute Creature. These labels are not simultaneous requirements or a complete unlock route.
Normal success
- Relic: Magic Wand
- Recorded reward +100; reward type not established
- Story state changes; its gameplay effect is not established
Failure
No outcome effects recorded. This does not establish that there are none.
Special outcomes
Recorded matches to investigate. Other conditions may apply; these are not guaranteed triggers.
Outcome 1 · Arron
Knight match: Arron.
- Additional scripted effect; its gameplay effect is not established
Recorded damage: 0–2.
A follow-up audience is referenced; its choices are not reconstructed here.
Follow-up audience recorded after success; the dialogue route is not established.
264Tame the baby dragonMoonvale Citadel · RescueSpecial outcome+
- Location
- Moonvale Citadel
- Knights needed
- Not established by this snapshot
- Duration
- 3 cycles
- Deadline
- 4 cycles
- Damage range
- 0–2
- Requested Knights
- Not established by this snapshot
Recorded stat requirements
These are recorded base values, not a guaranteed success formula.
Unlock conditions: Not established by this snapshot.
Task themes: Flying Creature, Cute Creature, Track, Help. These labels are not simultaneous requirements or a complete unlock route.
Normal success
- Relic: Baby Dragon
- Recorded reward +100; reward type not established
- Story state changes; its gameplay effect is not established
Failure
No outcome effects recorded. This does not establish that there are none.
Special outcomes
Recorded matches to investigate. Other conditions may apply; these are not guaranteed triggers.
Outcome 1 · Arron
Knight match: Arron.
- Additional scripted effect; its gameplay effect is not established
A follow-up audience is referenced; its choices are not reconstructed here.
Follow-up audience recorded after success; the dialogue route is not established.
265The Giant SlugsMossgartView record+
- Location
- Mossgart
- Knights needed
- 3
- Duration
- 3 cycles
- Deadline
- Not established by this snapshot
- Damage range
- 1–4
- Requested Knights
- Not established by this snapshot
Recorded stat requirements
These are recorded base values, not a guaranteed success formula.
Unlock conditions: Not established by this snapshot.
Task themes: Big Creature. These labels are not simultaneous requirements or a complete unlock route.
Normal success
- Population group not established: satisfaction +1
- Recorded reward +90; reward type not established
Failure
- Mossgart: destruction recorded
266The stone golemNaonedView record+
- Location
- Naoned
- Knights needed
- 2
- Duration
- 3 cycles
- Deadline
- 2 cycles
- Damage range
- 2–5
- Requested Knights
- Not established by this snapshot
Recorded stat requirements
These are recorded base values, not a guaranteed success formula.
Unlock conditions: Not established by this snapshot.
Task themes: Help, Big Creature, Magic Involved. These labels are not simultaneous requirements or a complete unlock route.
Normal success
- Merchants: satisfaction +1
- Population group not established: satisfaction +1
- Recorded reward +85; reward type not established
Failure
- Naoned: destruction recorded
267Oliver magic degreeAvalon · DiplomacyView record+
- Location
- Avalon
- Knights needed
- Not established by this snapshot
- Duration
- 4 cycles
- Deadline
- Not established by this snapshot
- Damage range
- 0–0
- Requested Knights
- Oliver
Recorded stat requirements
These are recorded base values, not a guaranteed success formula.
Unlock conditions: Not established by this snapshot.
Normal success
- Scholars: satisfaction +2
- Recorded reward +15; reward type not established
- Additional scripted effect; its gameplay effect is not established
Failure
No outcome effects recorded. This does not establish that there are none.
Follow-up audience recorded after success; the dialogue route is not established.
268The tiny (?) krakenPince HarborView record+
- Location
- Pince Harbor
- Knights needed
- 3
- Duration
- 3 cycles
- Deadline
- 2 cycles
- Damage range
- 2–5
- Requested Knights
- Not established by this snapshot
Recorded stat requirements
These are recorded base values, not a guaranteed success formula.
Unlock conditions: Not established by this snapshot.
Task themes: Water, Big Creature. These labels are not simultaneous requirements or a complete unlock route.
Normal success
- Recorded reward +80; reward type not established
- Population group not established: satisfaction +2
Failure
- Pince Harbor: destruction recorded
269Time rupturePinemaze · DiplomacyView record+
- Location
- Pinemaze
- Knights needed
- 3
- Duration
- 3 cycles
- Deadline
- 2 cycles
- Damage range
- 2–3
- Requested Knights
- Not established by this snapshot
Recorded stat requirements
These are recorded base values, not a guaranteed success formula.
Unlock conditions: Not established by this snapshot.
Task themes: Magic Involved, Investigation, Help. These labels are not simultaneous requirements or a complete unlock route.
Normal success
- Scholars: satisfaction +2
Failure
- Pinemaze: destruction recorded
- Recorded reward +75; reward type not established
270The LeviathanPopota Isles · DuelView record+
- Location
- Popota Isles
- Knights needed
- 3
- Duration
- 4 cycles
- Deadline
- 3 cycles
- Damage range
- 2–5
- Requested Knights
- Not established by this snapshot
Recorded stat requirements
These are recorded base values, not a guaranteed success formula.
Unlock conditions: Not established by this snapshot.
Task themes: Water, Big Creature. These labels are not simultaneous requirements or a complete unlock route.
Normal success
- Merchants: satisfaction +1
- Population group not established: satisfaction +1
- Recorded reward +115; reward type not established
Failure
- Popota Isles: destruction recorded
271The rat tideRozennView record+
- Location
- Rozenn
- Knights needed
- 3
- Duration
- 2 cycles
- Deadline
- 2 cycles
- Damage range
- 1–3
- Requested Knights
- Not established by this snapshot
Recorded stat requirements
These are recorded base values, not a guaranteed success formula.
Unlock conditions: Not established by this snapshot.
Task themes: Help, Cave, Crowd. These labels are not simultaneous requirements or a complete unlock route.
Normal success
- Nobles: satisfaction +2
- Population group not established: satisfaction +1
- Recorded reward +90; reward type not established
Failure
- Rozenn: destruction recorded
272The Legend of the Golden KeyAlmora · Relic RecoveryView record+
- Location
- Almora
- Knights needed
- 5
- Duration
- 3 cycles
- Deadline
- Not established by this snapshot
- Damage range
- 1–5
- Requested Knights
- Not established by this snapshot
Recorded stat requirements
These are recorded base values, not a guaranteed success formula.
Unlock conditions: Not established by this snapshot.
Task themes: Woods, Climbing, Cave, Track, Investigation, Heavy Lifting. These labels are not simultaneous requirements or a complete unlock route.
Normal success
- Quest item: Golden Key
- Additional scripted effect; its gameplay effect is not established
- Story state changes; its gameplay effect is not established
Failure
No outcome effects recorded. This does not establish that there are none.
273Searching for the traitorLocation not established · ResearchSpecial outcome+
- Location
- Not established by this snapshot
- Knights needed
- Not established by this snapshot
- Duration
- Not established by this snapshot
- Deadline
- 2 cycles
- Damage range
- 0–0
- Requested Knights
- Not established by this snapshot
Recorded stat requirements
These are recorded base values, not a guaranteed success formula.
Unlock conditions: Not established by this snapshot.
Task themes: Investigation. These labels are not simultaneous requirements or a complete unlock route.
Normal success
- Additional scripted effect; its gameplay effect is not established
Failure
- Additional scripted effect; its gameplay effect is not established
Special outcomes
Recorded matches to investigate. Other conditions may apply; these are not guaranteed triggers.
Outcome 1 · Angelica
Knight match: Angelica.
- Story state changes; its gameplay effect is not established
Recorded damage: 0–0.
A follow-up audience is referenced; its choices are not reconstructed here.
Outcome 2 · Gwendan
Knight match: Gwendan.
- Story state changes; its gameplay effect is not established
Recorded damage: 0–0.
A follow-up audience is referenced; its choices are not reconstructed here.
Outcome 3 · Ursule
Knight match: Ursule.
- Story state changes; its gameplay effect is not established
Recorded damage: 0–0.
A follow-up audience is referenced; its choices are not reconstructed here.
Outcome 4 · Gideon
Knight match: Gideon.
- Story state changes; its gameplay effect is not established
Recorded damage: 0–0.
A follow-up audience is referenced; its choices are not reconstructed here.
Follow-up audience recorded after success; the dialogue route is not established.
274The sea fire salamanderShellingtonView record+
- Location
- Shellington
- Knights needed
- 3
- Duration
- 3 cycles
- Deadline
- 2 cycles
- Damage range
- 2–5
- Requested Knights
- Not established by this snapshot
Recorded stat requirements
These are recorded base values, not a guaranteed success formula.
Unlock conditions: Not established by this snapshot.
Task themes: Help, Big Creature, Magic Involved. These labels are not simultaneous requirements or a complete unlock route.
Normal success
- Recorded reward +80; reward type not established
- Merchants: satisfaction +2
Failure
- Shellington: destruction recorded
275Expedition to Djinn IslandDjinn Island · Relic RecoverySpecial outcome+
- Location
- Djinn Island
- Knights needed
- 2
- Duration
- 3 cycles
- Deadline
- 3 cycles
- Damage range
- 1–2
- Requested Knights
- Not established by this snapshot
Recorded stat requirements
These are recorded base values, not a guaranteed success formula.
Unlock conditions: Not established by this snapshot.
Task themes: Water, Cave, Woods, Investigation. These labels are not simultaneous requirements or a complete unlock route.
Normal success
- Story state changes; its gameplay effect is not established
- Recorded reward +75; reward type not established
- Merchants: satisfaction +1
Failure
- Story state changes; its gameplay effect is not established
Special outcomes
Recorded matches to investigate. Other conditions may apply; these are not guaranteed triggers.
Outcome 1 · Ari
Knight match: Ari.
- Consumable: Wish Granting Lamp
- Story state changes; its gameplay effect is not established
Recorded damage: 0–1.
A follow-up audience is referenced; its choices are not reconstructed here.
Recorded variations
Activation conditions are not established. Do not add these changes together or apply them to every attempt.
Reported variant 1 · activation unknown
- Damage change: +2
Success changes
- Consumable: Wish Granting Lamp
- Story state changes; its gameplay effect is not established
Reported variant 2 · activation unknown
Success changes
- Story state changes; its gameplay effect is not established
Follow-up audience recorded after success; the dialogue route is not established.
276Legendary lamp at auctionShellington · Relic RecoveryView record+
- Location
- Shellington
- Knights needed
- Not established by this snapshot
- Duration
- 2 cycles
- Deadline
- 3 cycles
- Damage range
- 0–2
- Requested Knights
- Not established by this snapshot
Recorded stat requirements
These are recorded base values, not a guaranteed success formula.
Unlock conditions: Not established by this snapshot.
Task themes: Crowd. These labels are not simultaneous requirements or a complete unlock route.
Normal success
- Consumable: Wish Granting Lamp
Failure
- Story state changes; its gameplay effect is not established
- Story state changes; its gameplay effect is not established
- Story state changes; its gameplay effect is not established
Recorded variations
Activation conditions are not established. Do not add these changes together or apply them to every attempt.
Reported variant 1 · activation unknown
- Strength requirement change: +2
- Agility requirement change: +4
- Charisma requirement change: +2
- Wits requirement change: +3
- Damage change: +2
Success changes
- Story state changes; its gameplay effect is not established
- Story state changes; its gameplay effect is not established
Reported variant 2 · activation unknown
Success changes
- Story state changes; its gameplay effect is not established
- Story state changes; its gameplay effect is not established
Follow-up audience recorded after success and failure; the dialogue route is not established.
277The harbor pubsPince Harbor · ScoutingView record+
- Location
- Pince Harbor
- Knights needed
- Not established by this snapshot
- Duration
- 2 cycles
- Deadline
- 3 cycles
- Damage range
- 1–1
- Requested Knights
- Not established by this snapshot
Recorded stat requirements
These are recorded base values, not a guaranteed success formula.
Unlock conditions: Not established by this snapshot.
Task themes: Investigation, Crowd, At Night. These labels are not simultaneous requirements or a complete unlock route.
Normal success
- Story state changes; its gameplay effect is not established
- Recorded reward +15; reward type not established
Failure
- Story state changes; its gameplay effect is not established
Follow-up audience recorded after success; the dialogue route is not established.
278The Shellington marketShellington · ScoutingView record+
- Location
- Shellington
- Knights needed
- Not established by this snapshot
- Duration
- 2 cycles
- Deadline
- 3 cycles
- Damage range
- 1–1
- Requested Knights
- Not established by this snapshot
Recorded stat requirements
These are recorded base values, not a guaranteed success formula.
Unlock conditions: Not established by this snapshot.
Task themes: Crowd, Investigation, Water. These labels are not simultaneous requirements or a complete unlock route.
Normal success
- Story state changes; its gameplay effect is not established
- Recorded reward +50; reward type not established
Failure
- Story state changes; its gameplay effect is not established
Follow-up audience recorded after success; the dialogue route is not established.
279The lamp of old tomesLocation not established · ResearchSpecial outcome+
- Location
- Not established by this snapshot
- Knights needed
- Not established by this snapshot
- Duration
- 2 cycles
- Deadline
- 3 cycles
- Damage range
- 0–0
- Requested Knights
- Not established by this snapshot
Recorded stat requirements
These are recorded base values, not a guaranteed success formula.
Unlock conditions: Not established by this snapshot.
Task themes: Investigation. These labels are not simultaneous requirements or a complete unlock route.
Normal success
- Scholars: satisfaction +1
- Story state changes; its gameplay effect is not established
- Recorded reward +50; reward type not established
- Story state changes; its gameplay effect is not established
Failure
- Story state changes; its gameplay effect is not established
Special outcomes
Recorded matches to investigate. Other conditions may apply; these are not guaranteed triggers.
Outcome 1 · Brunhilda
Knight match: Brunhilda.
- Story state changes; its gameplay effect is not established
- Recorded reward +50; reward type not established
- Scholars: satisfaction +1
- Story state changes; its gameplay effect is not established
A follow-up audience is referenced; its choices are not reconstructed here.
Follow-up audience recorded after success; the dialogue route is not established.
280The mermaid's cureMermaid Island · ScoutingView record+
- Location
- Mermaid Island
- Knights needed
- 2
- Duration
- 3 cycles
- Deadline
- 3 cycles
- Damage range
- 0–0
- Requested Knights
- Not established by this snapshot
Recorded stat requirements
These are recorded base values, not a guaranteed success formula.
Unlock conditions: Not established by this snapshot.
Task themes: Investigation. These labels are not simultaneous requirements or a complete unlock route.
Normal success
- Story state changes; its gameplay effect is not established
- Recorded reward +75; reward type not established
Failure
No outcome effects recorded. This does not establish that there are none.
281Mermaid IslandMermaid Island · DiplomacyView record+
- Location
- Mermaid Island
- Knights needed
- 2
- Duration
- 3 cycles
- Deadline
- 3 cycles
- Damage range
- 1–2
- Requested Knights
- Not established by this snapshot
Recorded stat requirements
These are recorded base values, not a guaranteed success formula.
Unlock conditions: Not established by this snapshot.
Task themes: Water, Magic Involved. These labels are not simultaneous requirements or a complete unlock route.
Normal success
- Story state changes; its gameplay effect is not established
- Recorded reward +90; reward type not established
Failure
- Story state changes; its gameplay effect is not established
Follow-up audience recorded after success; the dialogue route is not established.
282Southbay political instabilitiesSouthbay Gate · DiplomacySpecial outcome+
- Location
- Southbay Gate
- Knights needed
- Not established by this snapshot
- Duration
- 2 cycles
- Deadline
- 3 cycles
- Damage range
- 2–4
- Requested Knights
- Not established by this snapshot
Recorded stat requirements
These are recorded base values, not a guaranteed success formula.
Unlock conditions: Not established by this snapshot.
Task themes: Crowd. These labels are not simultaneous requirements or a complete unlock route.
Normal success
No outcome effects recorded. This does not establish that there are none.
Failure
No outcome effects recorded. This does not establish that there are none.
Special outcomes
Recorded matches to investigate. Other conditions may apply; these are not guaranteed triggers.
Outcome 1 · Tarcus
Knight match: Tarcus.
No outcome effects recorded. This does not establish that there are none.
A follow-up audience is referenced; its choices are not reconstructed here.
Follow-up audience recorded after success; the dialogue route is not established.
283Urgent: The pirates threatGrest · ConfrontationView record+
- Location
- Grest
- Knights needed
- 2
- Duration
- Not established by this snapshot
- Deadline
- 2 cycles
- Damage range
- 2–5
- Requested Knights
- Not established by this snapshot
Recorded stat requirements
These are recorded base values, not a guaranteed success formula.
Unlock conditions: Not established by this snapshot.
Normal success
- Population group not established: satisfaction +2
- Recorded reward +80; reward type not established
Failure
- Grest: destruction recorded
284Pirates on dragonsTortosa Isles · DuelView record+
- Location
- Tortosa Isles
- Knights needed
- 4
- Duration
- 3 cycles
- Deadline
- 2 cycles
- Damage range
- 3–5
- Requested Knights
- Not established by this snapshot
Recorded stat requirements
These are recorded base values, not a guaranteed success formula.
Unlock conditions: Not established by this snapshot.
Task themes: Crowd, Help, Dragon, Intimidation. These labels are not simultaneous requirements or a complete unlock route.
Normal success
- Merchants: satisfaction +1
- Population group not established: satisfaction +1
- Recorded reward +120; reward type not established
Failure
- Tortosa Isles: destruction recorded
285Facing the Dragon KnightDrakovic Castle · ConfrontationView record+
- Location
- Drakovic Castle
- Knights needed
- 4
- Duration
- Not established by this snapshot
- Deadline
- Not established by this snapshot
- Damage range
- 2–4
- Requested Knights
- Not established by this snapshot
Recorded stat requirements
These are recorded base values, not a guaranteed success formula.
Unlock conditions: Not established by this snapshot.
Normal success
No outcome effects recorded. This does not establish that there are none.
Failure
No outcome effects recorded. This does not establish that there are none.
Follow-up audience recorded after success and failure; the dialogue route is not established.
286Dragon Knight ambushDrakovic Castle · ConfrontationView record+
- Location
- Drakovic Castle
- Knights needed
- 3
- Duration
- Not established by this snapshot
- Deadline
- Not established by this snapshot
- Damage range
- 1–4
- Requested Knights
- Silgur
Recorded stat requirements
These are recorded base values, not a guaranteed success formula.
Unlock conditions: Not established by this snapshot.
Task themes: Dragon. These labels are not simultaneous requirements or a complete unlock route.
Normal success
- Story state changes; its gameplay effect is not established
- Quest item: Dragon Heart
Failure
- Story state changes; its gameplay effect is not established
Follow-up audience recorded after success and failure; the dialogue route is not established.
287Trap the Dragon KnightDrakovic Castle · ConfrontationView record+
- Location
- Drakovic Castle
- Knights needed
- 2
- Duration
- Not established by this snapshot
- Deadline
- Not established by this snapshot
- Damage range
- 2–3
- Requested Knights
- Tarcus
Recorded stat requirements
These are recorded base values, not a guaranteed success formula.
Unlock conditions: Not established by this snapshot.
Task themes: Unethical. These labels are not simultaneous requirements or a complete unlock route.
Normal success
- Story state changes; its gameplay effect is not established
- Story state changes; its gameplay effect is not established
- Additional scripted effect; its gameplay effect is not established
Failure
- Story state changes; its gameplay effect is not established
Follow-up audience recorded after success and failure; the dialogue route is not established.
288The final battleAngelor · CompetitionView record+
- Location
- Angelor
- Knights needed
- 8
- Duration
- Not established by this snapshot
- Deadline
- Not established by this snapshot
- Damage range
- 3–5
- Requested Knights
- Not established by this snapshot
Recorded stat requirements
These are recorded base values, not a guaranteed success formula.
Unlock conditions: Not established by this snapshot.
Normal success
- Story state changes; its gameplay effect is not established
Failure
- Story state changes; its gameplay effect is not established
Follow-up audience recorded after success and failure; the dialogue route is not established.
289The final confrontationAngelor · ConfrontationView record+
- Location
- Angelor
- Knights needed
- 6
- Duration
- Not established by this snapshot
- Deadline
- Not established by this snapshot
- Damage range
- 3–6
- Requested Knights
- Not established by this snapshot
Recorded stat requirements
These are recorded base values, not a guaranteed success formula.
Unlock conditions: Not established by this snapshot.
Normal success
- Additional scripted effect; its gameplay effect is not established
Failure
- Story state changes; its gameplay effect is not established
Follow-up audience recorded after success and failure; the dialogue route is not established.
290World dominationAngelor · ConfrontationView record+
- Location
- Angelor
- Knights needed
- 6
- Duration
- Not established by this snapshot
- Deadline
- Not established by this snapshot
- Damage range
- 3–6
- Requested Knights
- Not established by this snapshot
Recorded stat requirements
These are recorded base values, not a guaranteed success formula.
Unlock conditions: Not established by this snapshot.
Normal success
- Story state changes; its gameplay effect is not established
Failure
- Story state changes; its gameplay effect is not established
Follow-up audience recorded after success and failure; the dialogue route is not established.
291Facing the KingslayerLocation not established · ConfrontationView record+
- Location
- Not established by this snapshot
- Knights needed
- 6
- Duration
- Not established by this snapshot
- Deadline
- Not established by this snapshot
- Damage range
- 3–5
- Requested Knights
- Not established by this snapshot
Recorded stat requirements
These are recorded base values, not a guaranteed success formula.
Unlock conditions: Not established by this snapshot.
Task themes: Ghost. These labels are not simultaneous requirements or a complete unlock route.
Normal success
- Relic: Ghost Sword
Failure
No outcome effects recorded. This does not establish that there are none.
Follow-up audience recorded after success and failure; the dialogue route is not established.
292Gwendan's squad facing the KingslayerLocation not established · ConfrontationView record+
- Location
- Not established by this snapshot
- Knights needed
- 4
- Duration
- Not established by this snapshot
- Deadline
- Not established by this snapshot
- Damage range
- 2–5
- Requested Knights
- Gwendan
Recorded stat requirements
These are recorded base values, not a guaranteed success formula.
Unlock conditions: Not established by this snapshot.
Task themes: Ghost. These labels are not simultaneous requirements or a complete unlock route.
Normal success
- Relic: Ghost Sword
Failure
No outcome effects recorded. This does not establish that there are none.
Follow-up audience recorded after success and failure; the dialogue route is not established.
293Kingslayer purificationLocation not established · ConfrontationView record+
- Location
- Not established by this snapshot
- Knights needed
- 4
- Duration
- Not established by this snapshot
- Deadline
- Not established by this snapshot
- Damage range
- 2–5
- Requested Knights
- Not established by this snapshot
Recorded stat requirements
These are recorded base values, not a guaranteed success formula.
Unlock conditions: Not established by this snapshot.
Task themes: Ghost. These labels are not simultaneous requirements or a complete unlock route.
Normal success
- Relic: Ghost Eye
Failure
No outcome effects recorded. This does not establish that there are none.
Follow-up audience recorded after success and failure; the dialogue route is not established.
294Kingslayer exorcismLocation not established · ConfrontationView record+
- Location
- Not established by this snapshot
- Knights needed
- 4
- Duration
- Not established by this snapshot
- Deadline
- Not established by this snapshot
- Damage range
- 2–4
- Requested Knights
- Not established by this snapshot
Recorded stat requirements
These are recorded base values, not a guaranteed success formula.
Unlock conditions: Not established by this snapshot.
Task themes: Ghost. These labels are not simultaneous requirements or a complete unlock route.
Normal success
- Relic: Ghost Eye
Failure
No outcome effects recorded. This does not establish that there are none.
Follow-up audience recorded after success and failure; the dialogue route is not established.
295Ursula facing the KingslayerLocation not established · ConfrontationSpecial outcome+
- Location
- Not established by this snapshot
- Knights needed
- Not established by this snapshot
- Duration
- Not established by this snapshot
- Deadline
- Not established by this snapshot
- Damage range
- 7–10
- Requested Knights
- Ursule
Recorded stat requirements
These are recorded base values, not a guaranteed success formula.
Unlock conditions: Not established by this snapshot.
Task themes: Ghost. These labels are not simultaneous requirements or a complete unlock route.
Normal success
- Relic: Demon Heart
Failure
No outcome effects recorded. This does not establish that there are none.
Special outcomes
Recorded matches to investigate. Other conditions may apply; these are not guaranteed triggers.
Outcome 1 · Ursule
Knight match: Ursule.
- Relic: Demon Heart
- Additional scripted effect; its gameplay effect is not established
Recorded damage: 10–10.
A follow-up audience is referenced; its choices are not reconstructed here.
Follow-up audience recorded after success and failure; the dialogue route is not established.
296Task name not establishedMana Strala · Relic RecoveryView record+
- Location
- Mana Strala
- Knights needed
- Not established by this snapshot
- Duration
- 3 cycles
- Deadline
- Not established by this snapshot
- Damage range
- 1–4
- Requested Knights
- Not established by this snapshot
Recorded stat requirements
These are recorded base values, not a guaranteed success formula.
Unlock conditions: Not established by this snapshot.
Task themes: Help, Investigation. These labels are not simultaneous requirements or a complete unlock route.
Normal success
- Story state changes; its gameplay effect is not established
- Additional scripted effect; its gameplay effect is not established
Failure
No outcome effects recorded. This does not establish that there are none.
297Victoria's ambushMana Strala · ConfrontationView record+
- Location
- Mana Strala
- Knights needed
- 4
- Duration
- Not established by this snapshot
- Deadline
- Not established by this snapshot
- Damage range
- 2–5
- Requested Knights
- Not established by this snapshot
Recorded stat requirements
These are recorded base values, not a guaranteed success formula.
Unlock conditions: Not established by this snapshot.
Normal success
- Relic: Victoria Sword
- Relic: Demon Heart 4
- Story state changes; its gameplay effect is not established
- Story state changes; its gameplay effect is not established
- Additional scripted effect; its gameplay effect is not established
- Additional scripted effect; its gameplay effect is not established
Failure
No outcome effects recorded. This does not establish that there are none.
Follow-up audience recorded after success; the dialogue route is not established.
298Victoria duelMana Strala · ConfrontationView record+
- Location
- Mana Strala
- Knights needed
- Not established by this snapshot
- Duration
- Not established by this snapshot
- Deadline
- Not established by this snapshot
- Damage range
- 3–6
- Requested Knights
- Not established by this snapshot
Recorded stat requirements
These are recorded base values, not a guaranteed success formula.
Unlock conditions: Not established by this snapshot.
Normal success
- Story state changes; its gameplay effect is not established
- Relic: Victoria Sword
- Relic: Demon Heart 4
- Additional scripted effect; its gameplay effect is not established
- Additional scripted effect; its gameplay effect is not established
Failure
No outcome effects recorded. This does not establish that there are none.
Recorded variations
Activation conditions are not established. Do not add these changes together or apply them to every attempt.
Reported variant 1 · activation unknown
Success changes
- Additional scripted effect; its gameplay effect is not established
299Victoria's surprise attackCity Of Enberg · DuelView record+
- Location
- City Of Enberg
- Knights needed
- 2
- Duration
- 3 cycles
- Deadline
- Not established by this snapshot
- Damage range
- 2–5
- Requested Knights
- Not established by this snapshot
Recorded stat requirements
These are recorded base values, not a guaranteed success formula.
Unlock conditions: Not established by this snapshot.
Normal success
- Relic: Victoria Sword
- Story state changes; its gameplay effect is not established
- Relic: Demon Heart 4
- Additional scripted effect; its gameplay effect is not established
- Additional scripted effect; its gameplay effect is not established
- Additional scripted effect; its gameplay effect is not established
Failure
No outcome effects recorded. This does not establish that there are none.
300Murder within our wallsLocation not established · AssassinationView record+
- Location
- Not established by this snapshot
- Knights needed
- Not established by this snapshot
- Duration
- Not established by this snapshot
- Deadline
- Not established by this snapshot
- Damage range
- 0–1
- Requested Knights
- Not established by this snapshot
Recorded stat requirements
These are recorded base values, not a guaranteed success formula.
Unlock conditions: Not established by this snapshot.
Task themes: Unethical. These labels are not simultaneous requirements or a complete unlock route.
Normal success
No outcome effects recorded. This does not establish that there are none.
Failure
No outcome effects recorded. This does not establish that there are none.
Follow-up audience recorded after success; the dialogue route is not established.
301Discreet assassinationVolga Camp · AssassinationView record+
- Location
- Volga Camp
- Knights needed
- Not established by this snapshot
- Duration
- 2 cycles
- Deadline
- Not established by this snapshot
- Damage range
- 0–1
- Requested Knights
- Not established by this snapshot
Recorded stat requirements
These are recorded base values, not a guaranteed success formula.
Unlock conditions: Not established by this snapshot.
Task themes: Investigation. These labels are not simultaneous requirements or a complete unlock route.
Normal success
No outcome effects recorded. This does not establish that there are none.
Failure
- Story state changes; its gameplay effect is not established
Follow-up audience recorded after success; the dialogue route is not established.
302Public assassinationVolga Camp · AssassinationView record+
- Location
- Volga Camp
- Knights needed
- Not established by this snapshot
- Duration
- 2 cycles
- Deadline
- Not established by this snapshot
- Damage range
- 2–4
- Requested Knights
- Not established by this snapshot
Recorded stat requirements
These are recorded base values, not a guaranteed success formula.
Unlock conditions: Not established by this snapshot.
Task themes: Unethical, Investigation. These labels are not simultaneous requirements or a complete unlock route.
Normal success
- Nobles: satisfaction +3
Failure
No outcome effects recorded. This does not establish that there are none.
Follow-up audience recorded after success; the dialogue route is not established.
303Assassination simulationVolga Camp · DiplomacyView record+
- Location
- Volga Camp
- Knights needed
- Not established by this snapshot
- Duration
- 2 cycles
- Deadline
- Not established by this snapshot
- Damage range
- 0–0
- Requested Knights
- Not established by this snapshot
Recorded stat requirements
These are recorded base values, not a guaranteed success formula.
Unlock conditions: Not established by this snapshot.
Normal success
No outcome effects recorded. This does not establish that there are none.
Failure
- Story state changes; its gameplay effect is not established
Follow-up audience recorded after success; the dialogue route is not established.
304Get rid of Victoria's ennemiesCity Of Enberg · AssassinationView record+
- Location
- City Of Enberg
- Knights needed
- 2
- Duration
- 3 cycles
- Deadline
- Not established by this snapshot
- Damage range
- 2–4
- Requested Knights
- Not established by this snapshot
Recorded stat requirements
These are recorded base values, not a guaranteed success formula.
Unlock conditions: Not established by this snapshot.
Task themes: Crowd, Unethical. These labels are not simultaneous requirements or a complete unlock route.
Normal success
- Relic: Flamberge Sword
- Story state changes; its gameplay effect is not established
- Nobles: satisfaction +3
Failure
No outcome effects recorded. This does not establish that there are none.
Follow-up audience recorded after success; the dialogue route is not established.
305Intimidate Victoria's ennemiesCity Of Enberg · DiplomacyView record+
- Location
- City Of Enberg
- Knights needed
- 2
- Duration
- 3 cycles
- Deadline
- Not established by this snapshot
- Damage range
- 2–2
- Requested Knights
- Not established by this snapshot
Recorded stat requirements
These are recorded base values, not a guaranteed success formula.
Unlock conditions: Not established by this snapshot.
Task themes: Crowd, Intimidation. These labels are not simultaneous requirements or a complete unlock route.
Normal success
- Story state changes; its gameplay effect is not established
- Nobles: satisfaction +1
Failure
No outcome effects recorded. This does not establish that there are none.
Follow-up audience recorded after success; the dialogue route is not established.
306Pay Victoria's gnatsCity Of Enberg · DiplomacyView record+
- Location
- City Of Enberg
- Knights needed
- Not established by this snapshot
- Duration
- 3 cycles
- Deadline
- Not established by this snapshot
- Damage range
- 0–1
- Requested Knights
- Not established by this snapshot
Recorded stat requirements
These are recorded base values, not a guaranteed success formula.
Unlock conditions: Not established by this snapshot.
Normal success
- Nobles: satisfaction +1
- Story state changes; its gameplay effect is not established
Failure
No outcome effects recorded. This does not establish that there are none.
Follow-up audience recorded after success; the dialogue route is not established.
307Assassinate all of Enberg (??)City Of Enberg · AssassinationView record+
- Location
- City Of Enberg
- Knights needed
- Not established by this snapshot
- Duration
- 3 cycles
- Deadline
- Not established by this snapshot
- Damage range
- 1–3
- Requested Knights
- Not established by this snapshot
Recorded stat requirements
These are recorded base values, not a guaranteed success formula.
Unlock conditions: Not established by this snapshot.
Task themes: Unethical, Crowd. These labels are not simultaneous requirements or a complete unlock route.
Normal success
- Quest item: Compromising Notes
- Story state changes; its gameplay effect is not established
- Recorded reward +1275; reward type not established
Failure
- Story state changes; its gameplay effect is not established
Follow-up audience recorded after success; the dialogue route is not established.
308Assassinate YohavCity Of Enberg · AssassinationView record+
- Location
- City Of Enberg
- Knights needed
- Not established by this snapshot
- Duration
- 3 cycles
- Deadline
- Not established by this snapshot
- Damage range
- 2–3
- Requested Knights
- Not established by this snapshot
Recorded stat requirements
These are recorded base values, not a guaranteed success formula.
Unlock conditions: Not established by this snapshot.
Task themes: Unethical. These labels are not simultaneous requirements or a complete unlock route.
Normal success
- Quest item: Compromising Notes
- Story state changes; its gameplay effect is not established
- Knight not established: death recorded
Failure
No outcome effects recorded. This does not establish that there are none.
Follow-up audience recorded after success; the dialogue route is not established.
309Simulate Yohav's deathCity Of Enberg · DiplomacyView record+
- Location
- City Of Enberg
- Knights needed
- Not established by this snapshot
- Duration
- 3 cycles
- Deadline
- Not established by this snapshot
- Damage range
- 0–2
- Requested Knights
- Not established by this snapshot
Recorded stat requirements
These are recorded base values, not a guaranteed success formula.
Unlock conditions: Not established by this snapshot.
Normal success
- Story state changes; its gameplay effect is not established
Failure
No outcome effects recorded. This does not establish that there are none.
Follow-up audience recorded after success; the dialogue route is not established.
310Demonic invocationVillador · ConfrontationView record+
- Location
- Villador
- Knights needed
- 3
- Duration
- 2 cycles
- Deadline
- 2 cycles
- Damage range
- 2–4
- Requested Knights
- Not established by this snapshot
Recorded stat requirements
These are recorded base values, not a guaranteed success formula.
Unlock conditions: Not established by this snapshot.
Task themes: Magic Involved. These labels are not simultaneous requirements or a complete unlock route.
Normal success
- Nobles: satisfaction +2
- Population group not established: satisfaction +1
- Merchants: satisfaction +1
- Scholars: satisfaction +1
- Recorded reward +100; reward type not established
Failure
- Villador: destruction recorded
Recorded variations
Activation conditions are not established. Do not add these changes together or apply them to every attempt.
Reported variant 1 · activation unknown
- Strength requirement change: +2
- Magic requirement change: -2
- Wits requirement change: -2
- Knight count change: +1
- Damage change: -2
Reported variant 2 · activation unknown
- Strength requirement change: -3
- Magic requirement change: +5
- Wits requirement change: +1
- Damage change: +1
311The looters of Volga CampVolga Camp · RescueView record+
- Location
- Volga Camp
- Knights needed
- 2
- Duration
- 3 cycles
- Deadline
- Not established by this snapshot
- Damage range
- 1–5
- Requested Knights
- Not established by this snapshot
Recorded stat requirements
These are recorded base values, not a guaranteed success formula.
Unlock conditions: Not established by this snapshot.
Task themes: Crowd, People Involved, Help. These labels are not simultaneous requirements or a complete unlock route.
Normal success
- Merchants: satisfaction +2
- Recorded reward +75; reward type not established
Failure
- Volga Camp: destruction recorded
312Architectural balanceMana Strala · ConfrontationView record+
- Location
- Mana Strala
- Knights needed
- 4
- Duration
- 4 cycles
- Deadline
- Not established by this snapshot
- Damage range
- 1–5
- Requested Knights
- Not established by this snapshot
Recorded stat requirements
These are recorded base values, not a guaranteed success formula.
Unlock conditions: Not established by this snapshot.
Task themes: Heavy Lifting, Help, Magic Involved. These labels are not simultaneous requirements or a complete unlock route.
Normal success
- Recorded reward +125; reward type not established
- Nobles: satisfaction +1
- Population group not established: satisfaction +1
- Merchants: satisfaction +1
- Scholars: satisfaction +1
Failure
- Ziskov: destruction recorded
Named quest examples and reported Knight choices
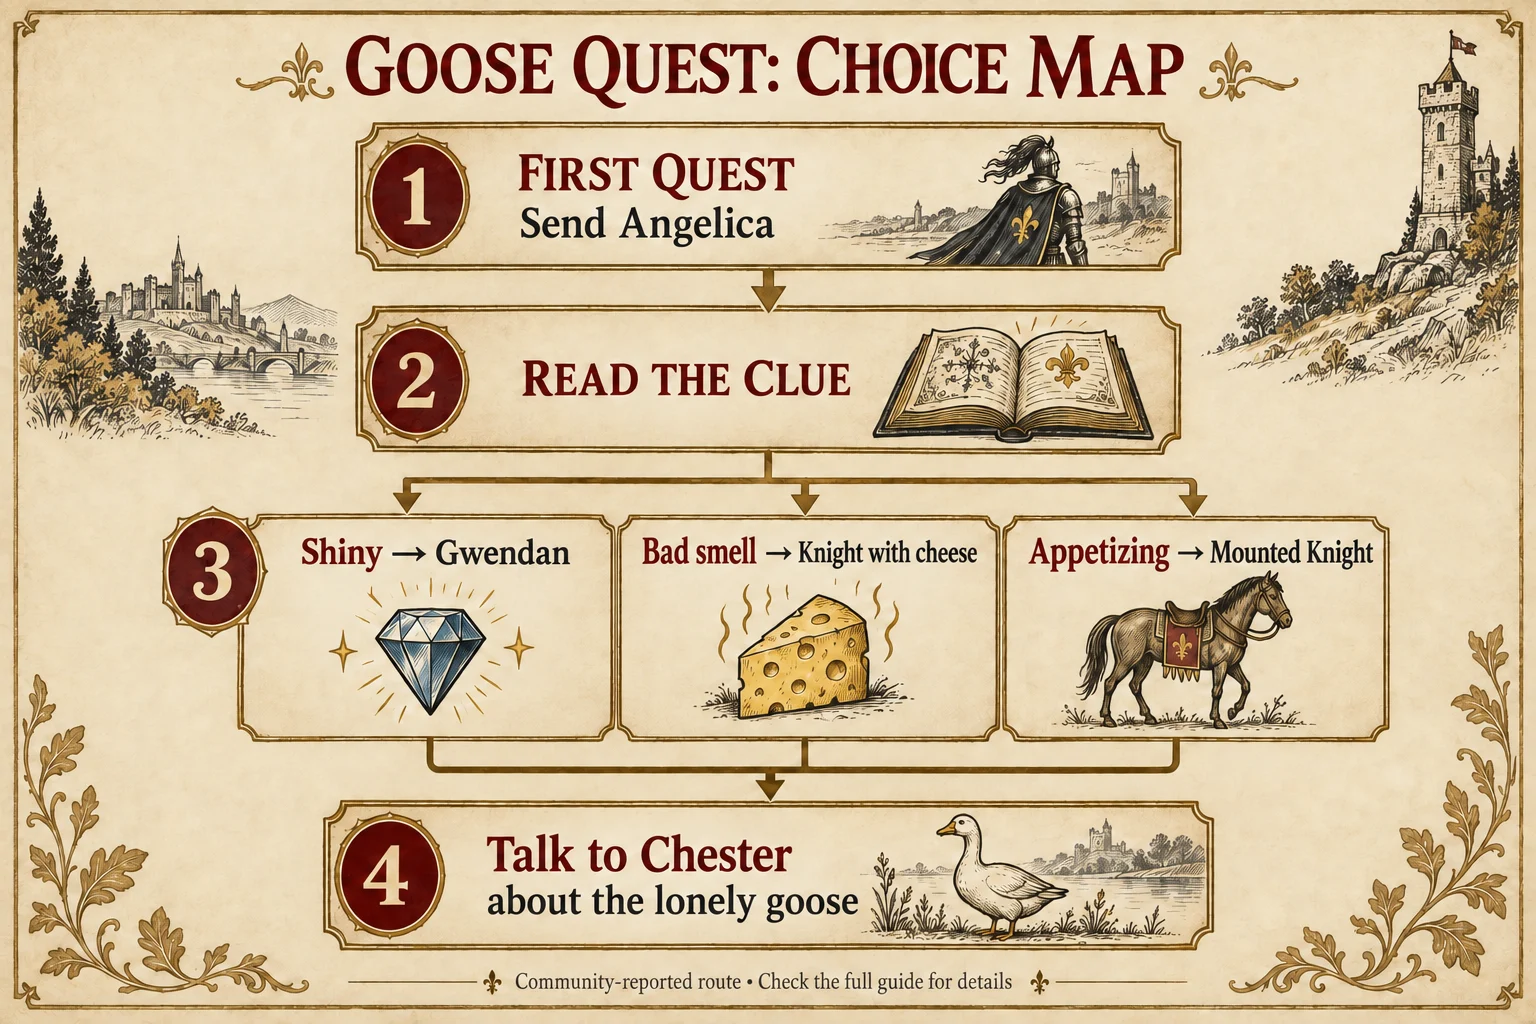
Quest and character spoilers. These examples explain selected routes; the 312-task database above provides broader coverage. Community entries describe other players' results; they have not been reproduced here on patch 1.1.1. Any stated threshold is a player's report, not an official guarantee. Some branch labels are descriptive because the source uses a different language.
| Quest or stage | Reported choice or issue | What to do with the information |
|---|---|---|
| Bucolic Diplomacy | An August 8 full-game report describes a better reward when Gwendan visits his aunt | A named relationship may matter beyond the visible stats; read the debrief. Player report |
| The Stolen Tiara | An August 7 player reports Gwendan returning without the tiara and losing noble approval | Do not assume his noble background makes him suitable for every noble request. His transformed state was not confirmed in that report. Player report |
| Almor tournament, final mission | August players report a special armour upgrade for Goberto; a follow-up says the earlier dragon must survive | Keep him available if exploring this branch, and check the earlier dragon decision. Exact stats and a guaranteed current-build result remain unverified. Player discussion |
| Clean Keeper Goose, first quest | Release-player comments report Angelica unlocking the second quest | Keep her available for this assignment. Early Act I discussion |
| Clean Keeper Goose, second quest | Match the clue: shiny → Gwendan; bad smell → cheese; appetizing smell → a mount | Complete the later lonely-goose conversation. See Chester's step-by-step route. Player corrections |
| Bloody Magpie | Release comments warn that sending Goberto leads to his death and Dulahan's arrival | Avoid this pairing if preserving Goberto is your goal. Player corrections |
| Political-prisoner fight | Players report sending Dulahan to restore his human body; one Wisdom unlocks the single-prisoner choice, or one Tyranny the all-prisoners choice | These are alternative reported dialogue gates. Check which option your run offers. Dulahan discussion |
| Southbay: old-tome lamp search | Brunhilda reportedly finds a mermaid-cure clue | A related clue, not proof of completing Ligia's route. Community reference |
| Djinn Island | Ari reportedly retrieves the lamp | Other players found it already stolen or needed a follow-up. Compare the reference and island discussion; see Ligia's market route. |
| Enberg: suspect interrogation | The reference reports Wit 12 or more, without Tarcus, revealing Polmauz as a candidate | A candidate is not a proven culprit. Community reference |
| Princely negotiations | Tarcus reportedly kills Brunhilda | Avoid this assignment if keeping her alive. Community reference |
| Mushrooms invasion | Official 1.1.0 notes fix missing rewards | Update before treating an old empty reward screen as intended behavior. |
| Volga Camp Serial Killer | Official 1.0.11 notes correct duplicated risk and requirement text between choices | Compare the current options instead of copying an older screenshot. |
| The Silver Cat | Official 1.1.1 notes fix mounts failing to reduce its duration | Check the live timer on 1.1.1 or later. |
| Rescuing the Beloved Knight | Official 1.1.1 notes restore the promised rewards | Update before treating an older empty result as intentional. |
| Jousting Tournament | Official 1.1.1 notes restore the Jousting Lance reward | Recheck the reward screen on the current build. |
| The Giant Eagles | Official 1.1.1 notes fix every grievance option showing the same stats | Compare the corrected options instead of relying on a pre-patch screenshot. |
Official notes and community reportsMixed; see each entryReference sources checked 2026-09-16, not replayed in-game. Release-player corrections are distinguished from older Demo advice. The community achievement reference was updated August 25 and describes using a mod for checking; its conditions remain community evidence. Earlier guide sources retain their original check dates.
For the larger story sequence, use the Act I–III walkthrough. For final choices, continue to the ending routes.
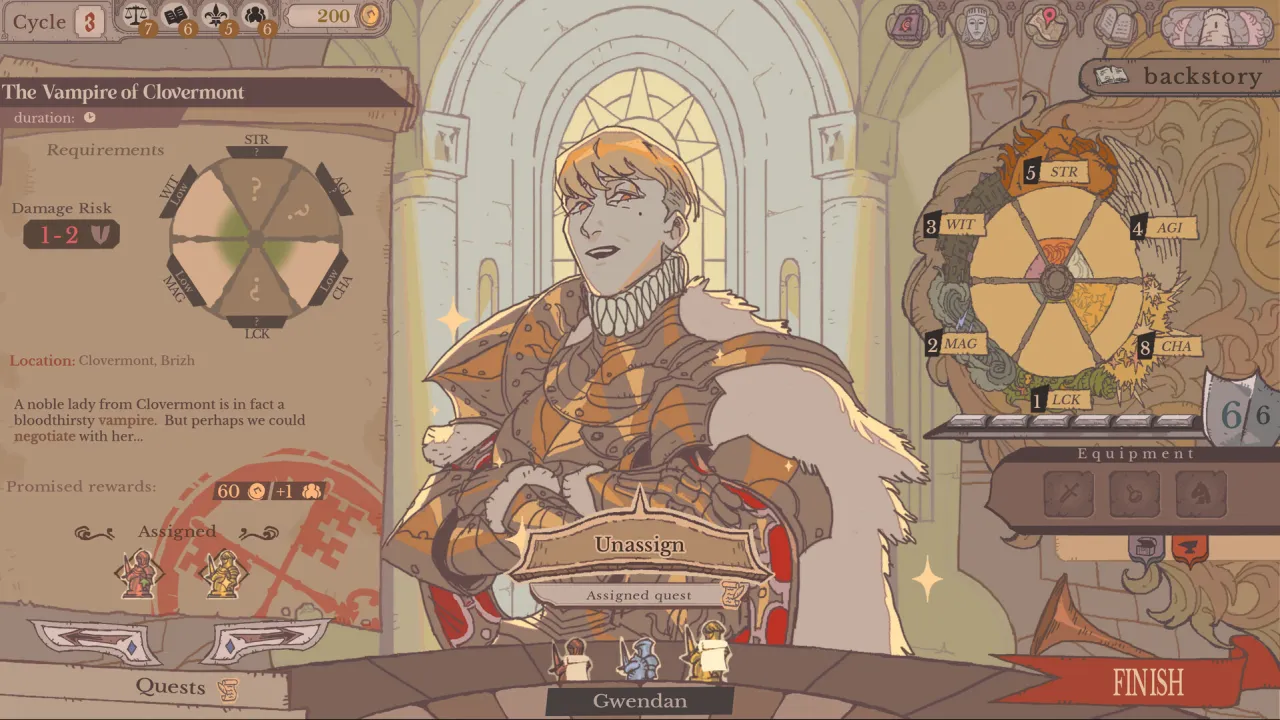
A reliable assignment checklist
Start with the quest's visible skill requirements, then compare Strength, Agility, Charisma, Magic, and Wit across your available Knights. Use learned attributes and equipment as secondary checks. A strong match lowers the chance of failure; it does not prove a guaranteed result.
- Read the whole quest prompt. The title alone may not reveal whether the job needs force, diplomacy, speed, magic, or careful reasoning.
- Match the five visible stats. Shortlist Knights whose strongest stats line up with the displayed requirements.
- Check learned attributes. PC Gamer's launch hands-on reports that positive and negative attributes begin hidden and can matter to quest results.
- Check equipment. Gear can change the fit of an otherwise good assignment, but the game and developer pages do not publish a complete item-to-outcome formula.
- Check availability and satisfaction. A perfect-looking Knight cannot help if another commitment or court decision has made the assignment impractical.
Version 1.1.1 route, reward and display fixes
Patch 1.1.1 corrects several tasks without publishing new hidden conditions. It fixes the mount-duration reduction for The Silver Cat, restores promised rewards for Rescuing the Beloved Knight, restores the Jousting Lance from the tournament, and separates the displayed stat requirements in The Giant Eagles grievance.
The same update fixes Moonvale alliances blocking quests from Pinemaze and Avalon, corrects ultimatum conditions after a county breaks its alliance with Brizh, and repairs the displayed gold change during Rupin's Plague audience. These notes override an older broken screen; they do not prove that the August 31 snapshot contains every 1.1.1 route or unlock rule.
Read the 1.1.1 update guide or the official patch notes.
Official patch notes1.1.1Patch details published September 17 and checked September 18, 2026. The wider quest database was not replayed in-game.
Version 1.1.0 restores mushrooms invasion rewards
Patch 1.1.0 fixes the mushrooms invasion quest giving no rewards. Check the installed version and the current reward screen before treating an older no-reward result as intended behavior. The notes do not specify reward items or amounts.
Read the official 1.1.0 patch notes or see the 1.1.0 update guide.
Official patch notes1.1.0Patch details checked 2026-09-08. This check covers only the update notes; the earlier guide evidence was not reverified.
Version 1.0.11 quest and balance fixes
Version 1.0.11 fixes Brunhilda's automatic quest assignment, ultimatums lasting more than one cycle, Gideon's Lost Child event in New Game Plus, and Victoria's Ambush appearing after Victoria was already recruited. It also corrects duplicated Arlin recruitment, Gwendan's negative-affinity resignation and debt plotline, Edith's repeated investigation and Syphon description, and Rupin's workforce choice affecting the wrong population satisfaction.
The patch also separates the damage and stat requirements shown for different Volga Camp Serial Killer choices and corrects several stat hints and quest-reward descriptions. Balance changes include Papillon giving +1 Charisma and -1 Wit in addition to +1 Agility, a slightly greater chance for civil-war events during Act 3, and the Gavault contract-spying choice dropping Munster cheese.
Read the official 1.0.11 patch notes.
What changed in version 1.0.8
The official 1.0.8 notes reduce the quest-score penalty when a Knight is weak in a required stat and increase the bonus when that Knight is over-levelled in a required stat. Visible stat matching still matters, but footage and advice recorded before this update may make one weak stat look more punishing than it is now. The developer still doesn't publish the complete scoring formula.
The same update adjusts quests against the Dragon Knight, gives the emergency pirate quest in Grest one extra cycle before its deadline, and strengthens multiple items found in Acts 2 and 3. Re-check those quests and item descriptions in the current build before copying a route from launch-week footage.
Read the official 1.0.8 patch notes.
Version 1.0.10 quest and result fixes
Version 1.0.10 fixes Victoria being able to ambush herself and Yorhav not dying properly after the assassination. It also corrects several quest-result calculations: Arron's TIMID trait being counted twice, Angelica's FORTUNATE and Arron's TIMID traits being applied negatively, Rufus's competitor trait not applying correctly, several incorrect score totals, Colombus missing the flying-mount bonus, and Arron's BRUTAL trait calculating incorrectly.
The patch also fixes the wrong follow-up events for an Unexpected Outcome in Ligia's Basalt Isles storyline. Update before using an older result screen or route recording as evidence for any of these cases.
Read the official 1.0.10 patch notes.
Version 1.0.9 quest fixes
Version 1.0.9 fixes responses in Victoria's trials being matched to the wrong quest, problems assigning Alwena to quests, and a route that could skip the Act antagonist confrontation. Update before retrying one of those paths so an older build does not hide the corrected behavior.
The same official notes said the assassination on Yorhav was not fixed in 1.0.9. Version 1.0.10 later fixed Yorhav not dying properly after the assassination, so compare that route only on the newer build.
Read the official 1.0.9 patch notes.
What each outcome means
The official game page names three broad results:
| Outcome | What you can safely conclude |
|---|---|
| Critical Failure | The assignment went badly. Don't assume one visible stat alone caused it. |
| Critical Success | The assignment produced an especially good result. This still doesn't reveal the hidden formula. |
| Unexpected Outcome | A special result occurred outside the normal success/failure pattern. |
A Steam community discussion reports that unexpected outcomes can come from finding a specific Knight for a specific quest. The thread also describes the Demo result screen showing score adjustments for skill fit and distinctive attributes. Treat that as a useful clue, not a release-build formula—check the result breakdown shown in your current game.
For a shorter answer focused only on this result type, read how unexpected outcomes work. It separates the visible evidence from the parts the game doesn't publish.
Turn each result into the next action
| Result on screen | Check next | Useful next move |
|---|---|---|
| Critical Failure | Newly revealed attributes, missing requirements, and the result text | Change one part of the assignment before repeating it |
| Critical Success | The complete stat, attribute, and equipment combination | Record the setup; don't reduce it to one visible stat |
| Unexpected Outcome | The exact Knight and quest pairing | Keep that pairing in mind after a rewind |
Changing one factor at a time makes a rewind more useful. If you swap the Knight, equipment, and earlier Audience choice together, you won't know which change produced the different result.
If two Knights look equally suitable
Prefer the Knight whose known attributes and equipment fit the story of the task. If those clues are still incomplete, choose the assignment whose failure you can absorb, then treat the result as information for a later timeline.
Don't read an early failure as proof that the game rolled pure randomness. It may expose a hidden trait, a missing item, or a special pairing you haven't learned yet.
A quick assignment worksheet
Before confirming a difficult quest, fill in this short comparison from the information visible in your current cycle:
| Check | Knight A | Knight B |
|---|---|---|
| Required stats match | Note strongest and weakest match | Note strongest and weakest match |
| Known attributes | Relevant positive or negative clues | Relevant positive or negative clues |
| Equipment | Item that supports the task | Item that supports the task |
| Availability | Free for the assignment? | Free for the assignment? |
| Satisfaction | Risk of repeated or disliked use | Risk of repeated or disliked use |
This doesn't calculate a hidden success percentage. It makes the reason behind your choice visible, which is useful when you compare the outcome after a Demon rewind.
What is not safe to guess
Exact thresholds, percentages, and a universal best Knight list aren't published by the developer. Use this page to make a stronger assignment with the information visible in your current cycle.
Use the Knights guide for the stat and preference model, the tips page for a compact decision checklist, or the first-cycle walkthrough to see where assignments fit in the daily loop.
Watch an assignment being explained
The release video is the better starting point. The Demo video is included only because it shows the original stats-and-attributes tutorial slowly and clearly.
 Community video · Game Launch Central10 Tips the Game Does NOT ExplainWatch for: Why the creator looks beyond visible stats and checks traits before dispatch.Use this for current-release assignment thinking.Watch on the creator's YouTube ↗
 Community video · JustDaZackSovereign Tower — DISPATCH Your Knights (Full Demo)Watch for: The tutorial distinction between levels, stats and quest-affecting attributes.The interface is from the Demo, so current-release details can differ.Watch on the creator's YouTube ↗